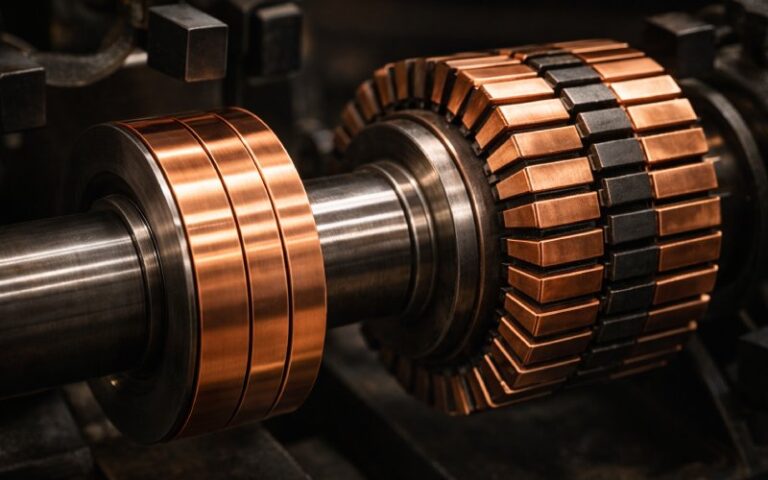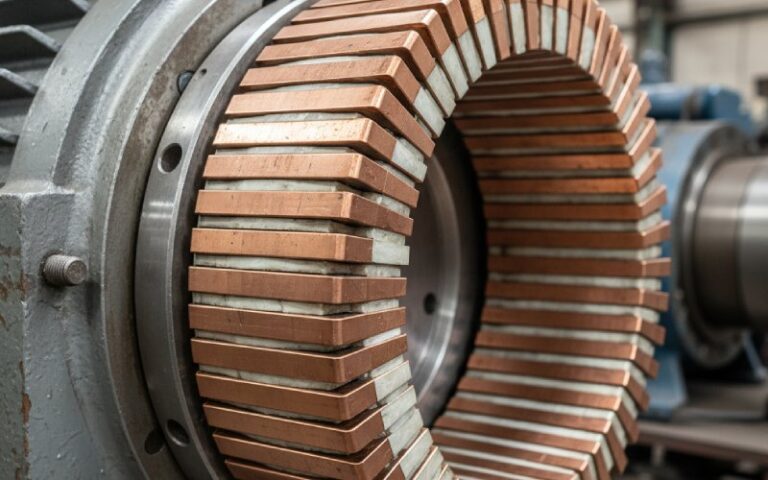
Calculating Proper Commutator Size for High-Power Motors
You already know what a commutator does. You’ve seen the textbooks and the OEM notes. This is about not burning one up at 800+ amps.
Most public material on commutator design just lists rules: “0.6–0.8 D”, “pitch ≥ 4 mm”, “15 m/s”, and walks away. Real high-power machines don’t always sit nicely inside those numbers. So let’s treat sizing as a set of limits you negotiate, not magic constants.
Table of Contents
1. Start from limits, not from pretty formulas
When you size a commutator for a high-power DC motor, four constraints quietly control everything:
- Peripheral speed limit – avoid brush lift, uneven wear, mechanical stress.
- Brush current density and grade – keep contact temperature and wear under control.
- Voltage per segment – keep segment-to-segment arcing away.
- Minimum segment pitch and mechanical strength – so the bars don’t crumble or crack at speed.
Everything else (diameter ratio, length, number of segments) is you juggling around those four.
1.1 Peripheral speed
Textbooks for DC machine design still tend to keep commutator surface speed around 15 m/s, with “up to about 30 m/s” only if you really have to.
Brush manufacturers for heavy-duty grades do advertise 25–50 m/s for some carbon/metallic mixes, so there is a bit of headroom if the mechanics and balance are very good.
The usual formula you already know:
v_c = π · D_c · N / 60 [m/s]
where (D_c) is commutator diameter (m) and (N) is speed (rpm).
In practice for high-power continuous motors:
- 15–20 m/s → conservative, easier on brushes.
- 20–25 m/s → common in compact industrial motors.
- 25 m/s → only if the mechanical engineer is fully on board and balancing is serious.
1.2 Brush current density
Carbon and graphite brushes for traction / industrial duty are usually happy around 8–12 A/cm² continuous, with short-time peaks up to roughly 20–25 A/cm² depending on grade.
So required total contact area:
A_b,total ≈ I_a / J_b,allowable
where (I_a) is armature current and (J_b) is chosen current density.
Nothing fancy. Just remember:
- Heavy mining or steel-mill duty → use lower J for life margin.
- Clean lab drives → you might push J higher.
1.3 Voltage per segment
Standard DC-machine design notes keep open-circuit voltage per commutator segment below roughly 20 V, to limit flashover risk.
If your winding layout leads to more than that, you either add segments or change the winding concept. There is no polishing trick that fixes a 40 V segment gap.
1.4 Segment pitch and mechanical strength
The minimum outer pitch (copper + mica) commonly used is about 4 mm, and that number repeats across various machine-design documents and PM-DC design papers.
Brush design notes also warn against brushes spanning too many segments: in larger machines, width is usually kept to about 4 segments or fewer.
So:
τ_c = π · D_c / C ≥ τ_min (≈ 4 mm)
where (C) is the number of segments.
2. Quick reference table
These are not standards, just a practical starting range when you’re sizing commutators for high-power industrial DC motors.
| Item | Typical design target | Notes |
|---|---|---|
| Commutator diameter (D_c) | 0.6–0.8 × armature D, and limited by v_c | Classical guideline plus peripheral-speed cap. |
| Peripheral speed (v_c) | 15–20 m/s conservative, up to 25 m/s | Higher only with strong mechanical justification. |
| Min. segment pitch (τ_c) | ≥ 4 mm | Below that, bars get mechanically weak. |
| Voltage per segment | ≤ 20 V (open-circuit) | Helps avoid segment-to-segment flashover. |
| Brush current density | 8–12 A/cm² continuous | See brush vendor data sheets. |
| Brush width | ≤ 4 segments (high-power) | Keeps commutation under interpole influence. |
If your new design sits way outside this table without a good reason, that’s usually a warning flag.

3. Sizing workflow that mirrors how people actually work
The classical 10-step checklists are fine. But in a real project you don’t start at “Step 1” and obediently march to “Step 10”. You bounce.
Here’s a workflow that matches how design reviews tend to go.
Step 1 – Collect the numbers that actually drive commutator size
Bare minimum:
- Rated power (P), armature voltage (V_a), rated speed (N).
- Duty (S1 continuous, S3 intermittent, etc.).
- Winding type (lap / wave) and number of poles (P).
- Chosen brush grade and its allowed current density (from your vendor, say Mersen).
- Environment: clean drive, or coal dust, oil mist, metal scale.
From that you get the armature current:
I_a ≈ P_out / (V_a · η)
You already do this in your head, but it belongs on the sheet.
Step 2 – Limit diameter by peripheral speed
Use your chosen limit for (v_c). For industrial high-power motors, 18–22 m/s is a reasonable first shot.
D_c,max = 60 · v_c,max / (π · N)
And also obey the classical ratio:
D_c ≈ 0.6…0.8 · D_armature (if possible)
If (0.7 D_{arm}) gives a surface speed above your brush spec, diameter loses; you shrink (D_c) and let commutator length grow instead.
Step 3 – Decide or check number of segments
Often the winding already fixes this: number of segments = number of active coils.
So you don’t “pick” (C) as much as verify it:
- Calculate segment pitch (τ_c = π D_c / C). If this drops below your 4 mm minimum, you either:
- reduce (C) by re-arranging the winding group, or
- increase (D_c) (if speed permits).
- Check voltage per segment Approximate line voltage per segment for a simple, single-turn coil:
V_seg ≈ E_total / CIt’s a blunt approximation; if that already exceeds 20 V, detailed coil-EMF calculation won’t rescue it. - Keep brush width within 3–4 segments for high-power machines.
Step 4 – Compute commutator length from brush area and mechanics
Now use the brush current-density limit to get total brush contact area:
J_b,allowable → A_b,total = I_a / J_b,allowable
For lap winding, current per brush arm:
I_brush_arm = 2 · I_a / P
For wave winding:
I_brush_arm = I_a
Cross-section area per brush arm:
A_b,arm = I_brush_arm / J_b,allowable
Then you break each arm into several thinner brushes because nobody wants to replace single giant bricks:
A_b,arm = t_b · w_b · n_b
where:
- (t_b) – brush thickness (circumferential).
- (w_b) – brush width (axial).
- (n_b) – number of brushes per arm.
Once you pick standard brush sizes (vendors list 16, 20, 25 mm thickness etc.), you can work backwards to get (n_b).
Finally, commutator length:
L_c ≈ (w_b + box_wall) · n_b + end_clearance + riser_clearance + staggering_clearance
Typical values used in teaching notes: box wall ≈ 5 mm, each clearance band 20–40 mm total.
If calculated (L_c) looks very short relative to diameter (like 50 mm long on a 500 mm diameter), you usually lengthen it slightly just for thermal and wear margins.
Step 5 – Thermal and loss sanity check
Two losses dominate:
- Brush contact drop: ≈ (voltage drop per set) × (I_a). For carbon brushes a 2 V drop per set is a common assumption.
- Brush friction loss: proportional to brush pressure, friction coefficient, total brush area and peripheral speed.
You don’t need perfect precision. You just need to know if you’re throwing a few hundred watts into the commutator or several kilowatts.
With the total loss and surface area (π D_c L_c), many design notes use an empirical temperature-rise formula. Keep the predicted rise within the insulation system you’ve chosen.
Step 6 – Iterate once more with real-world constraints
At this point someone usually says:
- “We can’t machine that diameter on our existing line.”
- “Brush supplier wants maximum 18 m/s for this grade.”
- “Gearbox supplier just changed the speed.”
So you loop through Steps 2–5 again, but now with manufacturing and cost constraints folded in.
4. Example: commutator sizing for a 400 kW mill-duty motor
Let’s walk a compact, slightly messy example. Numbers are rounded on purpose; you’d refine them in your CAD.
Target motor
- 400 kW, 600 V, 900 rpm
- 6-pole, lap-wound DC motor
- Armature diameter (D_{arm} = 0.7 m)
- Efficiency target ≈ 93 %
4.1 Armature current
I_a ≈ P / (V_a · η) ≈ 400 kW / (600 V · 0.93) ≈ 720 A
Call it 720 A.
4.2 Choose diameter from speed limit
Pick conservative (v_c,max = 20 m/s).
D_c,max = 60 · v_c,max / (π · N)
        ≈ 60 · 20 / (π · 900)
        ≈ 0.424 m
So diameter allowed by speed ≈ 0.42 m.
Classical rule of thumb: 0.6–0.8 of armature diameter → 0.42–0.56 m. Our speed limit naturally pushes us to the low end, so choose:
- (D_c = 0.42 m = 420 mm)
Nice and tidy.
4.3 Segments and pitch
Assume winding design gives 300 segments (this is for illustration).
Segment pitch:
τ_c = π · 420 mm / 300 ≈ 4.4 mm
Above the 4 mm mechanical minimum, so acceptable.
Voltage per segment (very approximate):
V_seg ≈ 600 V / 300 ≈ 2 V/segment
Well under the 20 V guideline. No concern here.
4.4 Brush current density and commutator length
Pick a metal-graphite brush grade rated ~10 A/cm² continuous.
Current per brush arm for a 6-pole lap winding:
I_brush_arm = 2 · I_a / P = 2 · 720 / 6 = 240 A
If we cap each brush arm at J_b = 10 A/cm²:
A_b,arm = I_brush_arm / J_b = 240 / 10 = 24 cm²
Suppose we use standard brushes:
- Thickness (t_b = 20 mm = 2 cm) (circumferential)
- Width (w_b = 30 mm = 3 cm) (axial)
Brush area each:
A_brush ≈ 2 cm · 3 cm = 6 cm²
Number of brushes per arm:
n_b = A_b,arm / A_brush = 24 / 6 = 4
So per polarity we have 6 brush arms total (one per pole), each with 4 small brushes.
Now length:
- Effective axial length for one arm: ((w_b + box_wall) · n_b). Take box_wall = 5 mm = 0.5 cm:
L_arm ≈ (3 cm + 0.5 cm) · 4 = 14 cm
Add, at commutator level:
- End clearance: say 25 mm total (2.5 cm).
- Riser band: 25 mm (2.5 cm).
- Staggering allowance: 25 mm (2.5 cm).
So:
L_c ≈ 14 + 2.5 + 2.5 + 2.5 ≈ 21.5 cm
Call it 220 mm axial length.
Aspect ratio:
L_c / D_c ≈ 0.22 m / 0.42 m ≈ 0.52
That’s a squat commutator, mechanically comfortable and with plenty of surface area.
4.5 Very rough thermal glance
Surface area:
A_surf ≈ π · 0.42 m · 0.22 m ≈ 0.29 m²
Brush contact loss: assume 2 V per brush set (positive+negative):
P_contact ≈ 2 V · 720 A = 1.44 kW
Friction loss will come out in the same ballpark for this size and speed, maybe another couple of kilowatts depending on brush pressure and friction coefficient.
So we’re putting maybe 3–4 kW into ~0.29 m². Detailed formulas in the literature give temperature rises of a few tens of degrees for that loading, which is workable with a proper cooling path.
If your own calculation comes out very different, one of your assumptions is off: either friction, pressure, or cooling airflow.
5. Common sizing traps in high-power designs
These are the problems that show up in failure reports, not in class notes.
- Copy-paste commutator from an older, slower motor Speed uprating without diameter check is a classic way to blow through the v_c limit and suddenly see odd brush wear.
- Changing brush material without rechecking J and v_c Some metal-graphite grades tolerate higher current but lower speed, others the opposite. You can’t just swap them and keep the same surface speed.
- Ignoring environment A design that works at 10 A/cm² in a clean lab may need 7–8 A/cm² in dust or oil mist, just to keep the commutator surface stable over time.
- Letting segment pitch go tiny to cram in more coils Dropping below ~4 mm pitch makes segments mechanically fragile; minor misalignment or vibration then chips the bars.
- Brushes spanning too many segments Wider brushes raise commutation time but also pull in coils that sit outside the interpole zone, which brings back sparking issues instead of curing them.
- Not balancing diameter vs length with manufacturing Very long, slim commutators are harder to keep round; very short, fat ones concentrate heat. There’s always a middle zone where both the machinist and the maintenance crew are less unhappy.
6. Checklist before you release the drawing
You can run this as a short design review:
- [ ] (v_c) at rated and overspeed within brush spec, with at least some margin.
- [ ] (Dc) within practical 0.6–0.8·(D{arm}) or mechanically justified otherwise.
- [ ] Segment pitch ≥ 4 mm and mechanically robust.
- [ ] Approx. voltage per segment < 20 V, confirmed by winding layout.
- [ ] Brush current density at worst-case armature current within vendor recommendation.
- [ ] Brush width ≤ 4 segments and sitting clearly under interpoles.
- [ ] Losses (contact + friction) checked against surface area and cooling; temperature rise matches insulation class.
- [ ] Supplier has signed off on manufacturability and balancing for the final dimensions.
If all eight are honest “yes”, your commutator sizing is usually in a safe zone.
FAQ: commutator sizing for high-power motors
Q1. How do I choose between a larger diameter and a longer commutator?
If speed is low and space radially is available, a larger diameter keeps length short and sometimes improves brush accessibility.
If the motor already runs near its v_c limit, you freeze the diameter and grow length to get the brush area you need.
Very long commutators (> roughly 1.2× diameter) can be tricky mechanically; very short ones (<0.3× diameter) may run hot.
Q2. What margin should I keep on brush current density?
For continuous industrial duty, many engineers treat vendor data (say 10 A/cm²) as the absolute limit and design for 70–80 % of that. So you’d size for 7–8 A/cm² and let overloads briefly climb toward 10–12 A/cm².
Q3. Is it safe to go above 30 m/s peripheral speed?
Only in special cases and with full coordination between electrical and mechanical design. Some publications and machine types do report higher allowable speeds, especially in smaller machines, but for big industrial motors 15–25 m/s is still a very common practical band.
If you go beyond that, you should be checking:
Rotor burst speed calculations.
Brush dynamics (lift-off risk).
Vibration and balancing tolerances.
Q4. How do I handle overload ratings when sizing commutators?
You can:
Size brush area for rated current at conservative J (e.g., 8 A/cm²).
Confirm that the short-time overload current pushes J only into the brush’s published peak region (maybe 15–20 A/cm² for a few seconds).
If your duty cycle spends significant time in overload, then overload is no longer “short-time” and you should size against that current instead.
Q5. What’s the minimum practical number of segments?
Electrically, fewer segments mean higher voltage per segment and rougher current ripple. Mechanically, fewer and wider segments can actually be stronger.
For high-power machines, it’s usually the voltage per segment and commutation quality that limit you, not the mechanical minimum. Once your voltage per segment is under 20 V and the commutation waveforms look reasonable, there is rarely a reason to push segment count even lower.
Q6. What should I send to a commutator supplier for a sizing sanity check?
As a minimum:
Electrical: (P), (V_a), (I_a), speed, duty cycle.
Winding data: lap/wave, poles, coils/segments, basic connection diagram.
Brush: grade, target current density, number of brushes per arm if already fixed.
Mechanical: max overspeed, cooling concept, approximate armature size.
With those, any motor-component supplier focused on commutators can run your numbers quickly and tell you whether your chosen (D_c), (L_c), and segment count sit in a comfortable region or not.