What Does a Motor Commutator Cleaner Actually Do?
A motor commutator cleaner is not there to make copper look new. That is usually the wrong target. In actual factory work, the cleaner is doing something narrower and more useful: it removes contamination that distorts the brush-to-bar contact, and it strips away enough surface noise that the real condition of the commutator can be read again. Sometimes that means carbon dust. Sometimes oil. Sometimes an old film that no longer matches the brush system now running on the machine.
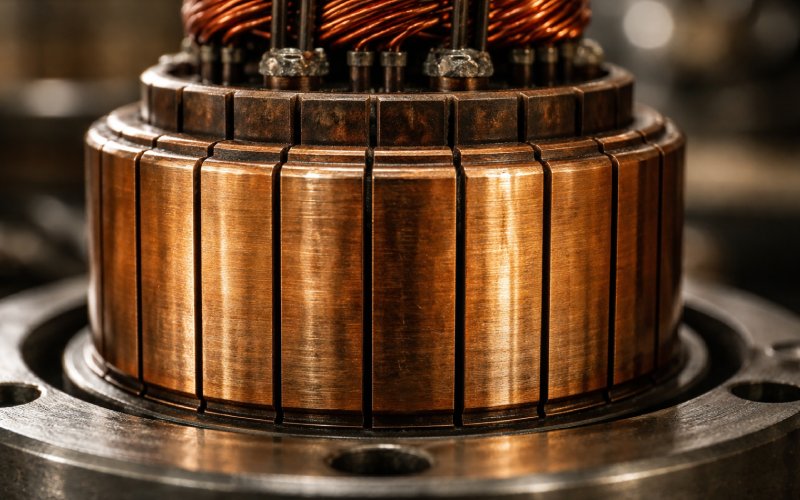
That point matters because a healthy commutator does not run as bare decorative copper. It runs with a controlled film. Light to medium film is usually where life is good. Heavy, streaked, contaminated, or unstable film is different. A cleaner can help reset that surface. It cannot manufacture correct commutation out of a bad setup.
Table of Contents
The real job of the cleaner
In our factory, we treat cleaner as a contact-surface correction step, not a repair method. It does four things well.
First, it removes loose carbon and oily residue that increase local resistance. Second, it clears contaminated film when the contact track has gone patchy or greasy. Third, it reduces the false symptoms that hide the real fault. Fourth, after a brush grade change, it helps remove the previous film so the new running surface can form correctly.
That is why cleaner often appears to “fix” a motor. What it really does is restore a more honest interface. Current transfer becomes more uniform. Arcing may drop. The brush face settles down a bit. Or not. If the marks come back immediately, the cleaner just told you the problem is mechanical or electrical, not cosmetic.
What it removes. And what it leaves behind.
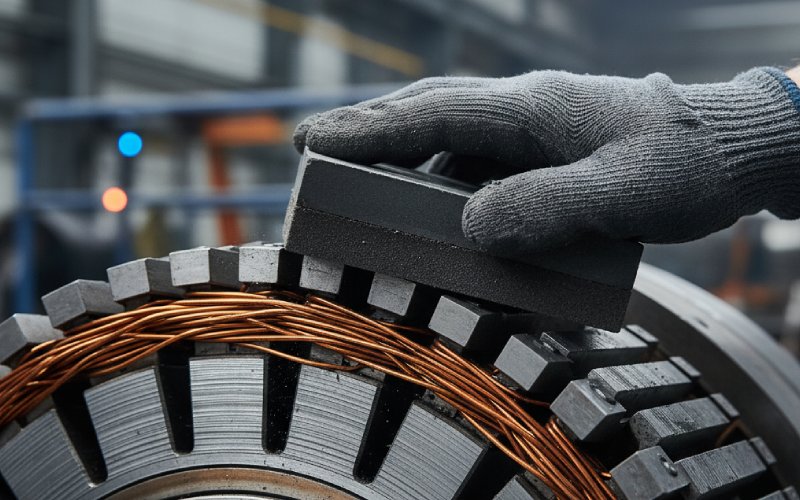
Loose dust is the easy part. Wipe it, vacuum it, blow it out correctly. Greasy contamination is different. On slightly greasy commutators, a dry clean is usually the first move. If that is not enough, a residue-free solvent is the next move, with the brushes removed first because they absorb contamination very easily. That sequence saves a lot of avoidable rework.
What the cleaner does not remove is just as important. It does not correct run-out. It does not flatten high bars. It does not repair poor mica undercut. It does not restore a wrong surface roughness. It does not fix low spring pressure, bad neutral setting, winding faults, or copper drag. Those defects stay there after cleaning. Usually more visible than before.
The shop-floor version
The table below is close to the decision logic we use when incoming rotors or field returns land on the inspection bench. Cleaner is useful. Just not universal.
| Surface condition | What cleaner can do | What cleaner cannot do | What we usually check next |
|---|---|---|---|
| Carbon dust on bars and in slots | Remove loose contamination and reduce stray tracking risk | Cannot fix the reason dust is building too fast | Brush grade, spring pressure, ventilation, duty cycle |
| Greasy or oily commutator track | Dissolve residue and recover more stable contact | Cannot correct a surface already heat-damaged | Source of oil ingress, bearing leakage, enclosure condition |
| Old or incompatible film after brush change | Strip or thin the old film so a new film can form | Cannot make an unsuitable brush grade work | Brush material match, current density, polarity path |
| Localized dark patches or light burn spots | Clean contamination and some high-resistance surface deposits | Cannot solve persistent commutation faults | Neutral setting, interpole condition, winding balance |
| Glossy machined surface | Very little | Cleaner does not create the right texture for seating | Roughness, seating method, abrasive residue removal |
| Grooves, streaking, hairlining, copper drag | Very little beyond making patterns easier to see | Cannot repair wear geometry or overheating damage | Run-out, pressure, vibration, load pattern, bar condition |
| High mica, burrs, poor chamfer | Nothing useful | Cleaner cannot machine the commutator | Undercut depth, burr removal, edge profile |
| Edge burning on bars | Maybe temporary appearance change | Cannot stop electrical interruption at the edge | Out-of-round, spring force, commutation setup |
The point of the table is simple. Cleaner handles contamination. It does not handle geometry, pressure, or commutation design. When those are the real fault lines, cleaning only shortens the time it takes to identify them. Which is still useful.
Why “clean and shiny” is sometimes a bad result
A common maintenance mistake is chasing brightness. The surface becomes visually cleaner, yes. But the commutator then loses a film that was actually helping current transfer. The better target is not shine. It is a stable running surface with the right film character and the right roughness underneath it. Too smooth after machining can be a problem. Too rough is also a problem.
This is where a lot of field service goes sideways. A dirty commutator gets treated with an abrasive when the issue is only contamination. Or a mechanically bad commutator gets wiped and sent back into service because the copper looks better. Neither choice lasts very long.
Cleaner vs. abrasive: not the same job
We separate cleaning from resurfacing. Always.
A cleaner removes contamination and unstable film. An abrasive changes the surface itself. That change may be necessary during seating or reconditioning, but it also introduces risk. Conductive abrasive material is a bad choice on a commutator surface, and any abrasive operation that leaves residue behind creates its own next failure. After seating or grinding work, abrasive dust has to be removed completely.
There is another detail most short articles skip. A machined commutator can be too glossy. In practice, that can delay graphite deposition and slow the development of a stable film. So the sequence matters more than the product. Clean first when the problem is contamination. Resurface only when inspection says the surface geometry or texture is wrong.
What cleaner reveals after the easy dirt is gone
This is usually the useful part.
Once the loose carbon and grease are off, the surface starts telling the truth. Streaking points toward metal transfer and often light load or weak spring pressure. Hairlining can be dust, oil, grease, underload, or poor pressure. Edge burning pushes the conversation toward difficult commutation, heavy sparking, interruption of contact, or out-of-round conditions. Copper drag points to overheating and softened copper. None of those are cleaning problems anymore.
That is why we say cleaner is diagnostic even when it is not curative. It strips away the easy excuses. After that, you are looking at the actual commutator system: brush grade, seating, pressure, roundness, chamfer, mica undercut, winding condition, and load behavior.
Where cleaner stops being enough
When we inspect commutators in production support or failure review, the stop line is fairly clear. If the surface roughness is wrong, if the bar edges are poor, if mica is not properly undercut, if burrs are present, if run-out is present, if the brush face is showing broken edges or deep tracking, we stop talking about cleaner and move into corrective machining or part replacement. That decision saves time. Cleaning again does not.
A cleaner can improve contact. It cannot create correct geometry. It cannot compensate for a commutator that was built, machined, or loaded outside the range the brush system can tolerate. That line is hard, not theoretical.
FAQ
1. Should a commutator cleaner make the copper bright?
Not necessarily. A working commutator usually carries a controlled film, and that film is part of normal operation. The goal is not maximum shine. The goal is a stable contact surface without contamination, unstable deposits, or localized high-resistance patches.
2. Can cleaner stop brush sparking?
Only when contamination is a real part of the cause. If sparking is being driven by run-out, weak spring pressure, poor commutation, wrong neutral setting, or winding-related trouble, the cleaner will not solve it. It may only make the pattern easier to diagnose.
3. Is cleaner the same as using abrasive paper or a stone?
No. Cleaner removes contamination. Abrasives alter the surface profile and are part of seating or reconditioning work. The choice of abrasive matters, and any abrasive residue left on the machine becomes a new problem.
4. Should brushes stay installed during solvent cleaning?
For solvent cleaning, we remove the brushes first. Absorbent brush material can retain contamination, and then the surface gets re-polluted as soon as the machine runs again.
5. When do you stop cleaning and rework the commutator?
When inspection shows geometry or electrical faults rather than surface contamination: high mica, burrs, run-out, edge burning, deep grooves, copper drag, unstable brush face patterns, or repeated rapid film failure. At that point, cleaning is no longer the main job.
Final note
What a motor commutator cleaner actually does is modest. Useful, but modest.
It removes contamination. It strips off the wrong film. It reduces local contact trouble. And it exposes the faults that cleaning cannot touch.
That is enough to make it important. In commutator work, a step does not need to be dramatic to be valuable. It just needs to separate dirt from defect.