How to Clean an Electric Motor Commutator (B2B, Real-World Method)
Electric motor commutator dirty again? Brushes sparking, brown dust everywhere, and production screaming for uptime?
This guide is about what actually happens on the shop floor: how to clean an electric motor commutator without shortening its life, and without turning a quick service into a rebuild.
Table of Contents
1. When Should You Clean, Machine, or Replace the Commutator?
Let’s start with decisions, not theory.
Most OEM manuals talk about “inspect and clean commutator regularly” and then jump straight to “turn in a lathe, undercut mica” when things get bad.
In reality, your options are:
- Level 1 – Light cleaning: film, dust, minor staining.
- Level 2 – Abrasive cleanup: light ridges, streaking, light tracking.
- Level 3 – Machining: flat spots, deep grooving, high/low bars.
- Level 4 – Replace: loosened bars, burnt segments, severe out-of-round.
Here’s a quick matrix you can actually use.
Table 1 – Commutator Condition vs Recommended Action
| Condition on commutator surface | Typical visual signs | What you can do on-site | When to stop and send to rewind / machine shop |
|---|---|---|---|
| Light carbon film, uniform | Smooth brown surface, no heavy streaks | Dry wipe, solvent wipe, no abrasive | You don’t, this is usually acceptable film |
| Dusty, slightly greasy | Wipe leaves black smear, brushes OK | Remove brushes, vacuum, dry cloth, then lint-free cloth with chlorine-free solvent | If film reforms quickly and sparking increases |
| Minor streaking / light ridges | Slight discoloration bands, feel with fingernail | Fine non-metallic abrasive (garnet paper, commutator stone), then clean slots | If streaks are deep or you feel steps between bars |
| Heavy grooving | Deep tracks, brush marks clearly visible | Field abrasive work only as a temporary fix | Normally schedule machining and re-undercut |
| Burnt bars / high mica | Blue/black spots, raised edges, excess sparking | Inspection only, maybe very light stone for test | Plan machining or replacement; investigate root cause |
| Loose bars | Dull sound when tapped, movement relative to neighbors | None safely on-site | Take out of service; send to specialist or replace armature |
2. Safety and Preparation (Keep It Boring but Fast)
You already have lockout/tagout rules. Still worth a very compact checklist before touching a commutator.
Electrical and mechanical safety
- Isolate and lock out the supply.
- Discharge any stored energy (capacitors, drives, DC supplies).
- Verify zero energy with a meter, not just a pilot light.
- Secure rotating parts; don’t rely on “it probably won’t move”.
Protect the motor itself
- Remove carbon brushes before solvent or compressed air. They soak up solvent and debris.
- Shield bearings and windings from dust and solvent splash.
- For large machines, mark brush position and polarity for correct reassembly.
Choose your cleaning level
- Visual check: film, grooves, mica height.
- Decide up front: just cleaning, or do you also want to re-seat brushes today?
- Confirm you have the right abrasives (non-conductive) and not whatever random emery strip someone left in a drawer.
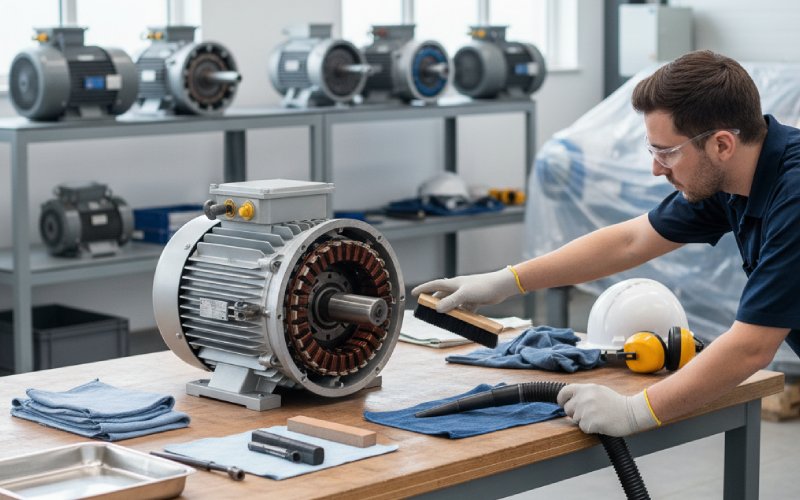
3. Level 1 – Dry Cleaning: Dust, Film, and Light Grease
For many motors, this is all you need. The goal is to remove loose contamination without changing geometry.
Step 3.1 – Remove loose carbon and debris
- Remove brushes and set them aside in order (same slot back in same holder).
- Use vacuum with a non-metallic nozzle around the commutator, brush holders, and end bracket.
- If you must use compressed air, it should be dry and oil-free, and you blow away from bearings and windings, not through them. Several OEM manuals explicitly warn about water/oil in air lines when cleaning commutators.
Short strokes. Short bursts. No “dust storm”.
Step 3.2 – Wipe the commutator surface
For slightly greasy or dirty surfaces:
- Wrap a clean, lint-free cloth around the commutator and rotate the shaft by hand.
- If a greasy film remains, repeat with the cloth lightly moistened with a chlorine-free solvent (often isopropyl alcohol or a specified electronics cleaner).
- Let it dry completely before doing anything else.
Avoid soaking. You’re cleaning, not washing dishes.
4. Level 2 – Light Abrasive Cleaning (Without Killing the Copper)
This is usually where online guides split. Some say “use 150-grit emery”; others, especially motor specialists, say never use emery on commutators because metallic particles can embed and cause arcing.
For industrial machines, follow the conservative side.
Recommended abrasives
- Garnet commutator paper (non-conductive, made for this job).
- Commutator stones / Rubrite-type flexible abrasives, mild and slow-cutting.
- Fine non-metal sandpaper or crocus cloth, if manufacturer allows it.
Not recommended:
- Emery cloth with aluminium oxide on commutator surfaces.
- Coarse sandpaper that leaves scratches and steps.
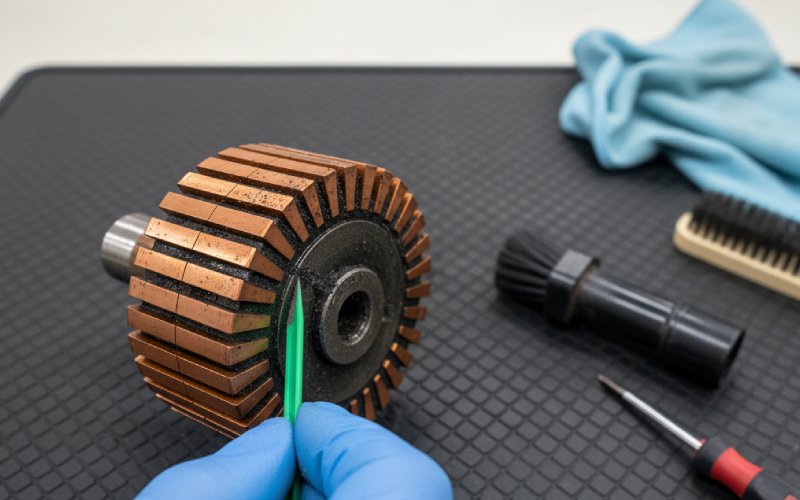
Step 4.1 – Using garnet paper by hand (armature accessible)
- Make sure brushes are removed.
- Cut a strip of garnet paper slightly wider than the commutator.
- Wrap it around the commutator with the abrasive side inward.
- Hold the ends gently and rotate the armature by hand. No need for heavy pressure.
- Change to a fresh section of paper as it loads with copper and carbon.
- Stop when the surface is uniform (no new grooves; just a consistent finish).
This is for polishing and minor cleanup, not re-machining.
Step 4.2 – Using a commutator stone
- Support the stone firmly so it can’t catch and chip.
- Bring it lightly against the rotating commutator (low speed).
- Move slowly along the width to avoid flat spots.
- Follow with a finer stone or garnet paper to refine the surface.
You should see a smooth satin finish, not mirror-bright and not heavily striped.
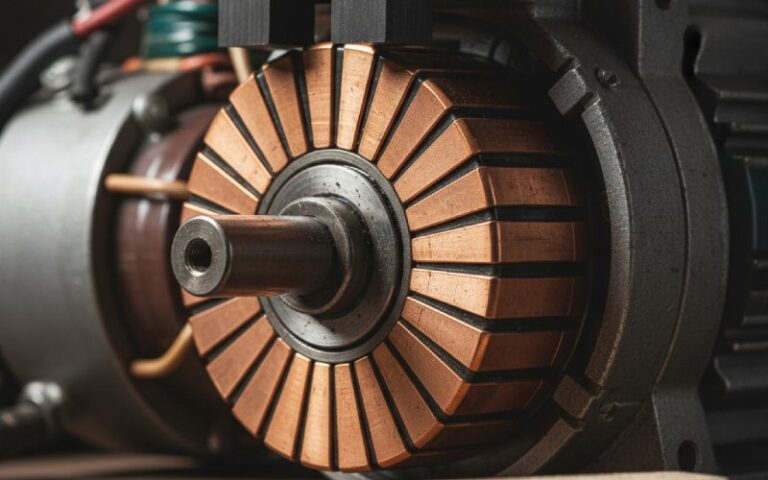
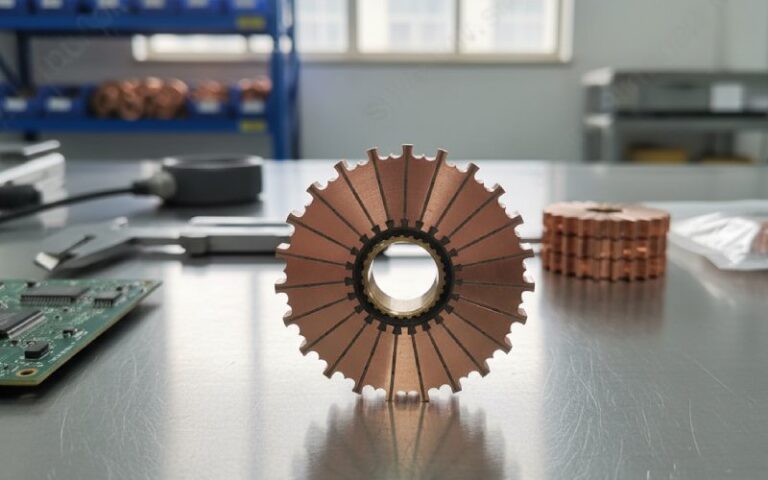
5. Cleaning the Mica Undercut and Slots
Cleaning the copper alone is not enough if the slots between bars are packed with dust or burrs.
Many maintenance guides recommend cleaning the undercut area and then blowing out the dust with clean, pressurized air.
Step 5.1 – Inspect the mica
- Mica should sit below the copper surface (by manufacturer’s spec).
- If it’s level or higher, the motor likely needs machining and re-undercutting, not just cleaning.
Step 5.2 – Clean the slots
- Use a non-metallic scraper or dedicated undercut tool.
- Work along the slot in line with its original undercut, not at an angle.
- Avoid widening the slot; you just want to clear compacted dust or copper.
- After scraping, use dry compressed air (again, oil-free) while rotating the armature slowly.
If dust keeps flying out for more than a short burst, that motor has been neglected for a while. Might be a sign to tighten the inspection schedule.
6. Surface Finish and Run-Out: Quick Checks Before Reassembly
You don’t need a metrology lab on the shop floor, but a couple of quick checks help.
Specialist guides suggest:
- Surface should not be too smooth or too rough; both extremes are bad for brush film.
- Total indicated run-out (TIR) usually held within tight limits (often under a few hundredths of a millimeter) for good commutation.
Visual and “fingernail” test
- Look for a uniform brown film once the motor has run in again. Right now, after cleaning, you mostly want:
- No sharp edges.
- No deep grooves.
- No isolated burnt bars.
- Gently drag a fingernail across bars:
- Small texture is normal.
- Sudden steps mean high/low bars → candidate for machining.
Basic run-out check (field method)
If you have a dial indicator, use it. If not, at least:
- Position a fixed reference (non-metallic pointer) near the commutator.
- Rotate slowly and watch the gap. Obvious wobble means it’s out of round.
When in doubt and the motor is critical, treat suspect run-out as a reason to send the rotor to a shop that can properly turn and balance it.
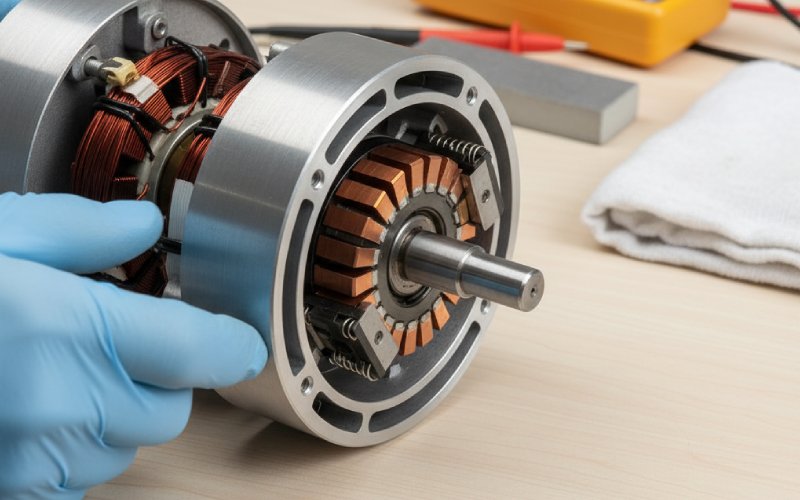
7. Brushes: Cleaning, Reinstalling, and Seating After Commutator Work
A clean commutator with badly seated brushes is still a noisy, sparking machine.
Many brush manufacturers and DC motor guides line up on a few basics: remove brushes before cleaning, check length and alignment, verify mica depth, and seat brushes using non-metal sandpaper or garnet paper until contact area is high.
Step 7.1 – Inspect and clean brush gear
- Confirm brush length against the OEM minimum.
- Make sure brushes slide freely in their holders.
- Check that springs are not overheated or collapsed.
- Blow or vacuum dust from the holders; do not drown them in solvent.
Step 7.2 – Check brush holder geometry
- Radial position: brushes centered on commutator face.
- Clearance between brush and holder sides within spec (too tight = binding; too loose = vibration).
- Distance from holder face to commutator surface as specified (often a few millimeters).
Step 7.3 – Seat the brushes to the new surface
Typical method with garnet paper:
- Cut a strip of garnet paper, abrasive side toward the brush.
- Place it on the commutator, reinstall brushes with normal spring pressure.
- Pull the paper in the direction of rotation under the brush; lift the brush on the return stroke.
- Repeat until 80–90% of the brush face shows contact.
Remove all abrasive dust afterwards and re-check that the brushes move freely.
Step 7.4 – Run-in procedure
For larger motors, many OEMs recommend:
- Initial run at no-load or reduced load.
- Short inspections for brush temperature, sparking, and noise.
- Gradual loading to normal operation if everything looks stable.
8. Common Mistakes That Shorten Commutator Life
Some of these are surprisingly frequent in real plants.
1. Using the wrong abrasive
- Emery cloth and coarse paper can leave conductive grit and scratches that trigger arcing and rapid wear.
2. Cleaning with solvent while brushes are installed
- Brushes soak up solvent and then shed it onto the commutator under load. That contaminates the surface and attacks the film.
3. Blasting with oily compressed air
- Water and compressor oil on copper + carbon dust = tracking paths and insulation issues over time.
4. Leaving dust in the undercut
- Packed slots can equal reduced insulation between bars and erratic commutation.
5. Ignoring root causes
- If you keep seeing grooves, it might be wrong brush grade, poor spring pressure, or contamination, not just “we didn’t clean enough”.
9. Standardizing Commutator Cleaning for Your Plant
For B2B operations, the real win is not one “hero clean” but a standard approach your maintenance teams can repeat.
Consider building a simple standard work package:
- Visual reference sheet for acceptable vs unacceptable commutator surfaces (photos).
- Pre-packed commutator service kit:
- Non-metallic vacuum tools.
- Approved solvent and cloths.
- Garnet paper in known grits.
- Commutator stone and undercut tools.
- Short checklist taped inside the motor control center door:
- Isolate → Remove brushes → Dry clean → Solvent wipe if needed → Light abrasive if justified → Clean slots → Re-seat brushes → Run-in check.
If your company supplies motors, commutators, or carbon brushes, this kind of documented procedure is also an easy value-add for customers, not just an internal practice.
10. FAQ: Practical Questions on Cleaning Electric Motor Commutators
1. How often should I clean an electric motor commutator?
There’s no universal number. Many industrial guides talk about scheduled inspections rather than fixed cleaning intervals.
Typical pattern in plants:
Critical motors: visual check every planned shutdown; clean only when actual dirt or tracking is present.
Non-critical or sealed motors: usually “inspect when there’s a symptom” (noise, sparking, unusual smell).
Over-cleaning with abrasives can be worse than living with a stable brown film.
2. Can I just use sandpaper?
Yes, but with constraints:
Use fine, non-metal sandpaper or garnet paper, not coarse grits.
Don’t stay in one spot and don’t change the commutator shape.
Avoid emery or anything with metallic particles that can embed in the copper.
Whenever possible, use products sold specifically as commutator abrasives.
3. Do I need to remove the rotor to clean the commutator?
Not always.
Small and medium motors: often cleaned in place through access covers.
Heavy damage, severe grooving, or obvious out-of-round → remove armature and machine on a lathe, as recommended by several OEM documents.
If you can’t access the full surface or can’t protect bearings properly, pulling the rotor may actually be safer for the machine.
4. Is it OK to use contact cleaner spray directly on the commutator?
Usually acceptable in small amounts, but:
Remove brushes first.
Use a cleaner that leaves no residue and is approved for electrical equipment.
Avoid soaking slots or bearings.
Dry completely before re-energizing.
Check both motor and cleaner datasheets; some solvents attack insulation or plastics.
5. How do I know if cleaning is not enough and I need machining?
Cleaning probably isn’t enough if you see:
Deep grooves you can clearly feel.
High/low bars (steps between segments).
Raised mica compared to copper.
Persistent heavy sparking even after brushes and supply are verified.
At that stage, machining and re-undercutting by a qualified shop is the normal next step.
6. Can I run the motor immediately after cleaning?
Yes, if:
Solvents are fully evaporated.
All abrasives and dust are removed.
Brushes are correctly seated and holders checked.
On larger motors, it’s safer to:
Run no-load or partial load first.
Monitor for brush sparking, noise, and temperature.
Then ramp to full load if behavior is stable.
7. What’s the best way to minimize future commutator cleaning?
Cleaning is a symptom; control the cause:
Correct brush grade and spring pressure for the application.
Keep air paths and filters clean so dust and oil don’t build up.
Avoid long periods of low-load operation on motors that are designed to run nearer to rated load.
Stick to a documented inspection routine instead of “fix when it screams”.