How to Bed In New Commutator Brushes Properly
New brushes do not fail because they are new. Most of the time, they fail because the contact is wrong in the first hour.
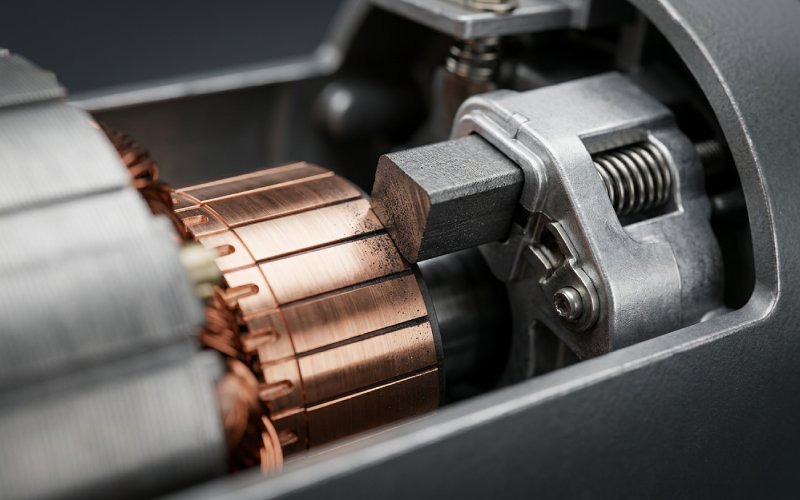
On a commutator, bedding in is not a formality. It is the step that decides whether current spreads across the brush face or crowds into a few hot points. When contact stays concentrated at the edges, the result is familiar: edge burning, unstable film, visible sparking, and a commutator surface that starts wearing for no good reason.
We see another pattern too. Teams follow the correct bedding procedure, yet the run-in is still slow, unstable, or inconsistent from one brush to the next. At that point, the problem is often not the method alone. Brush density variation, material inconsistency, face geometry deviation, or poor dimensional control can all extend bedding time and make the machine look harder to commission than it really is.
That is why we treat bedding as both a maintenance step and a quality checkpoint.
Table of Contents
What proper bedding is meant to achieve
The target is simple:
- build a stable contact pattern across most of the brush face
- prevent edge loading during the first operating hours
- reduce unnecessary sparking and localized heating
- allow the commutator film to form evenly
- shorten the time between brush replacement and stable operation
If bedding is done correctly, the machine settles faster. If it is done badly, the brush keeps telling you. Usually with heat first.
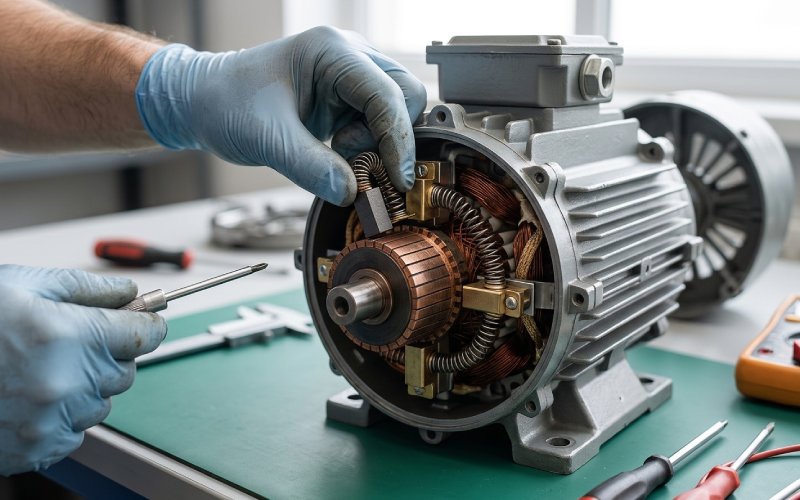
Before bedding, inspect the parts that actually decide the result
We do not start with abrasive paper. We start with rejection criteria.
A new brush should not be asked to correct a bad commutator surface, weak spring pressure, poor holder alignment, or sticking brush travel. It cannot. It only wears into those faults, and then the damage becomes more expensive.
Check these points first:
1. Commutator surface condition
The surface should be clean, dry, smooth, and free from raised burrs, scoring, or abnormal glazing. If mica is standing proud, bedding will not solve the real problem.
2. Brush holder condition
Each brush must move freely in the holder without drag or side pressure. A brush that hangs in the box never beds correctly, no matter how carefully the face was shaped.
3. Spring pressure consistency
Uneven spring pressure across a set causes uneven contact, uneven film, and uneven blame. One brush runs hot. Another floats. Then the whole set looks unstable.
4. Brush position control
Each brush should stay with its own holder position during the bedding process. Once the face begins to match a track, swapping positions creates new contact errors.
5. Brush quality consistency
This is the part many maintenance teams suspect too late. If brush dimensions vary too much, if the material structure is not uniform, or if the face finish is inconsistent, bedding time becomes unpredictable. The procedure may be correct. The brushes may still refuse to settle as a matched set.
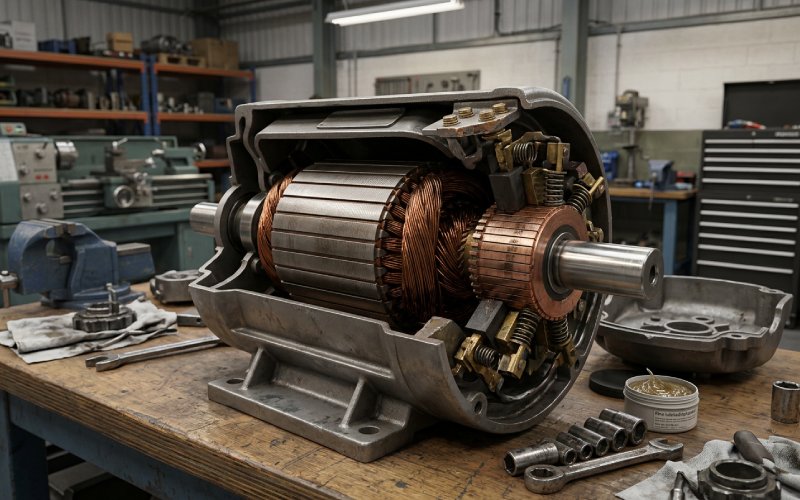
Proper method to bed in new brushes on a commutator
This is the method we use in workshop fitting, rebuild preparation, and field troubleshooting.
Step 1: Mark each brush to its holder position
Keep every brush assigned to one holder and one cable position. Do not mix them once fitting starts.
Step 2: Pre-form the brush face
Use a non-metallic abrasive paper suitable for brush seating. Place it between the brush face and the commutator surface, with the abrasive side toward the brush.
Do not use emery cloth. It leaves the wrong kind of residue behind, and that residue has a way of showing up later as electrical trouble.
Step 3: Pull the abrasive in the correct direction
Pull the abrasive strip so the brush face is shaped to the true commutator radius. The motion should be controlled and light. Not fast. Not forced.
Too much pressure at this stage usually creates a face that looks seated but carries load badly once the machine is energized.
Step 4: Check the contact pattern early
Stop after a few passes and inspect the face.
You are looking for a broad, even contact pattern. Not two shiny edges. Not isolated islands. For most industrial commutator applications, we want at least 80% to 85% contact area before the machine goes back into serious duty.
Step 5: Clean the dust completely
Remove brush dust and abrasive residue from:
- brush holders
- commutator area
- nearby insulation surfaces
- air passages
- surrounding machine internals
Do not leave carbon dust in the assembly and call the job finished.
Step 6: Reinstall and verify free movement
After cleaning, reinstall the brushes in their original positions. Confirm free movement and correct spring action again. This second check matters more than it sounds.
Step 7: Run in under controlled load
A short no-load verification is acceptable. But a long no-load run is not a bedding strategy.
A brush that behaves at no load may still show unstable contact under real current density. We prefer a short verification run, followed by progressive loading until the contact pattern, film, and sparking behavior can be judged under actual working conditions.
Bedding targets and rejection signs
| Check item | Acceptable result | Rejection sign |
|---|---|---|
| Brush face contact | 80%–85% or better, even distribution | Edge contact only, patchy islands, two-point loading |
| Brush travel in holder | Free sliding, no sticking | Drag, side pressure, intermittent movement |
| Spring pressure | Consistent across the set | One or more brushes visibly lighter or heavier |
| Commutator surface | Smooth, clean, no raised defects | Burrs, heavy scoring, high mica, uneven track |
| Dust condition after seating | Cleaned before restart | Carbon dust left in holders or machine interior |
| Initial run behavior | Stable contact, minor transient activity only | Persistent sparking, heating, chatter, rapid dusting |
What usually goes wrong during bedding
Most bedding failures are not mysterious. They follow the same patterns.
Flat brush installed and run without pre-seating
This is common. It wastes time and increases local heating at the first contact points.
Wrong abrasive used
Abrasive contamination creates trouble that looks electrical later, not mechanical now.
Too much force during seating
Heavy-handed seating can damage the face structure, distort the contact pattern, or roughen the surface more than intended.
Dust not removed
Residual carbon dust and abrasive residue can contaminate the machine and interfere with stable operation.
Brushes mixed after shaping
A partly seated brush is already matched to one holder path and one track. Swap it, and you start again, only less cleanly.
No real check under load
A brush may look fine on visual inspection and still behave badly when current density rises. Bedding is only confirmed when the machine operates steadily.
When bedding problems are actually brush quality problems
This is where maintenance teams lose hours.
If the method is correct and the results are still inconsistent, look at the brush itself. We treat the following signs as quality-related warning signals:
- one or two brushes in the same set bed much slower than the rest
- contact pattern remains uneven after proper seating work
- sparking stays localized on specific brushes, not the full set
- wear rates differ too much within one replacement batch
- the face texture looks inconsistent from brush to brush
- correct holder setup still produces unstable running
In practice, prolonged bedding often points to one of these:
- unstable material density
- poor resistivity consistency
- dimensional variation outside tight fit tolerance
- uneven face finish
- internal structure that does not wear uniformly under load
This is why brush quality affects more than service life. It affects commissioning time, maintenance time, and how much trust the operator has in the replacement set.
A well-made brush usually does not call attention to itself. It seats faster. Runs cleaner. Stops wasting your shift.
How brush quality affects commutator life
A poor bedding result does not stay on the brush face. It moves into the copper.
When current crowds into limited contact points, the commutator sees:
- localized heating
- unstable film build-up
- bar edge distress
- streaking or patch formation
- unnecessary surface wear
That is one reason buyers who focus only on piece price often end up with the more expensive result. A low-cost brush that takes longer to bed, sparks more during run-in, or wears the commutator surface is not low-cost in operation.
For applications with frequent starts, variable loading, or demanding duty cycles, we usually recommend tighter control over:
- brush grade consistency
- dimensional tolerance
- face finish accuracy
- fit with holder geometry
- current and speed matching
Those points do more to shorten bedding time than any improvised workshop trick.
Our engineering recommendation for replacement projects
If your team is replacing brushes on a commutator-driven machine, do not judge the result by whether the new brushes physically fit into the holder.
That is the lowest bar.
Judge the result by these questions instead:
- Do the brushes seat quickly and evenly?
- Does the contact pattern stabilize across the set?
- Does sparking drop after correct run-in?
- Does the commutator keep a clean, even track?
- Are wear rates consistent from brush to brush?
If the answer is no, the issue may be the brush grade or manufacturing consistency, not only the bedding method.
For maintenance buyers and OEM sourcing teams, that distinction matters. A more consistent brush saves labor during installation, shortens run-in time, and reduces avoidable commutator damage. That is usually where the real cost sits.
Choosing brushes that are easier to bed in
When buyers ask why one replacement batch runs smoothly and another causes repeated adjustment, the answer is rarely one thing. Still, the pattern is clear enough.
Brushes are generally easier to bed in when they offer:
- stable density from batch to batch
- controlled resistivity
- accurate dimensions for holder fit
- uniform face structure
- grade matching for the machine duty
- predictable wear behavior under load
That is also why many buyers move away from generic replacements after one or two bad shutdown cycles. The labor cost around the brush often exceeds the brush cost itself.
If you are sourcing replacement commutator brushes, custom carbon brush grades, or precision-fit industrial carbon brushes, it is worth treating bedding performance as a purchasing criterion, not just a maintenance issue.
FAQ
How much contact area should a new commutator brush have before operation?
For most industrial applications, we recommend at least 80% to 85% contact before returning the machine to normal duty. More is fine. Less than that usually means the current is still too concentrated at limited points.
Does carbon brush quality affect bedding time?
Yes. Poor dimensional control, unstable density, inconsistent resistivity, and uneven face finish can all extend bedding time or make the result inconsistent across one brush set.
Can new brushes bed in naturally during operation?
They can, but that is usually the slower and riskier route. A flat brush forced to seat under operating load often creates edge heating, unstable film, and unnecessary commutator wear before it reaches a proper contact pattern.
Why are new brushes still sparking after correct bedding?
If the seating method was correct, check holder alignment, spring pressure, brush freedom in the holder, commutator surface condition, and brush grade suitability. Persistent sparking after proper seating often points to a broader matching or quality issue.
Should one failed brush be replaced by itself?
Sometimes it is done. It is not always the best practice. A single replacement may run differently from the rest of the set due to wear pattern, spring condition, and grade variation. For critical service, matched replacement is usually the safer choice.
Is no-load running enough after bedding?
No. A short no-load verification can help, but bedding should be judged under progressive real operating load. Stable no-load behavior does not always predict stable current-carrying performance.
What kind of abrasive should be used?
Use a non-metallic abrasive paper suitable for brush seating. Avoid abrasive materials that can leave conductive contamination in the machine.
Final practical note
A new brush should not need guesswork.
If bedding takes too long, if contact stays uneven, or if sparking remains after the correct procedure, stop treating it as a workshop habit issue. Check the brush quality, the fit, and the grade match to the commutator duty.
That is where many repeat problems begin.
If your team is dealing with long bedding time, uneven brush wear, or persistent commutator sparking after replacement, we can help assess the brush specification, fit tolerance, and application conditions behind it. In many cases, the fix is not more sanding. It is a better brush match from the start.