How a Commutator Converts AC to DC (Without the Fairy Dust)
Table of Contents
1. The Short Story: AC Lives Inside, DC Lives Outside
Inside a DC generator (or motoring machine in generating mode), the armature conductors see a sinusoidal or near-sinusoidal induced EMF as they sweep past the field poles. That part is AC. Always.
The commutator’s only trick is quite modest:
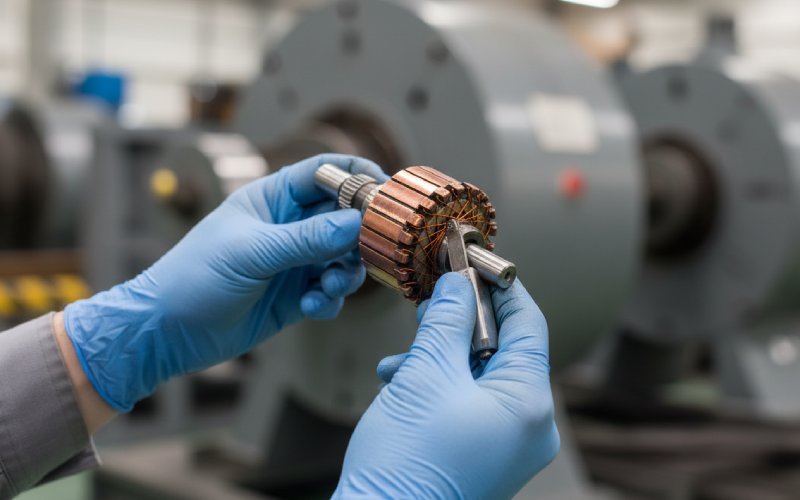
- It divides the armature into segments.
- It swaps which coil ends are connected to which brush every half-turn.
- The external brush terminals keep the same polarity, so the external circuit sees current in one direction only.
No diodes, no control IC. Just copper, mica, and carbon.
That’s the “conversion”. Not magic. Just timed swapping of conductors.
2. Step-By-Step: What the Commutator Actually Does Each Half-Turn
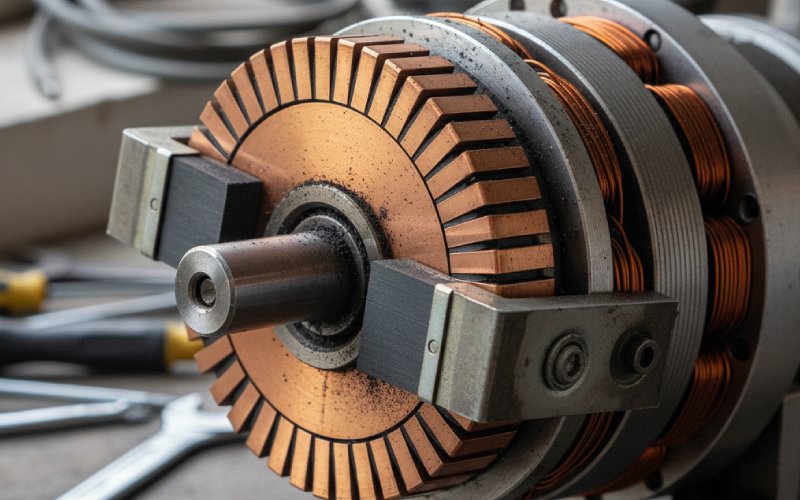
Picture a single armature loop with two commutator segments and two brushes.
As the loop rotates:
- Conductor EMF changes sign At 90° mechanical, induced EMF in that loop is maximum positive. At 270°, it’s maximum negative. Standard generator story.
- Commutator overlap region Around the neutral plane, both commutator segments briefly bridge a brush. For a short angle, the coil is effectively shorted via the brush (commutation zone).
- Brush sees “new” segment, same polarity Just after passing the neutral plane, the conductors whose EMF flipped polarity are now connected to the opposite brush. So the brush marked “+” stays “+”, even though the individual coil EMF reversed.
- External terminals: unidirectional, but pulsating Because of this swapping, the external circuit sees a current that never reverses sign. It simply rises, falls, rises, falls. Pulsating DC.
More segments and more coils just chop the pulsation into finer steps and clean up the DC.
3. What Actually Controls “How Good” the AC→DC Conversion Is
At this point, you don’t need the principle. You need levers.
Below is a compact view of the design choices that really shape the AC-to-DC behavior at the commutator.
| Design lever | What you gain or lose on AC→DC conversion | Typical B2B questions to ask supplier |
|---|---|---|
| Number of commutator segments | More segments → smaller voltage step between adjacent segments → smoother DC, lower ripple, easier commutation at high speed. | “What segment count vs pole count for our voltage ripple target?” |
| Brush width vs segment pitch | Poor matching → severe sparking during commutation; good matching → lower local heating and contact noise. | “How is brush width chosen relative to segment pitch on this frame size?” |
| Brush material / grade | Wrong grade → arcing, high wear, noisy current; right grade → stable film, predictable voltage drop, lower RF noise. | “Which grades are qualified for our current density and duty cycle?” |
| Peripheral speed (m/s) | Too high → film instability and brush lift-off; too low → poor film formation and uneven wear. | “What tested speed range do you guarantee for this commutator?” |
| Mica undercut & chamfering | Incorrect undercut depth → carbon tracking, micro-arcs; bad chamfer → edge chipping. | “What undercut depth and chamfer tolerances do you hold?” |
| Armature reaction control | Weak interpoles / no compensation → current reversal happens under non-zero field → sparking. | “How is armature reaction compensated at our rated load?” |
4. Mechanical Rectifier vs Semiconductor Rectifier: Why Commutators Still Exist
On paper, you could:
- Let the armature output pure AC through slip rings.
- Rectify with diodes or controlled devices.
- Be done.
Yet, commutator machines are still designed and purchased. Reasons are not mysterious:
- Legacy systems and drop-in replacements Steel mills, cranes, traction refits, mining gear. The mechanical structure exists around a commutator motor; replacing it with a modern solution sometimes costs far more than keeping the format.
- Simple DC from a rotating source A basic DC generator with a commutator gives you DC using no electronics, useful in harsh environments or where electronics are constrained.
- Specific torque-speed behavior High starting torque, smooth low-speed control with simple voltage variation. Certain applications are tuned around that characteristic, not just “any motor”.
From a sourcing angle, your comparison is less “old vs new” and more “total system retrofit vs qualified commutator supply”.
5. Failure Modes That Tell You the AC→DC Conversion Is Going Wrong
When commutation isn’t working, you don’t need a scope to know. It leaves marks.
Typical signatures:
- Localized brush sparking along one edge Often means poor neutral setting, segment eccentricity, or wrong brush grade for the current density.
- Heavy grooving on commutator surface Hard brush grade, contamination, or poor film. The “DC” may still be there, but ripple and noise increase, which hits sensitive loads.
- Blackened, cracked mica between segments Evidence of tracking due to inadequate undercut or overvoltage spikes.
- Uneven brush wear between poles Pointer to magnetic imbalance, poor interpole design, or housing distortion.
Each of these issues quietly turns the commutator from a neat mechanical rectifier into a random noise source that happens to still rotate.
6. Engineering Notes on Improving the “DC-ness” of the Output
You may already be doing this, but it’s useful to see the options in one place:
- Increase segment count (within manufacturable limits) This reduces each commutation voltage step. The DC at the brushes approaches a flatter line without changing basic principle.
- Use skewed armature slots Mechanical trick to distribute the induction effect and reduce ripple and cogging torque.
- Add interpoles / compensating windings These intentionally create a local field in the commutation zone to help current reverse with minimal sparking at higher loads.
- Match brush grade to waveform and duty Different carbon grades handle ripple, humidity, and loads differently. A cheap brush can turn a good commutator into a maintenance headache.
- Maintain surface quality Slightly smooth, uniform color, no heavy ridges. Over-polishing or under-cutting both create problems later.
7. FAQ: Commutator AC-to-DC Questions Your Customers Actually Ask
1. Is the commutator really “converting” AC to DC, or just swapping wires?
Both descriptions point to the same mechanism.
The armature generates AC-type EMF in each conductor. The commutator and brushes reorder which ends of those conductors connect to the external terminals so that the terminal polarity stays fixed. In classical terms the commutator acts as a mechanical rectifier.
So yes: it is “just” swapping conductors at the right time. That is exactly the conversion.
2. Why is the output called DC if the waveform is pulsating?
Because the polarity does not reverse. The instantaneous voltage and current stay on one side of zero, even though the magnitude varies.
For low segment counts, you see strong pulsation. As segment count and pole count increase and as more coils are distributed around the armature, the output becomes smoother but still technically pulsating DC, not pure flat DC.
If your load can tolerate some ripple (heaters, many mechanical loads), this is acceptable. For sensitive electronics, extra filtering or a different topology is usual.
3. How is this different from using diodes to rectify AC?
Functionally, both commutators and diode bridges turn an alternating quantity into a unidirectional one.
Key differences:
Location: Commutator sits on the rotating shaft and switches at the mechanical frequency; a diode bridge usually sits in a stationary cabinet.
Mechanism: Commutator relies on moving copper segments and brushes, diodes rely on semiconductor junctions.
Maintenance: Commutators need periodic turning and brush replacement; diodes tend to fail less often but require thermal management and protection circuits.
In many modern systems, slip rings plus diodes win. In certain legacy or special cases, the commutator is still the simpler answer.
4. Why does brush sparking get worse at higher load if the commutator is supposed to be “self-contained”?
Because commutation is not only about geometry; it is about current reversal under a changing magnetic field.
At higher armature current, armature reaction distorts the main field. The “ideal” neutral plane shifts. If brushes are not moved to match, the coil undergoing reversal is still under substantial field, so the current cannot reverse cleanly, and you see sparking at the commutator.
That’s why proper interpole design and maintenance procedures are critical.
5. Can I treat any “DC motor commutator” as a drop-in replacement?
Not safely.
Even if the shaft diameter matches, differences in:
segment count,
copper alloy,
insulation system,
permissible speed,
and intended brush grade
will change commutation behavior and lifetime.
For B2B supply, always align the replacement with the original design data or have the supplier calculate an equivalent that matches electrical and mechanical limits, not just size.
6. Does the commutator itself care whether the machine is used as motor or generator?
The copper and mica do not care. The same commutator can serve both modes.
What changes is:
direction of power flow,
average current level,
and how long the machine spends in heavy starting or braking (for motors) versus steady running (for generators).
So the application duty still matters for brush selection, cooling, and maintenance intervals, even though the geometric conversion action is the same.
7. What should be on a technical drawing from a serious commutator supplier?
At minimum:
dimensional drawing with tolerances,
segment count and pitch,
insulation specification,
max speed and temperature class,
balance grade,
recommended brush grades and settings.
If your current vendor only sends a vague “commutator for DC motor” description, that’s a commercial gap your own site content can quietly expose.