Fixing Washing Machine Motor Issues Caused by Worn Commutators
B2B reality: when a washing machine stops mid-cycle at a customer site, nobody says “the commutator failed.”
They say “your motor failed.” Or worse: “your machine failed.”
So let’s talk about worn commutators in washing machine motors from a point of view that matters to you: less guesswork in the lab, fewer RMAs, cleaner specs for sourcing, and a motor that doesn’t come back to haunt you two years into the field.
Table of Contents
1. Quick check: is the commutator actually the villain?
You already know the classic symptoms: low torque, harsh noise, occasional stalling, loss of spin speed, excess sparking, that faint hot smell near end of cycle.
The question isn’t what the machine does. It’s where to focus first.
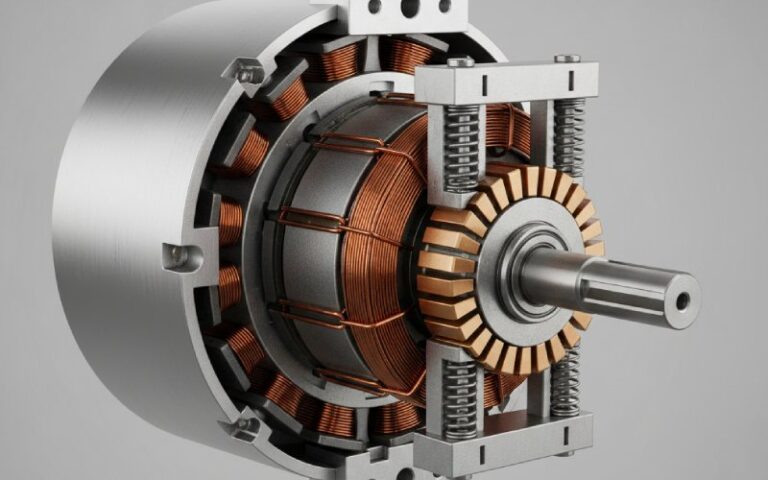
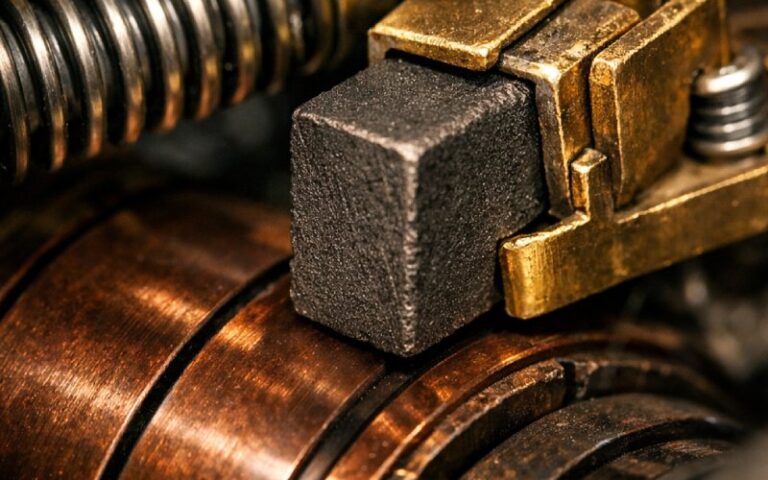
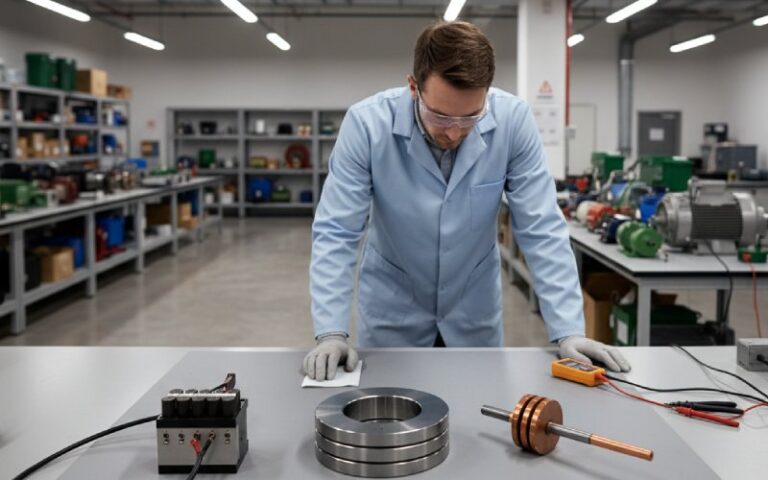
Most washing machine universal motors use copper segment commutators with carbon brushes, often hook-type designs optimized for compact armatures. So brush–commutator interaction is usually the most stressed mechanical contact in the whole drive system.
Use this as a fast filter before you start tearing down gearboxes or blaming the PCB:
| Symptom seen in testing / field | What the tech actually observes | Likely commutator condition | Risk if you ignore it |
|---|---|---|---|
| Strong sparking at brush area under load | Blue/white arcs, noise, smell | Rough, grooved, or contaminated surface; possibly oval (out-of-round) | Accelerated brush wear, bar edge burning, eventual flashover risk |
| Motor runs but torque is inconsistent | Oscillating current, unstable speed | Uneven film, local high resistance bars, minor mica rise | Unstable spin speed; noisy EMC profile; callbacks from end users |
| Brushes wearing unusually fast | Short brush length, lots of dust | Poor surface finish or high runout on commutator | Frequent replacements, contamination of windings, higher failure rate |
| Heavy black deposits around brush holder | Visible dust, dirty slots | Carbon dust packing slots, greasy contaminants | Tracking across bars, local heating, eventual insulation issues |
If your cases line up with the rightmost two columns more often than not, you don’t have a “motor problem”. You have a commutator + brush system problem.
2. How worn commutators actually destroy washing machine motors
Not theory. Just the chain of events you see in practice:
- Surface goes from smooth to grooved / rough
- Micro-pitting, copper drag, slot bar edges raising.
- Out-of-round develops from mechanical stress or poor balancing.
- Roundness typically needs to sit within about 0.002″ / ~30 µm for stable brush contact; outside that, brush springs work overtime and wear goes up sharply.
- Brush contact becomes uneven
- Contact pressure fluctuates.
- Local current density spikes.
- You see uneven film color, local dark spots, or streaks.
- Electrical damage starts to dominate
- Sparking becomes stronger as brushes jump.
- Heat spots appear on bar edges.
- Carbon dust and copper particles lodge between bars and in slots, changing surface leakage paths.
- The rest of the motor pays the price
- Leads and windings near the commutator get cooked.
- Bearing grease degrades faster from heat and contamination.
- PCB / control electronics see nasty transients and overload conditions.
So a “simple” worn commutator doesn’t stay simple. It drags the whole motor and even your control board into the failure story.

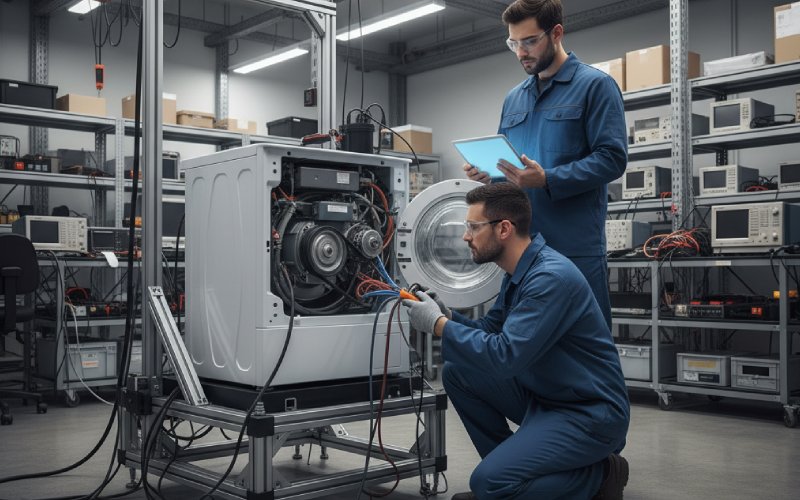
3. A fast diagnostic routine that respects your time
You’ve read the standard maintenance guides. Let’s trim the process for washing machine motors specifically.
Step 1 – Film and surface snapshot
- Look at the commutator before touching anything:
- Healthy surface usually shows a uniform tan → dark brown film, sometimes with faint streaks.
- Patchy light copper with dark burn marks? Current distribution is uneven.
- Very heavy black film only in certain zones? Local overload or brush seating issues.
- Rotate slowly by hand:
- Feel for ridges with a fingernail (power off, of course).
- Any step you can feel easily is already a red flag for brush wear and sparking.
Step 2 – Basic geometry sanity check
Nothing fancy, just practical:
- Check runout with a dial gauge if you have one on the bench.
- For small universal motors, you want total indicated runout in the tens of microns range, not “somewhere near”.
- No gauge available?
- Use a fixed reference (e.g., caliper tip) and rotate slowly.
- Watch visible wobble; if obvious, don’t expect any brush set to fix it.
Step 3 – Brush system shortcut checks
- Brush length: near its wear limit = pressure dropping, sparking rising.
- Spring condition: any discoloration, loss of tension, or pitting on the spring arms? Replace, don’t argue with it.
- Seating: if you’ve just replaced brushes and sparking is wild, seating on a worn commutator is probably terrible.
Step 4 – Clean, but in a controlled way
- Dry wipe first.
- If greasy film stays, use a clean cloth with suitable, residue-free solvent, and remove brushes beforehand so they don’t soak up everything.
- Avoid aggressive abrasives:
- If you must polish, use a fine commutator stone or very fine sandpaper, never coarse grit that leaves scratches deeper than the original wear.
Your goal with all this isn’t to make it “look nice.” It’s to answer one question: can this commutator return to stable film and geometry, or is it time to scrap?
4. Repair vs replace: a simple decision path
You don’t have time for philosophy when the line is down. Here’s a practical way to decide.
Case A – Light wear, acceptable geometry
Typical signs:
- Surface generally smooth, with minor streaks or color variation.
- Runout within your internal spec.
- Mica depth still within design margin.
Actions that usually make sense:
- Controlled cleaning and light polishing.
- Slot cleaning to remove packed carbon dust.
- Brush replacement if length is low or grade is mismatched to duty cycle.
You keep the armature. Scrap rate stays low. This is often fine for field repairs and small batches.
Case B – Moderate wear, visible grooves, local burning
Signs:
- You can feel grooves.
- Some bars have darker burn marks near the trailing edge.
- Sparking is high even with fresh brushes.
Possible actions:
- Skim / turn the commutator on a lathe to restore roundness.
- Undercut mica if needed, re-chamfer bar edges.
- Rebalance the rotor if you’ve removed significant material.
But: if you’re in a mass production environment, repeated machining is often more expensive (in time and QA risk) than sourcing higher-grade commutators or complete armatures. So you might do this for failure analysis, not as a long-term volume strategy.
Case C – Heavy wear, deformation, repeated failures
Signs:
- Deep grooves, bar lifting, exposed or smeared mica.
- Strong arcing remains after careful rework.
- Multiple motors from the same batch show similar patterns.
At this point, rework is usually just delaying a repeat failure.
Two focus areas:
- Redesign or respec the commutator
- Copper alloy choice
- Segment geometry
- Insulation material and thickness
- Balancing and mechanical support
- Review operating conditions
- Duty cycle (spin profile, locked-rotor events, imbalance events)
- Logic controlling soft-start / braking
- Ventilation and dust ingress near motor area
And then talk to your commutator supplier like a partner, not just a price tag.
5. What purchasing should ask commutator suppliers (but often doesn’t)
This is the part that quietly decides whether your washing machine platform has a long, boringly reliable life… or an expensive RMA curve.
When you source washing machine motor commutators (especially hook-type for universal motors), go beyond OD/ID and segment count.
Here’s a short checklist you can drop straight into your RFQ or supplier audits:
Geometry & mechanical control
- Roundness & runout control
- Ask for their typical and guaranteed TIR values and how they measure them.
- Concentricity of commutator to shaft
- Especially critical for high-speed spin cycles.
- Bar edge profile
- Chamfer design, burr control, post-machining steps.
Materials & construction
- Copper grade and impurities control (important for consistent film formation).
- Insulation system:
- Mica or resin type
- Dielectric strength between segments
- High-temperature performance for repeated spin cycles
- Molding / bonding process:
- How they control voids and cracks in resin.
Electrical characteristics
- Bar-to-bar resistance limits and test method.
- Insulation resistance to shaft and core.
- High-potential test levels used on every batch or via sampling.
Reliability & process control
- Evidence of performance under washing-machine-like duty cycles (frequent start/stop, reverse, high spin).
- SPC charts or at least historical Cpk for critical dimensions.
- Traceability: can they track back from your failed motor to their raw material lot?
If a supplier can’t answer these questions clearly, you already have your risk analysis result.
6. Design tweaks that reduce commutator-driven failures in the next platform
Engineers: this part is more for you. Purchasing can still read it; you’ll just roll your eyes less.
Think in terms of how your washing machine is used, not just rated.
Align brush grade with real duty
- Aggressive spin profiles with frequent short bursts:
- Consider brush grades tuned for higher current density and better film control on your specific copper alloy.
- Long, gentle cycles but in dusty environments (laundromats, industrial sites):
- Focus more on dust tolerance, lower dusting grades, and enclosure design.
Your commutator–brush–controller system works as one; treating them as separate commodities is how weird wear patterns show up later.
Don’t ignore airflow and contamination paths
Dust, lint, and detergent residue have a way of finding the commutator. Once there, they promote grooving, side wear, and poor film.
So:
- Review vent direction vs airflow over the commutator.
- Check whether lint filters and seals realistically keep contamination away from the motor area over years, not just in lab testing.
- Make service cleaning access at least possible, even if not pleasant.
Motor control tweaks
Even minor firmware changes change commutator life:
- Softer start profiles reduce initial arcing and mechanical shock.
- Controlled braking instead of brutal dc-injection spikes can cut peak stress.
- Over-current and stall detection tuned to real world, not only nominal loads.
This is the quiet engineering work nobody sees in the brochure, but it shows up in your warranty curve.
7. Translating all this into a practical internal playbook
You don’t need a 40-page manual. You need a short habit list your teams can actually use.
For field service / service partners:
- Photograph commutator and brushes of every failed motor from warranty returns.
- Tag each with:
- hours / estimated cycles,
- environment type,
- symptom description.
- Feed this back quarterly to engineering and purchasing.
For engineering:
- For any new washer platform, define:
- target commutator life in cycles,
- acceptable sparking level under worst-case imbalance test,
- maximum allowed runout and bar wear.
For purchasing:
- Bake those limits into your RFQ and supplier scorecards.
- Don’t just negotiate price per piece. Negotiate:
- testing coverage,
- response time on failure analysis,
- ability to modify design mid-life if field data demands it.
Then your “worn commutator issue” becomes a controlled variable, not a recurring surprise.

FAQ – Worn Commutators in Washing Machine Motors
Q1. How do I quickly separate brush wear issues from commutator wear?
Brushes that wear fast and show strong sparking usually point back to commutator condition: roughness, contamination, or out-of-round. If you fit new brushes and sparking remains high after a short run-in, suspect the commutator geometry or surface instead of assuming a “bad batch” of brushes.
Q2. When is it worth machining a commutator instead of replacing the motor?
For lab analysis, machining (skimming, undercutting) is useful to understand failure modes and confirm whether the design is robust. In field repairs or volume production, once grooves are deep or multiple motors from the same batch show bar damage, replacement is often more economical than repeating rework. Use rework as controlled investigation, not your long-term strategy.
Q3. How often should washing machine motor commutators be inspected?
There’s no single number. For commercial or industrial washers, a scheduled check at defined cycle counts (for example, during bearing or seal checks) makes sense. For domestic platforms, you usually rely on failure feedback: any rise in brush-related failures or reports of noise/sparking should trigger a sample inspection campaign of returned units.
Q4. Can we just specify “better copper” and expect fewer commutator issues?
Not by itself. Copper grade, brush material, control strategy, and mechanical design live together. A higher grade copper with the wrong brush grade or rough machining can still wear badly. The right approach is to ask your commutator supplier for material + process + recommended brush pairs validated under washer-style duty cycles.
Q5. What’s a simple acceptance test for new commutator suppliers?
Beyond dimensional checks, run a small batch of motors with their commutators through aggressive duty cycles: frequent starts, reversed spins, intentional imbalance. Monitor sparking level, brush wear, commutator film uniformity, and temperature rise. If wear patterns already look uneven or noisy in this early test, don’t expect miracles after two years in the field.