Commutator Problems in Vacuum Cleaner Motors and How to Fix Them
Most vacuum cleaner motor failures that land on your bench are commutator and brush problems wearing different masks. If you can read the commutator face, control a few key dimensions, and standardize your repair workflow, you cut warranty returns and keep your fleet running with fewer surprises.
Table of Contents
1. Why the commutator is usually the first suspect
You already know the theory. Universal motor. High speed. Dust everywhere.
So instead of explaining operation, here’s the practical framing:
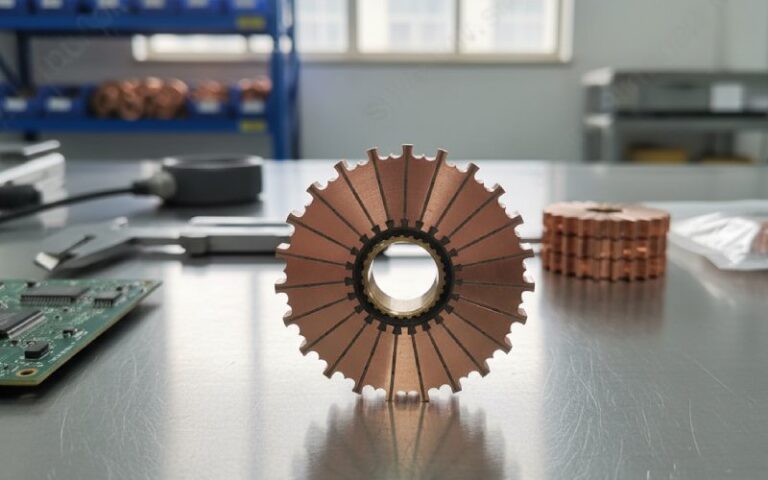
- The commutator is the main mechanical contact interface inside the vacuum cleaner motor.
- It runs in a dirty airflow, often at 20k–30k rpm, with frequent on/off cycles.
- Heat, carbon dust, and small runout errors stack over time.
Field data from DC motor maintenance shows that many failures trace back to commutator condition: contamination, eccentricity, and brush-related issues that then damage bars and insulation.
So when a vacuum motor is noisy, hot, or sparking, start here. Almost by default.
2. Fast triage: reading a vacuum motor commutator in 60 seconds
This is the quick check you do before reaching for the parts catalog.
Step 1 – Look at colour and pattern
- Uniform light copper: normal wear-in.
- Dark brown but even: acceptable glazing.
- Blackened, with distinct darker stripes: contamination, poor brush contact or incorrect brush grade.
Step 2 – Look at geometry
- Visible grooves or ridges: abrasive dust, wrong brush hardness, or commutator too soft.
- High bars / “steps”: machining or wear problem; strong candidate for arcing and brush chipping.
- Flat spots: severe overload, blocked fan, or bearing issues.
Step 3 – Watch the sparking pattern
Some light, even corona at the brushes is normal in small universal motors. Heavy, bright, directional arcs around part of the commutator are not.
Step 4 – Quick mechanical feel
- Check bearing play.
- Spin the rotor by hand: listen for scraping, feel for tight spots.
- Any wobble will turn into eccentric brush loading and segment wear over time.
Now you already know if you’re dealing with contamination, geometry, or deeper electrical damage.

3. Typical commutator problems in vacuum cleaner motors
3.1 Heavy sparking and bright arcs at the brushes
What this usually means
- Worn brushes → low spring pressure, unstable contact.
- Rough or out-of-round commutator surface.
- Carbon dust and copper particles bridging segments.
- Sometimes armature faults (shorted turns) causing localized overload.
Checks
- Measure brush length against spec; confirm spring force if you have the fixture.
- Inspect commutator runout and surface: high bars, scratches, or “shadowed” areas.
- Check insulation between segments (mica undercut) for packing with dust.
Fix on existing units
- Replace brushes with the correct grade and geometry, not “close enough” generics.
- Lightly clean and polish the commutator with fine non-conductive abrasive; avoid emery that can leave conductive particles.
- Clean between segments and blow out all dust.
- If sparking remains localized to the same area: test for armature shorts; scrap where needed.
Design / purchasing actions
- Specify brush grade and hardness for the real duty cycle (on/off, temperature, dust load), backed by supplier test data.
- Put limits on commutator runout and bar height difference.
- Require a brush/commutator life test in dusty conditions as part of supplier qualification.
3.2 Blackened, streaked, or patchy commutator surface
Typical causes
- Brushes not seated properly.
- Contaminants: fine dust, cleaning agents, or fumes.
- Incorrect brush grade forming unstable films.
Checks
- Compare pattern to brush footprint. If the contact path is narrow, the brush is not following the profile.
- Inspect brush holders for restricted movement or contamination.
- Confirm that the motor actually sees clean intake air (filter design, sealing).
Fix
- Properly seat new brushes: low-voltage run-in or mechanical seating with suitable sandpaper, followed by thorough cleaning.
- Improve filtration/air sealing so the commutator is not bathed in fine abrasive dust.
Purchasing angle
- Ask the commutator supplier for recommended brush grades and film behaviour data, not just dimensions.
- Include requirements for initial surface finish (e.g., Ra range) and roundness to reduce aggressive film formation.
3.3 Grooves, high bars, and “out-of-round” commutators
These are the ones that eat brushes, quickly.
What’s happening
- Eccentricity or high bars make the brush bounce.
- Abrasive particles in the airflow cut grooves.
- Hard brushes on soft copper, or the opposite, over thousands of cycles.
Checks
- Measure commutator runout.
- Check bar height uniformity.
- Inspect for bearing wear or loose housings that let the rotor orbit.
Fix
- Light skim (turning) on a lathe if there’s enough copper left, then undercut and polish, then clean thoroughly.
- Replace bearings, not just the commutator, if runout is caused by shaft or bearing play.
Purchasing actions
- Put numeric tolerance on:
- Total indicated runout (TIR).
- Bar-to-bar height difference.
- Concentricity to shaft.
- Request sample inspection records from the motor supplier, not just a drawing with nice numbers.
3.4 Burnt bars, open segments, and flashover marks
Once you see molten copper or burnt mica between bars, you’re usually beyond light repair.
Signs
- One or a few bars visibly darker, pitted, or eroded.
- Deep tracking marks between bars.
- Motor may run intermittently or surge.
Root issues
- Local overload from armature winding faults.
- Dust and conductive debris bridging segments under high voltage.
- Severe brush bounce causing intermittent contact.
Practical approach
- Electrical testing (surge/low-voltage bar-to-bar) if you have the setup.
- For low-cost vacuum cleaner motors, replacement is usually more rational than re-baring or rewinding.
Spec-level control
- Define electrical test coverage per batch: surge test, hi-pot, and bar-to-bar resistance checks at the motor factory.
- Clarify the acceptable flashover marks (if any) on life-tested samples.
3.5 Rapid brush wear, chipping, and cracked brush edges
Usual causes
- Wrong spring pressure or inconsistent springs.
- Commutator too rough or too soft.
- High vibration from rotor imbalance or housing resonance.
- Mismatch between brush grade and duty cycle.
Checks
- Compare brush wear rate versus expected life hours.
- Inspect spring fit and brush holder clearance (brush should move freely).
- Check rotor balance if you have the fixture; otherwise, watch for abnormal vibration.
Fix
- Use properly balanced rotors and verified spring force.
- Review brush grade with your brush and commutator suppliers together, not separately.
- Confirm that holders allow smooth axial movement; clean or replace if carbon deposits are restricting motion.
4. Symptom-to-action map for vacuum cleaner commutators
A quick reference you can send around between engineering, service, and purchasing:
| Symptom at Motor / Bench | Likely Commutator / Brush Cause | Quick Engineering Check | Recommended Fix | Purchasing Note |
|---|---|---|---|---|
| Bright, heavy sparking; visible arcs | Worn brushes, rough/out-of-round commutator, dust bridging bars | Brush length, runout, visual surface inspection | Replace brushes, clean/polish commutator, clean slots and dust | Specify brush grade, runout and bar-height tolerance; require life tests with photos of commutator condition |
| Black, streaked commutator | Poor seating, unstable film, contamination | Compare brush footprint; check holder movement | Reseat brushes, clean commutator, improve filtration | Add surface finish spec and contamination tests on sample motors |
| Deep grooves and ridges | Abrasive dust, hardness mismatch, long service without cleaning | Inspect groove depth, check bearing play | Light skim and undercut (if economical) or replace motor; replace bearings | Define material pair (brush grade vs copper), verify bearing quality and dust sealing |
| Burnt or pitted bars | Local overload, shorted turns, severe arcing | Electrical tests on armature; localized visual damage | Scrap or full rebuild; not field polishing | Require surge/balance testing and clear scrap criteria in supplier QA documents |
| Fast brush wear, chipped edges | Excessive spring force, vibration, rough commutator | Measure spring force; check balance, runout | Replace springs/brush holders, re-balance, re-finish commutator | Put spring-force range and balance requirements in the drawing or quality agreement |
| Noise, heat, low suction speed | General commutator wear, high friction, partial shorts | Temperature rise test, speed measurement at rated load | Replace motor or rebuild commutator/brush assembly | Specify efficiency and temperature rise limits with end-of-life criteria in validation plan |

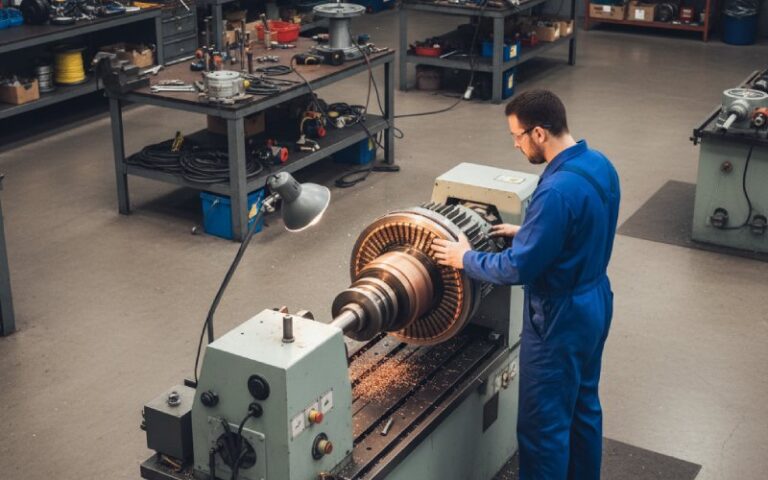
5. A practical repair workflow for vacuum cleaner commutators
For service centers or in-house rework lines.
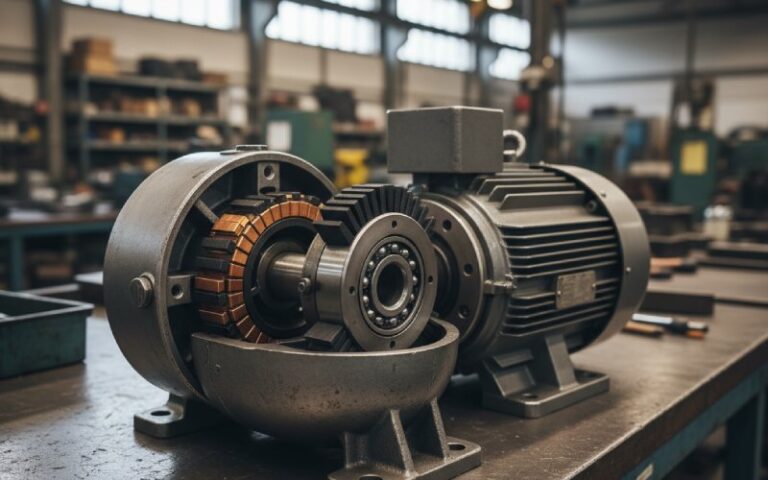
Step 1 – Disassemble and inspect
- Remove motor, open housing, pull the armature.
- Inspect commutator face, slots, and mica depth.
- Check bearings first; a perfect commutator on bad bearings will not stay perfect.
Step 2 – Clean and surface-correct
Following common practice from motor maintenance and vacuum repair guides:
- Use fine non-conductive abrasive (e.g., 400–600 grit) to restore a smooth, even copper surface.
- If you spin the armature with a drill, do it gently; avoid aggressive material removal.
- Avoid lifting the abrasive away during contact; keep it consistent to avoid uneven wear.
If the commutator is badly grooved or out-of-round, a lathe skim plus proper undercut is cleaner than trying to “sand it flat by hand.”
Step 3 – Undercut and clean the slots
- Re-cut insulation between bars to the target depth (usually slightly below the copper surface).
- Remove all burrs.
- Blow out carbon and abrasive dust with dry air; no leftovers.
This step prevents carbon tracking and high-resistance bridges that show up later as “mystery” sparking.
Step 4 – Fit and seat new brushes
- Use the correct brush: material, size, and lead arrangement as in the motor design.
- Check brush holder clearance and free motion.
- Seat brushes:
- Either with controlled low-voltage running for a short time.
- Or with a dedicated seating strip, then full cleaning.
Step 5 – Run-in and verify
- Run the motor at rated voltage with a representative airflow path.
- Watch sparking through the vents.
- Monitor temperature, noise, and speed under load.
- Capture photos of the commutator surface at the end of run-in for your own internal standard.
Once this is documented, you have a repeatable, teachable process rather than just “polish until it looks good.”
6. What purchasing should actually put in the commutator / motor spec
For B2B buyers, the real control happens on the drawing and in the supplier agreement, not at the rework bench.
Consider adding the following to your universal vacuum motor specifications:
Geometric requirements
- Commutator diameter and TIR (runout) limits.
- Bar-to-bar height variation limit.
- Concentricity to shaft and rotor stack.
Surface and material
- Copper alloy spec and hardness range.
- Surface roughness (Ra/Rz) range after machining.
- Minimum and maximum mica undercut depth.
Brush system
- Approved brush grades (with test data).
- Spring force range and tolerance.
- Holder material and allowable clearance.
Tests and documentation
- Routine:
- Hi-pot and bar-to-bar resistance tests.
- Speed and current at rated voltage and load.
- Periodic:
- Surge test on armatures.
- Life test in dusty conditions with end-of-test photos of commutator and brushes.
Quality feedback loop
- Simple RMA data back to the motor supplier: failure reason codes tied specifically to commutator/brush findings.
- Shared “acceptable appearance” library for commutators at different life stages.
This shifts commutator problems from being “surprises in the field” to measurable supplier performance.
7. Preventive tactics for commercial fleets
For contract cleaners, hotels, industrial users – anywhere vacuums are assets, not consumer gadgets:
- Define an operating hours limit where motors are inspected or replaced before obvious failure.
- Keep filters clean so motors don’t run in thermal overload, which accelerates commutator wear.
- Store vacuums in dry conditions; moisture plus dust on the commutator is not helpful.
- Maintain a small stock of pre-qualified replacement motors/armatures instead of improvising substitutes with unknown brush and commutator combinations.
Even small changes in handling and filtration can extend commutator and brush life significantly over the installed base.
8. FAQ: commutator issues in vacuum cleaner motors
Q1. Is some sparking at the commutator normal in vacuum motors?
Yes. A low, even glow at the brushes is typical in universal motors. Short, bright, frequent arcs or “fireworks” along part of the commutator surface indicate a problem (worn brushes, rough commutator, contamination, or armature faults).
Q2. When is it worth repairing the commutator vs replacing the motor?
Rough guideline:
Repair makes sense when: Bearings are good or easily replaced.
Commutator wear is moderate: minor grooves, light discoloration, no burnt bars.
The motor cost is high enough (commercial machines, specialty cleaners).
Replace is more rational when: Bars are burnt or eroded.
Runout is severe due to shaft or rotor damage.
Motor price is low and labour is the main cost.
Q3. Which abrasive should I use to clean a vacuum motor commutator?
Use fine, non-conductive sandpaper (often 400–600 grit aluminium oxide) or a dedicated commutator stone. Avoid emery paper and aggressive abrasive wheels that can embed conductive particles or tear the copper. Always clean thoroughly after polishing.
Q4. How smooth should the commutator be after repair?
You’re aiming for:
Even copper colour.
No sharp steps between bars.
No deep grooves you can catch with a fingernail.
Mica slightly recessed relative to the copper.
It doesn’t need to be a mirror, but it should not make the brush jump.
Q5. Can I use generic brushes if the OEM type is unavailable?
You can, but only with care:
Match dimensions, lead type, and spring arrangement.
Choose a grade recommended for high-speed universal motors, not low-speed DC machines.
Expect to validate: check sparking, temperature, and brush wear over a defined test period.
For production use, lock down a specific brush grade in your spec and keep it consistent across suppliers.
Q6. Why do new replacement motors sometimes spark more than the old ones?
New brushes need time to seat and form a stable film on the commutator. During early hours, some extra sparking may appear until the contact pattern stabilizes. That said, very intense sparking, loud noise, or visible commutator damage on a new motor indicates a tolerance, brush grade, or quality issue and should be treated as a supplier problem, not just “break-in.”