DC Motor Commutator Sparking: Causes, Fixes, and How to Stop the Light Show for Good
If you’ve ever watched a DC motor and seen bright sparks dancing around the commutator, you probably had one of two reactions:
- “Wow, that looks cool.”
- “Uh oh… that can’t be good.”
You’re right to be suspicious. A little soft sparking can be normal, but visible, noisy, or persistent sparking is usually your motor’s way of saying, “Something’s wrong. Fix me before I burn your money.”
This guide is written to go deeper than a quick “clean it and hope for the best.” We’ll walk through how commutator sparking really happens, what different spark patterns mean, and how to systematically diagnose and fix the problem — without guesswork.
Table of Contents
1. What Is Commutator Sparking, Really?
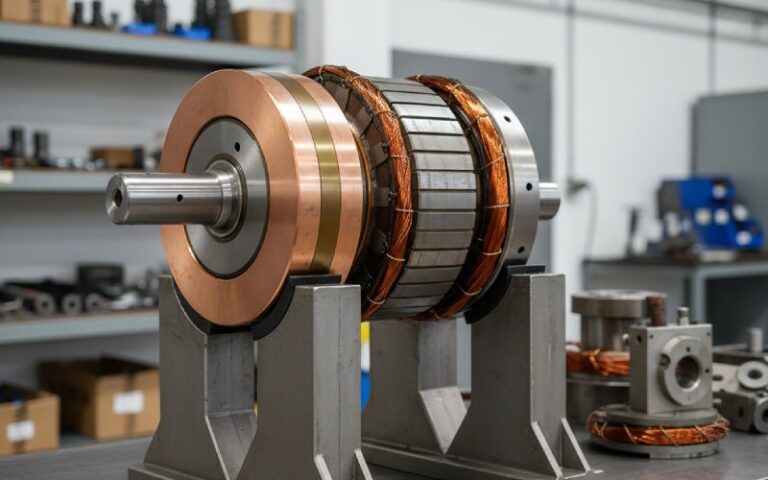
At its core, a DC motor commutator is a mechanical switch that changes the direction of current in the armature windings so the motor keeps spinning instead of rocking back and forth.
As the armature rotates:
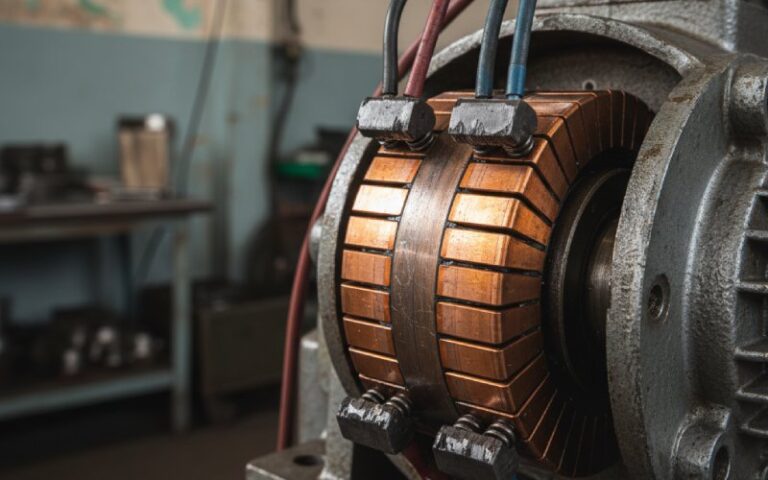
- Brushes slide across copper segments (commutator bars).
- Current in a coil must switch from one bar to the next in a fraction of a second.
- The coil has inductance, so it resists sudden changes in current.
- That resistance to change shows up as a voltage spike — and that spike can create a spark at the brush contact.
Some sparking is just this switching energy being released in a controlled way. But when mechanical alignment, brush pressure, surface condition, or electrical loading go wrong, the sparks become bigger, longer, and hotter. That’s when you start burning copper, charring brushes, and cooking insulation.
2. How Sparking Shows Up in Real Life
- Soft, short orange “fuzz” around the brush contact at higher loads
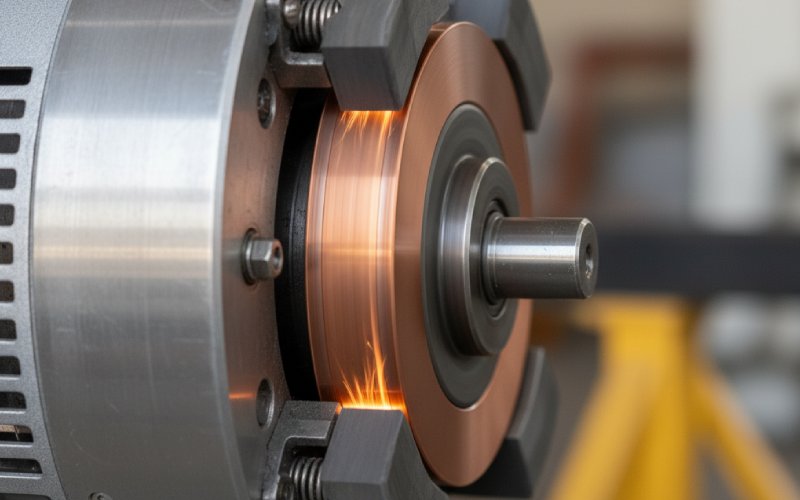
- Individual bright yellow sparks shooting in one direction from a single brush
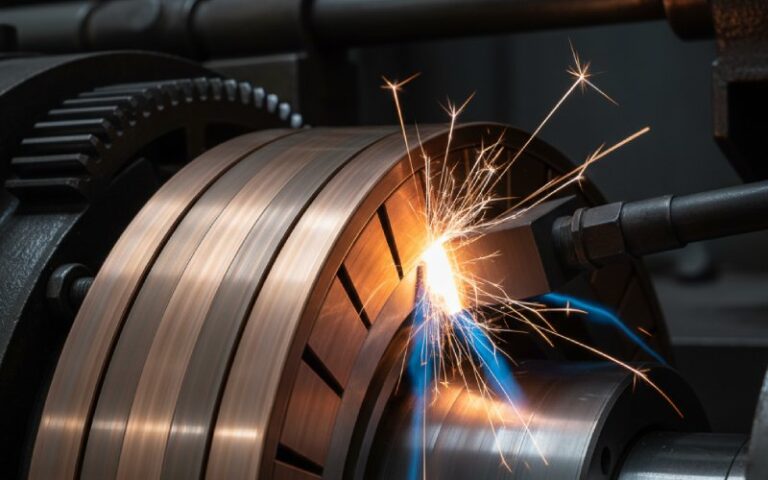
- A continuous “ring of fire” circling the commutator at speed
- Rapid crackling sound from the brush area, especially under load
- Smell of hot carbon or burnt insulation near the motor housing
- Brushes wearing unevenly or “feathered” on one edge
- Visible scoring, black deposits, or bluish discoloration on the commutator surface
Each of these patterns tells a slightly different story. The trick is learning to read them.
3. Good vs Bad Sparking: Where’s the Line?
In a real industrial environment, zero visible spark is ideal but not always realistic — especially on older machines or high-load motors. A very faint, uniform, short orange glow right at the contact area, with no long tails and no audible crackling, can be acceptable.
The trouble starts when sparking becomes:
- Localized – mainly at one or two brushes, not all around
- Long-tailed – sparks stretch across several commutator bars
- Noisy – accompanied by snapping or crackling sounds
- Hot and bright – intense yellow-white or bluish arcs
- Persistent – doesn’t settle down as the motor runs
This kind of sparking isn’t just cosmetic. Over time it will:
- Erode brush material and shorten brush life
- Overheat and pit commutator bars
- Carbonize insulation between bars
- Increase electrical noise and risk of interference
- Eventually cause hard failures: open circuits, shorted coils, or flashover
So the goal is not “eliminate every photon of light forever,” but rather avoid destructive sparking that accelerates wear or leads to failure.
4. Main Causes of DC Motor Commutator Sparking
Think of sparking causes in four big buckets. This makes troubleshooting much easier.
- Brush-related issues
- Wrong brush grade (too hard, too soft, wrong material for the duty)
- Incorrect brush spring pressure (too high = wear & heat, too low = poor contact)
- Worn, chipped, or cracked brushes
- Brushes not properly “seated” to the commutator radius
- Sticking brush holders, causing brushes to hang up instead of sliding freely
- Commutator surface / geometry
- Rough, grooved, or out-of-round commutator
- High mica (insulation between bars not properly undercut)
- Contamination: oil, grease, moisture, abrasive dust, carbon build-up
- Loose bars or poor segment insulation
- Electrical loading & circuit problems
- Overload or frequent overcurrent conditions
- Sudden load changes and frequent start-stop cycles
- Armature winding faults (shorted turns, open circuits)
- Interpole or field winding issues in larger machines
- Incorrect supply voltage or poor power quality
- Environment & mechanical alignment
- Excessive vibration or misalignment
- Bearings worn, causing armature to wobble
- Operating in dusty, corrosive, or wet environments without proper sealing
- Temperature extremes causing material expansion or contraction issues
When you see sparks, something from at least one of these buckets is misbehaving.
5. Reading the Sparks: Symptom → Cause → What to Check
Sparks are not random; they’re a visual symptom of a specific problem. Below is a practical “spark decoder” you can use in the field.
First, here’s the big picture in one table:
| What You See / Hear | Likely Root Cause Category | First Things to Check |
| Soft, even orange glow at all brushes under load | Near-normal switching | Load level, commutator cleanliness, brush grade suitability |
| Bright yellow sparks at one brush only | Local brush or commutator defect | That brush’s seating, wear, spring tension, and its bar condition |
| Long sparks trailing around the commutator | Overload or poor commutation | Motor load, supply voltage, interpoles (if present), brush grade |
| Continuous “ring of fire” around the commutator | Severe commutation failure | Overload, armature faults, interpole polarity, send to workshop |
| Crackling noise plus irregular bright flashes | Loose contact or vibration | Brush holder tightness, bearing condition, shaft runout |
| Heavy black deposits and burning smell | Overheating at brushes | Brush pressure, cooling, overload, contamination |
| Sparking mainly in one sector (angle of rotation) | Local winding or bar fault | Bar-to-bar resistance tests, armature inspection |
In practice, your diagnostic process will look like this:
Start visually and with your senses: watch the sparks, listen to the sound, smell for overheating. This gives you a first “shape” of the problem. Then you combine that impression with mechanical checks (brushes, bearings, alignment) and electrical tests (insulation, continuity, balance) to zero in on the root cause.
6. Step-by-Step Troubleshooting Workflow
When you have a sparking DC motor, instead of jumping straight to “clean it” or “change brushes,” walk through a structured workflow:
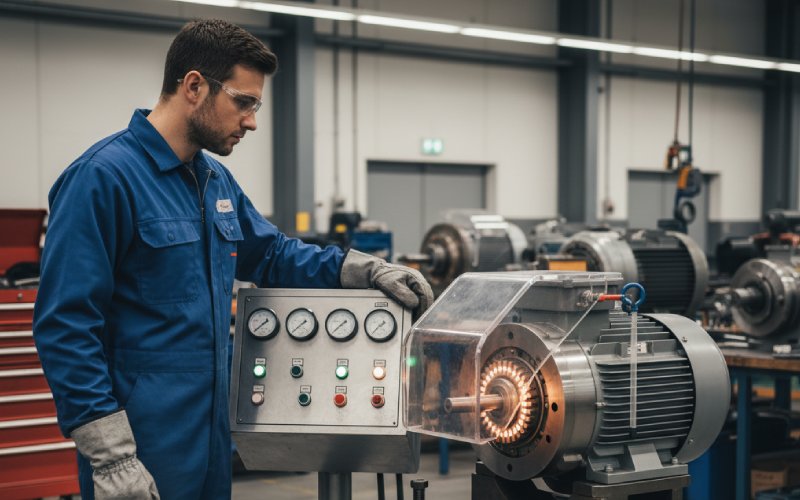
- Step 1 – Safety first
- Isolate power, lockout/tagout if in an industrial environment
- Wait for rotation to stop; discharge capacitors if applicable
- Use appropriate PPE (eye protection, gloves, etc.)
- Step 2 – Quick visual inspection
- Check brush length; replace if below manufacturer’s minimum
- Inspect brush faces: glazed, chipped, cracked, or uneven?
- Look at commutator: smooth and chocolate-brown, or rough, grooved, blue, or burned?
- Check for obvious oil/grease contamination or dust build-up
- Step 3 – Check mechanical conditions
- Ensure brush holders are rigid, aligned, and not loose
- Verify brushes slide freely in holders (no sticking)
- Wiggle shaft gently: any obvious play in bearings?
- Rotate armature slowly by hand: does the commutator feel out-of-round or “lumpy”?
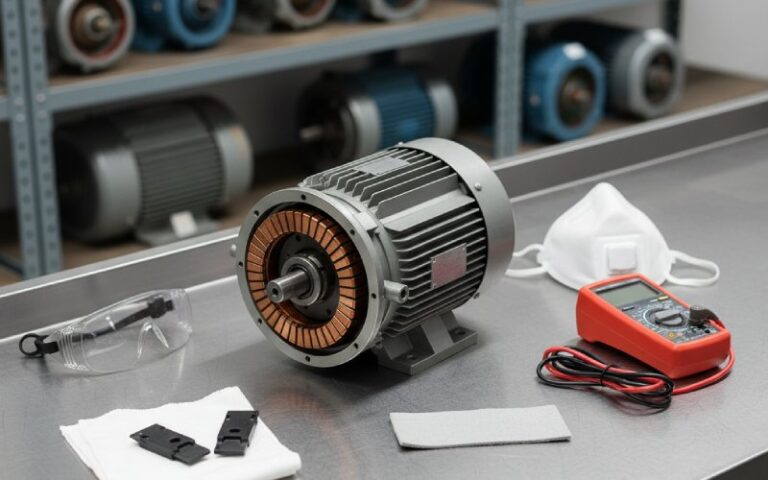
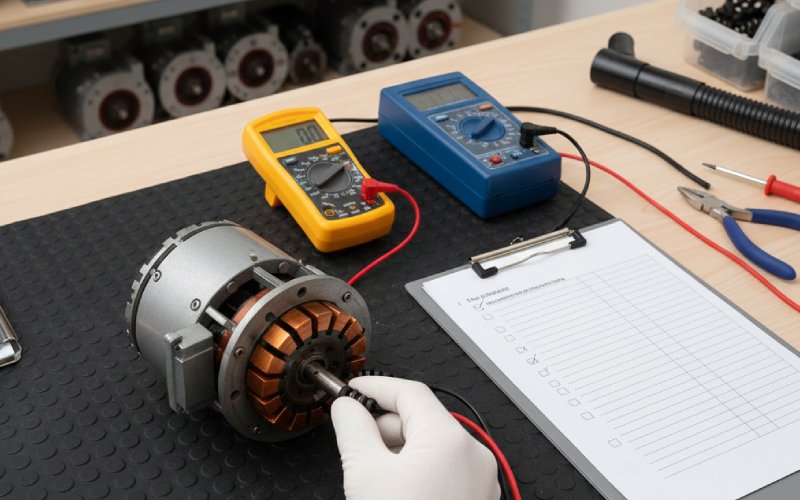
- Step 4 – Electrical testing (if tools are available)
- Insulation tests (megger) between windings and frame
- Bar-to-bar resistance tests to find shorted or open coils
- Check field and interpole windings (on larger motors) for correct resistance
- Confirm supply voltage and polarity are correct
- Step 5 – Clean and “reset” the interface
- Remove loose dust and debris with vacuum (avoid high-pressure air that redistributes dirt)
- Wipe commutator with lint-free cloth slightly moistened with suitable solvent
- Replace or reseat brushes as needed
- Step 6 – Run test with observation
- Run motor briefly at no load, then under light load
- Observe spark pattern at each brush position
- Listen for unusual mechanical noise or electrical crackling
- If sparking is still severe or gets worse, stop and escalate (repair shop, rewinding, or OEM support)
This sequence keeps you from missing obvious low-cost fixes while still leading you toward deeper faults if required.
7. Repair Techniques That Actually Work (and When to Use Them)
Once you’ve narrowed down the cause, you can choose the right corrective actions rather than trying random fixes.
In many cases, you’ll start with the brush–commutator interface:
- Replacing brushes with the correct grade recommended by the motor manufacturer or brush supplier (material matters a lot for different speeds, loads, and voltages).
- Properly seating new brushes to the commutator radius using fine grain seating stones or approved abrasive sheets placed in the direction of rotation. This maximizes contact area and reduces local heating.
- Making sure brush spring pressure is within the recommended range (not “as tight as it will go”). Unequal pressure between brushes can easily cause localized sparking.
If the commutator itself is suspect:
- Polishing a slightly rough or dirty commutator with a proper commutator stone to restore a smooth, even surface.
- Undercutting mica if the insulating mica between bars is too high — flush or proud mica can lift the brush and disturb commutation.
- Turning (machining) the commutator in a lathe if it is badly scored, out-of-round, or tapered. This is usually followed by undercutting and fine polishing.
- Rebuilding or replacing the armature, in severe cases where bars are loose, badly burned, or windings are damaged.
On the electrical side:
- Reducing overload conditions by adjusting process parameters, sizing the motor correctly, or improving cooling.
- Fixing control or supply problems (incorrect voltage, faulty controllers, or contactors causing erratic current).
- Correcting interpole or field issues on larger DC machines so that the electromagnetic conditions for commutation are restored.
Often, long-term success is a combination of all three angles: mechanical (alignment & balance), electrical (loading & windings), and interface (brushes & commutator).
8. Preventive Maintenance: How to Keep Sparking from Coming Back
Once you’ve tamed a sparking motor, the real win is making sure it doesn’t return in three months. A simple, disciplined maintenance routine goes a long way.
- Routine inspection schedule
- Light-duty or small motors: check every 6–12 months
- Heavy-duty / critical motors: visual check monthly, detailed inspection quarterly
- Standard inspection checklist
- Brush length, seating, and freedom in holders
- Brush spring condition and approximate tension
- Commutator color (healthy brown film vs black, blue, or patchy)
- Any sign of grooving, pitting, or mica issues
- Motor cleanliness (inside and out), cooling paths, and filters
- Environmental control
- Reduce dust and abrasive particles in the motor area
- Protect against oil mist and moisture ingress
- Ensure adequate ventilation and cooling airflow
- Data and trend tracking
- Log brush replacements, commutator rework, and major load changes
- Record when sparking is first noticed and under what conditions
- Use this history to predict when proactive work is needed instead of waiting for emergencies
Preventive maintenance turns commutator care from “unexpected crisis” into a predictable, budgeted task.
9. A Quick Real-World Story: From Ring of Fire to Clean Running
Imagine a small manufacturing plant where a key DC motor on a conveyor started showing a bright, persistent ring of fire around the commutator every time production ramped up.
At first, operators shrugged — “It’s always done that.” But then:
- Brushes started needing replacement every few weeks.
- The commutator developed deep grooves and dark patches.
- Eventually, the motor tripped on overload and production stopped.
During troubleshooting, the team discovered:
- The motor had been overloaded for years after a line upgrade.
- Brushes were a generic replacement of the wrong grade.
- The commutator was slightly out-of-round, and the mica had never been recut.
After a proper repair:
- The commutator was turned, undercut, and polished.
- OEM-recommended brushes were fitted and seated properly.
- The process load was adjusted, and an additional motor was added upstream.
Result: the “ring of fire” vanished, brush life increased dramatically, and unplanned downtime dropped. The sparks weren’t “just how it is” – they were an early warning that had been ignored.
10. Quick FAQ on DC Motor Commutator Sparking
Is some sparking normal in a DC motor?
A faint, even orange glow at the brush contact under load can be acceptable. Bright, noisy, long sparks or a ring of fire are not normal and should be investigated.
Can I just sand the commutator with regular sandpaper?
That’s risky. Many sandpapers contain abrasives that embed into the copper and make things worse. Use proper commutator stones or approved abrasive materials recommended for electrical machines.
Why do new brushes sometimes spark more at first?
Fresh brushes have limited contact area until they are properly seated to the commutator radius. During this bedding-in period, some additional sparking can occur. If seating is done correctly and the motor is otherwise healthy, sparking should reduce as the contact surface improves.
Does cleaning alone fix sparking problems?
Cleaning helps if contamination or carbon build-up is the main issue, but it won’t fix out-of-round commutators, wrong brush grade, overload, or winding faults. Think of cleaning as step one, not the whole solution.
When should I send a motor to a specialist workshop?
If you see a ring of fire, severe burning, loose commutator bars, suspected armature faults, or repeated sparking despite basic maintenance, it’s time for professional service. Continuing to run it can turn a repairable unit into scrap.