Custom Commutator Assembly: What Information an OEM Should Provide
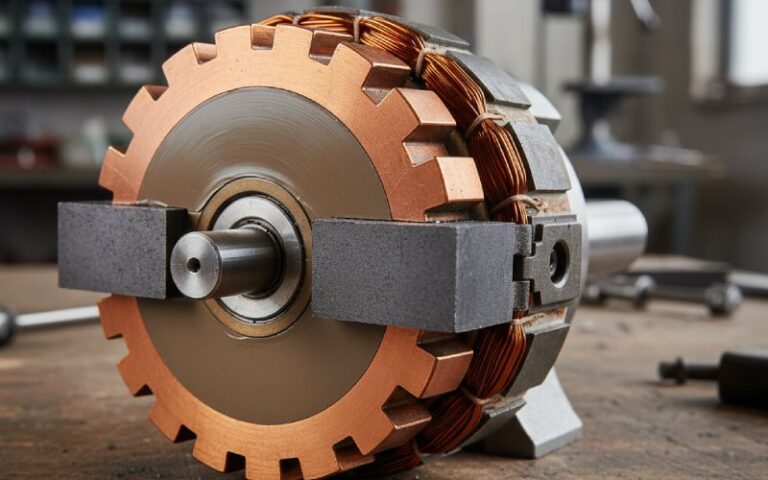
A custom commutator RFQ usually stalls for one simple reason: the part is described like turned copper hardware. It is not. For us, it is geometry, yes. But also switching behavior, insulation structure, fit-up method, thermal exposure, brush track, and production tolerance stack. Send only OD and segment count, and the quotation may look fast. The tooling review will not.
What we want from an OEM is not more paperwork. Just the right paperwork. Earlier.
Table of Contents
The minimum data package we need before we quote
The usual starting set in commutator inquiries is still very basic: OD, ID, total height, copper height, bar count, commutator type, copper material, application, quantity, whether a bush is required, plus any special technical requirements. That is enough to open a file. Not enough to lock a design.
| Information you send | What we actually use it for | What happens when it is missing |
|---|---|---|
| OD, bore, total height, copper height | Determines segment pack envelope, molding window, turning allowance, and final brush track | Tooling starts from assumptions; later OD corrections often affect copper height and brush contact |
| Bar count and commutator type | Sets electrical segmentation, slot pitch, riser or hook layout, and assembly method | Coil connection layout becomes uncertain; sample matching gets slower |
| 2D drawing with tolerances | Separates nominal size from functional size | Everyone thinks they agree until fit trial |
| Shaft seat, press-fit zone, shoulder datum | Controls interference, axial location, and runout reference | Good commutator, bad assembly. That happens a lot |
| Voltage, current, peak current, stall condition | Drives copper section, joint design, heat input limits, insulation margin | The part may survive rated load and fail at start-up |
| RPM and real duty cycle | Defines surface speed, brush track condition, mechanical balance risk, thermal cycling | Overdesign or underdesign. Usually underdesign |
| Brush grade, width, spring force, holder geometry | Matches copper surface, segment pitch, and film formation behavior | Commutation issue gets blamed on the commutator alone |
| Winding wire size and termination method | Determines hook/riser geometry, weld or braze window, neck strength | Connection area is redesigned after samples. Expensive step |
| Insulation system and environment | Selects mica/composite/resin system, thermal class, and contamination resistance | Lab sample passes; field unit sees oil mist, dust, or solvent and drifts |
| Electrical test requirements | Aligns insulation resistance, hipot, bar-to-bar checks, and acceptance plan | Supplier and OEM each pass a different test |
| Annual volume and service life target | Decides tooling grade, automation level, inspection depth, and cost structure | Low prototype logic gets applied to long-run production |
The three inputs that change the design more than OEMs expect
1) Load profile, not just rated point
We need the ugly part of the cycle. Start current. Reversal. Short overload. Braking. Idle. Repeat. In motor selection practice, speed and torque, starting or stall torque, and duty cycle are treated together because one number on its own does not describe the actual working condition. That matters directly at the commutator.
A commutator that lives comfortably at nominal current may still fail at the transition points. Usually the start. Sometimes the repeated restart after short idle. So send the load profile as a curve, or as time blocks. Accelerate 0.8 s. Run 12 s. Brake 0.5 s. Off 3 s. That level is enough.
2) Brush system data
If you send only the commutator drawing and keep the brush data for the motor team, we are missing half the interface.
We need brush grade, brush width, spring force, brush overlap on the bar pitch, and expected surface speed. As commutator surface speed rises, the acceptable roundness error tightens quickly; one widely used maintenance reference gives about 0.001 inch concentricity on diameter around 5000 feet per minute and about 0.0005 inch above 9000 feet per minute to avoid brush bounce and arcing.
That is why two commutators with the same OD can behave very differently in service. Same drawing. Different brush system. Different result.
3) Final process route
Tell us whether you need:
- a fully finished commutator assembly
- a semi-finished assembly with stock for your own turning
- a commutator mounted on shaft or armature
- a bare component for your internal welding line
This point gets skipped, then shows up late.
If your factory will do final turning and undercutting, we need the machining allowance, the target track width, the undercut form, and edge-break expectation. Undercutting matters because mica and copper do not wear the same way at the brush track; published service guidance also treats the slot geometry as a real control item, often setting width and depth equal to mica thickness when no part-specific value exists, followed by a light chamfer on the bar edges.
That changes how much copper we leave. And where.
What we need in the drawing, specifically
A usable commutator drawing is not long. It is just disciplined.
Mechanical
Include:
- bore size and tolerance
- OD and finish OD tolerance
- total height and copper height
- riser or hook geometry
- axial reference face
- press depth
- any skew or special slot relation
- allowable runout, and the datum used to measure it
That last line matters more than most of the drawing. Runout to the bore is not the same as runout to the shaft journal after assembly. In one published rebuild specification, truing is referenced to the armature shaft bearing seats and total indicated runout is limited to 0.002 inch. Same commutator. Different acceptance logic, depending on what surface controls the rotor system.
Electrical
Include:
- rated voltage and current
- peak current and duration
- bar-to-bar spacing concerns, if any
- bar-to-shaft insulation requirement
- insulation resistance target
- surge or dielectric test requirement
- acceptable temperature rise, if you are controlling it at component level
Typical published figures on custom commutator pages and rebuild procedures include bar-to-shaft high-potential tests around 3500 V in the absence of a part-specific value, and insulation checks using a 500 V insulation test with high megohm expectations. Those numbers are not universal. Which is exactly why we ask you to specify yours.
Process and material
Include:
- copper grade or approved material family
- mica or insulation family, if fixed
- welding, brazing, or fusing preference at the riser
- resin or molding compound restrictions
- balancing responsibility: ours or yours
- cleanliness, oil exposure, dust exposure, chemical exposure
- storage condition if the part ships semi-finished
A lot of field failures are not commutation failures in the narrow sense. They are process-route failures. Wrong resin for the environment. Too much heat into the hook. Press-fit chosen from shaft theory without checking the molded body response. Small decisions. Then not small.
What a sample can tell us, and what it cannot
A sample is useful. We can recover a lot from it:
- main dimensions
- type
- approximate copper section
- bar count
- obvious assembly method
- some clues about wear pattern
But a sample does not tell us, reliably:
- peak current
- duty cycle
- acceptable noise or spark level
- qualification test limits
- brush spring force
- allowed runout at the actual assembly datum
- production capability target for your line
So yes, we can quote from a sample. The quote is provisional until the internal structure is checked and the application window is clear. That is normal.
Where OEM projects usually go wrong
Not at the obvious places.
It is usually one of these:
- The drawing shows nominal geometry but no functional datum.
- The OEM sends rated current, not the repetitive peak.
- Brush data is treated as “motor-side,” not “commutator-side.”
- The requested part is called finished, but still expects in-house turning.
- The qualification test is discussed after tooling release.
- The sample is from a worn unit, and the wear shape is copied as if it were design intent.
We see these often enough that we now ask for them early. Saves a loop.
FAQ
Do you need a full drawing to quote a custom commutator assembly?
No. We can start from a sketch, sample, or a marked-up PDF. But the quotation stays wider, and the design review takes longer. For production pricing, we still need toleranced geometry and the application data.
Can we send only dimensions and add electrical data later?
You can. It slows the correct design path. Dimensions let us estimate tooling. Electrical duty decides copper section, joint margin, insulation margin, and sometimes the assembly type.
Should the OEM provide brush information if the order is only for the commutator?
Yes. The brush and the commutator are one interface. If brush grade, spring force, or overlap changes, the commutation behavior changes with it.
What is the single most important tolerance to define?
Not one tolerance. One reference system. If runout, OD, and press depth are measured from different assumptions, the drawing may look complete and still be unusable for assembly.
Can you reverse-engineer a commutator from a sample?
Yes, to a point. We can recover geometry and much of the construction logic. We cannot reliably recover the original duty cycle, qualification window, or all process controls from the sample alone.
Do you need the annual quantity before sample making?
Yes. Volume affects tooling grade, inspection strategy, and whether we build around manual, semi-automatic, or more automated assembly logic. Prototype and production do not always want the same path.
Final note
The best OEM input is rarely the thickest package. It is the package that ties drawing, duty, brush system, and assembly route together. Once those four align, custom commutator assembly becomes straightforward. Until then, every quote looks precise and stays conditional.