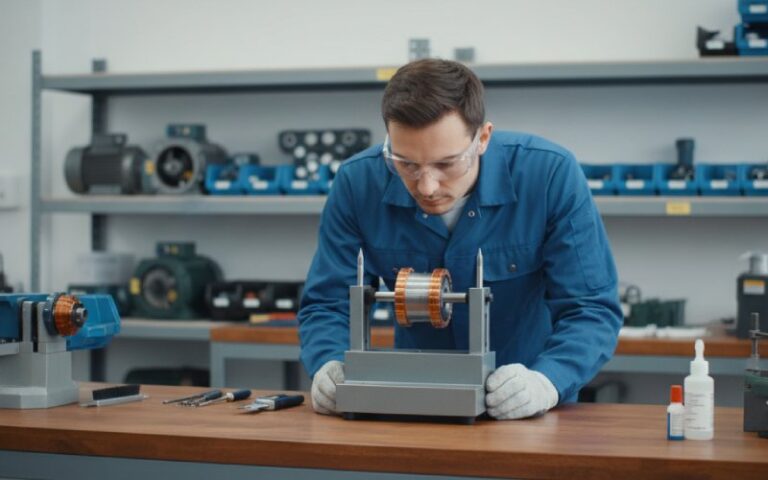
Essential Commutator Repair Tools for DC Motor Maintenance
Most commutator failures do not begin with a missing tool.
They begin with the wrong decision.
A stone gets used before runout is checked.
Mica is undercut, but the slot edges are left sharp.
New brushes are seated on a surface that should have been turned first.
The motor goes back into service. It runs. Not well.
From a manufacturer’s side, that pattern is familiar. The wrong question is often, which tool should we use. The better question is is this still a repairable commutator, or has it already become a replacement job.
This guide is written for industrial and heavy-duty DC motors with serviceable commutators. Small sealed units and non-serviceable constructions are a different case. Standard lockout, dust control, and shop PPE are assumed.
Table of Contents
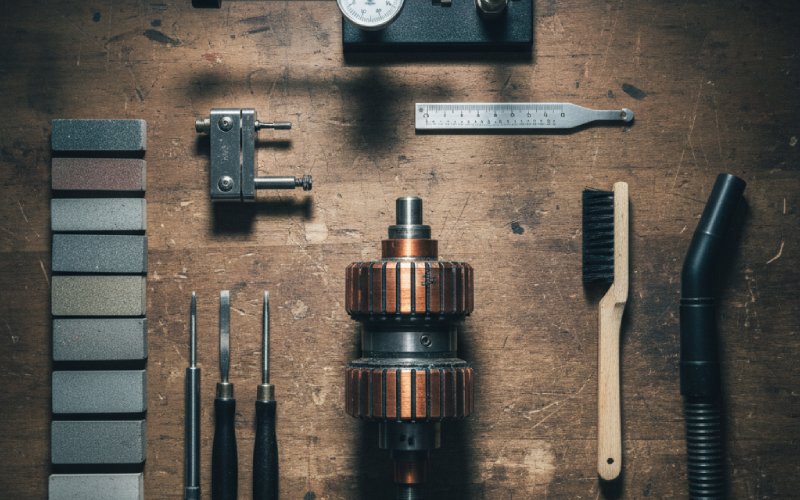
The essential tool set, and what each tool actually tells you
| Tool | Primary use | What it confirms | When it is not enough |
|---|---|---|---|
| Dial indicator with rigid base | Check total runout, high bars, bar-to-bar variation | Whether the commutator is still geometrically true | When surface damage is already obvious and copper must be cut |
| Lathe or precision turning setup | Restore roundness, remove grooves, burns, flats, heavy scoring | Whether the copper surface can still be recovered within service limits | When remaining copper is already too low, bars are loose, or risers are damaged |
| Commutator stone or burnishing stone | Light surface conditioning, minor ridges, film correction | Whether the issue is only superficial | When runout, bar height, or heavy grooving are present |
| Undercutting tool | Restore mica clearance between bars after turning | Whether brush contact can return to copper instead of insulation | When slots are damaged, packed with carbon, or bar edges are already broken down |
| Slot scraper and edge deburring tool | Remove mica fins, copper slivers, and sharp bar edges | Whether the undercut work is actually finished | When the segment edges are structurally damaged |
| Non-metallic slot brush and dry air / vacuum | Remove mica dust, copper dust, and abrasive residue | Whether the machine is clean enough to restart safely | When debris has already entered windings or insulation spaces |
| Brush seating paper, typically medium grit | Match the new brush face to the commutator radius | Whether the contact area is real, not guessed | When the commutator surface is glossy, out of round, or unstable |
| Spring pressure gauge | Check brush pressure consistency | Whether uneven current transfer is mechanical rather than material-related | When holders are misaligned or brushes do not slide freely |
| Holder alignment and spacing gauges | Check holder angle, spacing, and holder-to-surface clearance | Whether sparking is coming from rigging geometry | When the commutator itself is already beyond service condition |
That is the bench set we trust. Not because it looks complete. Because it forces the right sequence.
Measure first. Cut second. Finish the slots. Clean everything. Then seat the brushes.
Skip the order and the repair starts looking better than it really is.
Start with measurement, not abrasion
A commutator can look dirty and still be serviceable.
It can also look clean and still be wrong.
We check runout before any resurfacing decision. On many industrial DC machines, a practical field limit is around 0.002 in. / 0.05 mm total indicated runout, with very small allowable difference between adjacent bars. If the commutator is not true, surface stones do not fix the defect. They only soften the evidence.
This is where a dial indicator earns its place. It tells you whether you have:
- overall eccentricity
- local high bars
- camming
- bar-to-bar height variation
- a commutator problem that is really a shaft or bearing-seat problem
A lot of brush complaints start there. Not in the brush grade. Not in the spring. In geometry.
How to clean a commutator without creating a bigger problem
The safe answer is plain:
Clean contamination first. Do not machine first.
Oil, carbon packing, loose dust, and conductive residue can all imitate a surface defect. So can copper dragged by bad seating. We start with dry cleaning methods appropriate to the machine condition, then inspect the bars, slots, holders, and brush tracks again before deciding whether cutting is even needed.
A few rules stay fixed:
- Do not treat every dark surface as damage.
- Do not chase film color by habit.
- Do not leave slot debris in place and call the job done.
- Do not use conductive abrasive media that can stay embedded and score the surface later.
A stable working film does not need to be pretty. Uniform operation matters more than bright copper.
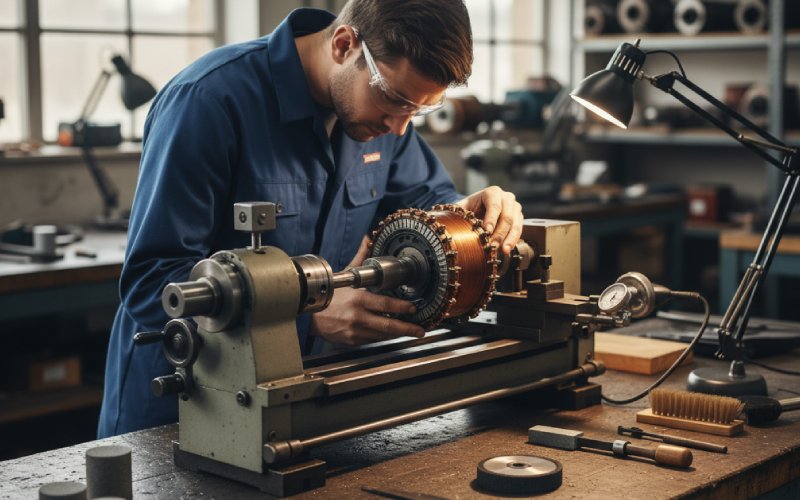
Commutator resurfacing: when a stone is enough, and when turning is not optional
This is where many repairs drift off course.
A commutator stone is correct for:
- light ridging
- minor thread marks
- small surface burns
- opening a glossy surface so film can form again
It is not correct for:
- out-of-round condition
- flat spots
- heavy grooving
- badly burned bars
- measurable high mica after prior machining
- bar height variation
If geometry is already gone, the commutator needs to be turned, not persuaded.
When we turn a commutator, the goal is not cosmetic finish. It is controlled recovery:
- true running surface
- consistent bar height
- minimal material removal
- correct relation to the bearing seats
- enough copper left for future service, if future service still makes sense
Too much field work still treats turning as a way to save a worn part at any cost. That is the wrong mindset. Turning is only valid while the commutator can still be restored inside serviceable limits.
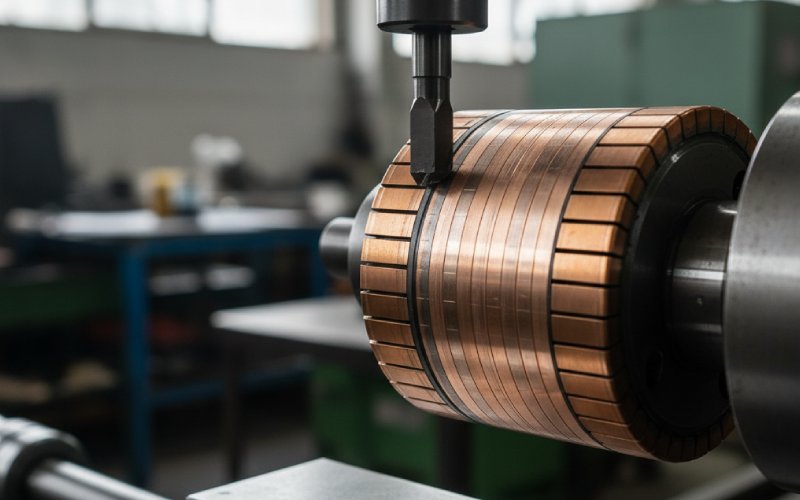
Undercutting tools matter more than many shops admit
After turning, mica that remains too high will push the brushes off the copper. Then the repair fails in a very predictable way: chatter, weak contact, local heating, sparking, edge wear.
So yes, undercutting is part of real commutator work. Not optional. Not decorative.
The exact undercut profile follows the original design. When the drawing is available, we follow it. When it is not, we still do not guess blindly. For industrial rebuild work, the field rule is usually built around mica thickness or roughly 1 to 1.5 times slot width, with a clean U or V profile and a light bar-edge chamfer after cutting.
The undercut tool alone is not the full job. The sequence is:
- undercut the slot
- remove mica fins
- remove copper slivers
- chamfer the bar edges lightly
- clean every slot
- recheck for residue
Miss step 2 or 3 and the machine often tells you on restart.
Brush seating tools finish the work. They do not replace the work.
New brushes on a bad surface do not become a good contact system just because they were installed carefully.
We use brush seating media after the copper condition is already correct. For many industrial jobs, medium seating paper around 80 grit is still the practical choice. Much finer than that, and the surface can stay too glossy for stable film development. Coarser than needed, and you create extra wear where you did not need it.
Two details matter here:
First: pre-radiused brushes save time, not judgment. They reduce seating work. They do not cancel it.
Second: all abrasive and carbon residue must be removed after seating. Every slot. Every holder area. Every exposed surface around the commutator zone.
A surprising number of repeat failures are just leftover debris.
Why is my DC motor sparking after commutator repair?
Usually because the repair stopped one step too early.
If sparking comes back after resurfacing or brush replacement, we check these in order:
- runout and adjacent bar condition
- high mica or poor undercut depth
- copper slivers at slot edges
- brush seating area
- brush spring pressure balance
- holder angle and holder-to-surface distance
- brush freedom in the box
- contamination in slots or on the rigging
- neutral setting, if the machine design makes that relevant
Changing brush material too early wastes time. If the copper surface, slot geometry, or holder condition is still wrong, the brush only reports the error. It does not cause it.
When commutator repair should stop and replacement should start
This is the section many manufacturer blogs avoid. We do not.
A commutator should move out of the repair category and into the replacement category when one or more of these conditions show up:
- remaining copper after turning is no longer enough for safe service margin
- bars are loose, mobile, or repeatedly lose clamping stability
- risers are cracked, broken, or heat-damaged
- insulation between segments is degraded beyond reliable recovery
- deep burning, tracking, or segment damage returns after correct machining and seating
- eccentricity can only be removed by cutting away too much copper
- bar alignment is unstable
- the construction type itself is not a practical rebuild candidate once bar movement begins
At that point, the job is no longer surface recovery.
It becomes a replacement problem.
And replacement should not be treated like failure. Often it is the cheaper decision. One more repair cycle on a bad commutator can damage brushes, holders, windings, downtime schedules, and trust in the machine. All at once.
A repair decision is often a manufacturing decision
This is the part field maintenance teams already know, even if they do not say it this way.
Two commutators can look similar on the bench and behave very differently in service. Why?
Because repair quality is only half the story. The other half is the component itself:
- segment copper quality
- mica consistency
- slot geometry
- clamping integrity
- riser construction
- concentricity control
- balance with the armature build
- duty cycle compatibility
That is why replacement selection cannot be reduced to diameter and bar count only. A commutator for continuous heavy-duty service is not judged the same way as a lightly loaded intermittent unit.
If the machine has already crossed from repair into replacement, the right next step is not another stone. It is a manufacturing review: application, duty, speed, thermal load, commutation behavior, and dimensional limits. Our custom commutator manufacturing team builds replacement units around those conditions, not around catalog shorthand.
The repair-or-replace checkpoint we use in production support
| Condition found on inspection | Repair is still reasonable | Replacement is the better choice |
|---|---|---|
| Light film variation, minor ridging, no structural damage | Yes | No |
| Measurable runout but recoverable with minimal cut | Yes | No |
| High mica after previous machining | Yes, if copper and structure remain sound | No, if repeated slot work has already reduced service margin |
| Loose bars or unstable clamping | Sometimes, depending on construction and rebuild path | Often yes |
| Cracked or heat-damaged risers | Rarely | Yes |
| Deep segment burning or recurring tracking after correct repair | Sometimes, after full root-cause review | Usually yes |
| Required turning would remove too much copper | No | Yes |
| Non-serviceable or poor rebuild candidate construction | No | Yes |
FAQ
What tools are essential for commutator repair?
The core set is a dial indicator, turning setup, commutator stone, undercutting tool, slot deburring tools, cleaning tools, brush seating media, and spring/holder inspection gauges. Without measurement tools, shops usually overuse abrasives.
How do you clean a commutator correctly?
Remove contamination first, then inspect. Dry cleaning, slot cleaning, and residue removal come before any decision about stoning or turning. A dirty surface and a damaged surface are not the same thing.
When is commutator resurfacing enough?
Resurfacing is enough only for light surface defects. If the commutator is out of round, flat-spotted, heavily grooved, or has bar height problems, turning is the correct process.
What undercut depth should be used on a commutator?
Use the original design whenever available. In field rebuild practice, the undercut is commonly based on mica thickness or about 1 to 1.5 times slot width, followed by proper deburring and a light chamfer.
Why is my DC motor still sparking after brush replacement?
Because brush replacement does not correct copper geometry. Persistent sparking usually points to runout, high mica, poor slot finishing, weak seating, holder issues, or contamination that was left behind.
When should a commutator be replaced instead of repaired?
Replace it when safe service margin is gone or structural integrity is no longer reliable. Loose bars, cracked risers, severe insulation breakdown, repeated damage after correct repair, or excessive copper loss after turning are the usual turning points.
Can a dark commutator still be normal?
Yes. Film color alone is not a failure criterion. Stable operation, controlled sparking, acceptable brush life, and acceptable commutator life matter more than appearance.
Need a replacement commutator instead of another repair cycle?
If repeated turning, undercutting, and brush seating still do not restore stable commutation, the issue is no longer bench technique. It is usually component condition.
We manufacture replacement commutators for industrial DC motors, including OEM-equivalent and custom commutator builds for rebuild shops, motor service teams, and equipment owners working with real service limits rather than guesswork.
For sizing, drawings, reverse engineering, or rebuild review, contact our engineering team.