Commutator Bar Burning: What It Really Means for Your DC Machines
Table of Contents
1. What actually counts as “commutator bar burning”
Most field guides now agree on a simple working definition:
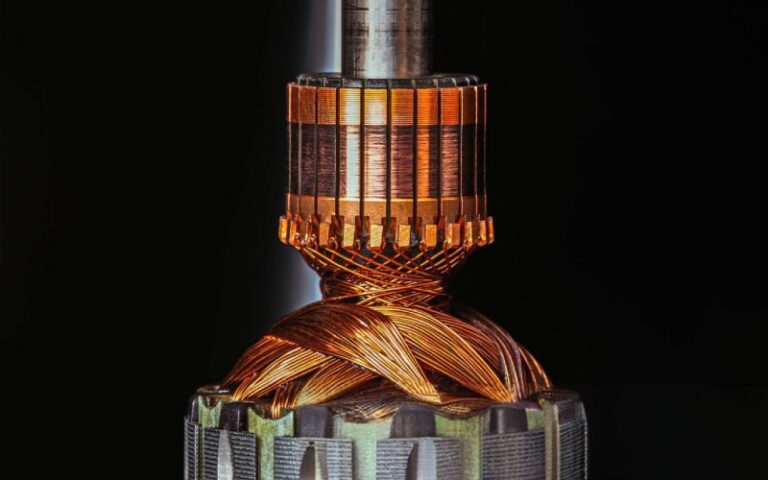
Bar burning = erosion of the trailing edge of one or more commutator bars, usually with visible metal removed, not just brush film discoloration.
The S7 bar burning pattern from the commutator surface chart by Electrographite Carbon Co. describes it in exactly those terms: trailing-edge erosion, driven by maladjusted electrical symmetry or poor commutation, with a clear warning about possible flashover if left alone.
A few nuances that matter in practice:
- Burning vs “ugly but okay” film Dark, light, mottled, streaky films can be perfectly serviceable if the copper itself is not damaged. Morgan’s commutator guides point out that quite a few machines run for years with films that don’t look like the classroom photo.
- Burning starts small Bright spots in the film, then localized sparking, then patina stripped at the bar edge, then copper erosion. Morgan’s maintenance notes link bright spots and severe metal transfer to later bar burning and film stripping, both flagged as unacceptable conditions if they progress.
- Burning is a symptom, not the root The commutator is reporting something upstream: brush choice, electrical symmetry, mechanical disturbance, loading, or all of them at once.
So you don’t “treat bar burning” in isolation. You treat the system that created it.
2. Patterns that matter: bar, slot bar, pitch bar burning
Field literature and OEM guides usually separate three destructive patterns: bar burning, slot bar burning, and pitch bar burning.
Here’s a compact view you can actually use during an outage.
Visual patterns and likely causes
| Pattern type | Visual pattern on commutator | Typical electrical / mechanical suspects | Risk trend if ignored |
|---|---|---|---|
| Simple bar burning | Random or localized bars with eroded trailing edges; may start where sparking is worst | Maladjusted brush holder position, neutral shift, poor commutating brush, low-resistivity brush on a “hard” machine | Copper loss → deeper craters → brush bounce → risk of flashover |
| Slot bar burning | Every 2nd / 3rd / 4th bar darker and etched in a regular “keyboard” pattern; damage at trailing edges when film is removed | Weak commutation, wrong brush grade, poor electrical adjustment of interpoles, load or transient load above design, high reactance voltage | Accelerating erosion, rising sparking, eventual flashover and brush destruction |
| Pitch bar burning | Burned zones repeating at distances related to pole pitch; often under the negative (cathode) brush, with one or several bars in each zone | Cyclic mechanical or electrical disturbance in phase with armature rotation: unbalance, vibration, open or high-resistance armature/equalizer joints, unbalanced main field | Localized hot spots, brush bounce, fast growth of burned areas; serious flashover risk |
The slot bar burning and pitch bar burning definitions above follow the interpretations given in Morgan’s “Guide for Successful Commutator and Brush Operation” and related patina notes.
If your commutator doesn’t fit one of these three, you may be looking at something else: threading, copper drag, selective action, non-conductive filming, or just ugly but acceptable patina.
3. Why commutator bars burn in real machines
You already know the theory: reactance voltage, contact drop, commutation zone. Let’s translate that into what maintenance and design teams actually see.
3.1 Electrical symmetry and neutral setting
If your brushes don’t sit in the right electrical neutral, reactance voltage doesn’t get cancelled properly. That usually shows up as:
- Persistent sparking on one brush arm bank more than the others
- Burning biased to one side of the commutator
- Sensitivity to load: acceptable sparking at light load, then aggressive at higher load
The commutator surface charts and OEM guides highlight maladjusted brush holders / electrical symmetry as a primary cause of S7 bar burning.
So, before changing brush grade or skimming anything:
- Verify brush stagger, polarity, and position relative to neutral
- Check interpole polarity and air gap against nameplate or design data
- Confirm equalizer connections and pole circuits (shorted turns, unequal pole gaps) if pitch bar patterns appear
3.2 Brush grade and design choice
Wrong brush grade on a “difficult” DC machine is a classic silent killer.
Morgan’s technical papers show how higher-resistivity materials and multi-wafer brushes reduce circulating brush currents on high-reactance machines, directly cutting sparking and bar burning.
In practice, warning signs that you have a brush mismatch:
- Good geometry, but blackened commutator with hot spots and early burning
- Brush faces glazed, with metal inclusions, and commutator starting to thread or pit
- Bar burning and flashovers triggered when load swings, even though temperature limits are nominal
Variables to review with your brush supplier:
- Brush resistivity vs machine reactance voltage
- Contact drop and current density
- Wafer count (single vs multi-wafer)
- Lubricating / cleaning additives in the grade
3.3 Overload and transient torque
Slot bar burning is strongly linked to sparking created when commutating ability is exceeded by load or severe transients.
Typical scenarios:
- Drives running above their original nameplate duty because the process changed
- Repeated hard starts or plugging on large DC motors
- Frequent short-term overloads in cranes, mills, winches, etc.
High reactance voltage, saturated commutating poles, and inadequate neutralizing flux all stack up. Once sparking is high enough, every 2nd or 3rd bar loses metal at the trailing edge. Then the pattern keeps deepening, like potholes on a road that never gets repaved.
3.4 Mechanical disturbance and vibration
Pitch bar burning is often tied to a specific mechanical rhythm:
- Eccentric or rough commutator
- Worn bearings or soft foundations
- Shaft misalignment or coupling issues
- Armature unbalance
When this disturbance lines up with electrical poles, you get burnt zones separated by a fixed angle (half pole pitch initially, then full pole pattern).
Even if current sharing between bars is fine on a test bench, vibration combined with marginal brush pressure lets arcs lengthen and bite into the bars every time that sector passes the cathode brush.
3.5 Environment and contamination
Industrial docs on commutator patina point out that film appearance shifts with humidity, oil vapour, fumes, and light loading.
On its own, that’s often acceptable. It becomes a bar-burning story when:
- Oil or conductive dust changes surface resistance unevenly
- Aggressive fumes or moisture attack the film and copper
- Low load plus contamination lead to metal transfer and bright spots, which then grow into bar burning and film stripping
So cleaning and environmental control are not cosmetic; they change how quickly you move from “odd film” to “damaged commutator.”
4. An inspection workflow you can run in a short shutdown
Let’s assume you have limited time. No lab work, just a planned outage and basic tools.
Step 1 – Confirm the pattern, not just the color
- Clean the commutator surface carefully.
- Remove film locally on a few darker bars with a non-metallic eraser or fine abrasive, as suggested in technical guides.
- Look specifically at the trailing edges:
- Is copper intact?
- Any etched lips, pits, or craters?
If the darker bars look fine once the film is removed, you might have a harmless slot bar pattern, not slot bar burning.
Step 2 – Listen for loose bars
Organizations like EASA describe a simple tap test: light taps across the commutator, listening for a dull sound that indicates a loose bar.
Loose bars plus visible burning is a strong case for more serious repair, not just stone dressing.
Step 3 – Check brushgear and basic settings
Without getting lost in theory:
- Measure spring pressures; bring them back into the brush supplier’s recommended range
- Check brush grade and wafer configuration vs your application
- Verify brush stagger and spacing relative to neutral marks and interpole centers
Brush adjustment and grade selection are consistently ranked among the top levers for reducing destructive conditions like slot bar and pitch bar burning.
Step 4 – Mechanical checks
Very quick, but valuable:
- Radial run-out of the commutator
- Bearing condition and shaft endplay
- Coupling alignment
- Foundation or base looseness
If the burning shows a fixed angular pattern that matches mechanical issues, you are likely in pitch bar territory, not purely electrical.
Step 5 – Decide on resurfacing vs “watch and wait”
Technical troubleshooting charts from manufacturers like Regal Rexnord treat burnt bars as a severe condition that can require motor replacement or major repair, especially when insulation between bars is compromised.
But not every mark means immediate rewind. A reasonable decision logic:
- Copper damage shallow, no loose bars, sparking controllable → Thin skim or stoning, brush and setting optimization, then close monitoring.
- Deep craters, bar edges breaking, repeated flashover, loose bars → Pull the armature for full shop repair (undercut, reband, possible rewind), or plan a replacement.
5. Corrective actions by time horizon
Sometimes you just need to keep production going until the next maintenance window. Other times you’re redesigning a fleet of drives.
Immediate actions (hours to a few days)
- Clean commutator and brush boxes
- Adjust brush pressure and holder alignment
- Reduce loading peaks or short-term overloads if possible
- Dress the commutator lightly to remove high spots and smooth the worst edges
Once sparking is under control and bar burning stops progressing, you’ve at least stabilised the situation.
Short-term corrective work (next outage)
- Proper skim cut and undercut in a shop
- Replace carbon brushes with a more suitable grade and/or multi-wafer design
- Correct main field and interpole air gaps, check equalizer connections
- Balance the armature, renew bearings and correct alignment where needed
Morgan’s maintenance notes show that with these practices in place, commutator life expectancy in industrial DC machines typically runs from 10 to 20+ years.
Long-term design and procurement changes
For OEMs, repair shops, and large end-users:
- Specify commutator bar material and dimensions with a clear duty cycle in mind
- Work with brush suppliers such as Morgan Advanced Materials or equivalent to standardise grade families per application (steel mill, crane, winder, traction, etc.)
- Align drive settings (current limits, acceleration ramps, braking profiles) with commutation capability
- Include commutator film inspection and sparking checks in routine maintenance, not just “change brushes when short”
At that point, commutator bar burning becomes an exception report, not weekly noise from the shop floor.
6. Using bar burning as an asset-management signal
From a B2B perspective, commutator bar burning is more than a maintenance defect. It’s data.
You can treat it as a field indicator for:
- Machines running outside design duty – Repeated slot bar burning says your load model is optimistic.
- Inconsistent repair standards across service providers – One shop’s rewinds run clean, another’s show pitch bar issues within months.
- Brush and commutator sourcing problems – A change of supplier followed by new burning patterns is a strong hint about grade or geometry differences.
If you’re an OEM, a repair business, or a parts supplier:
- Logging bar-burning incidents by machine family, environment, and brush/commutator spec quickly shows where you need design or sourcing changes.
- Building standard “burning response playbooks” makes your service offering more predictable: customers see repeatable recommendations, not opinions.
7. FAQ: commutator bar burning in DC motors
Q1. Is any commutator bar discoloration a sign of bar burning?
No. Acceptable slot bar patterns and non-uniform films are well-documented in commutator surface charts and guides. Only when metal is actually removed from the trailing edges of bars — visible etching or craters — do we talk about destructive bar burning.
Q2. When should I stop the motor because of commutator bar burning?
Short answer: when burning is progressing between inspections or when you see:
Deep, sharp-edged craters at trailing edges
Frequent or long arcs around the commutator circumference
Evidence of loose bars or insulation damage
Repeated flashover events
Troubleshooting charts from manufacturers treat heavily burnt bars as a reason for major repair or replacement, not just cosmetic dressing.
Q3. Can I just skim the commutator and carry on?
Sometimes. A light skim or stone dressing is normal maintenance and is often recommended once bar burning is arrested and the root causes are corrected.
If you skim without fixing the underlying electrical, mechanical, or environmental issue, the burning pattern usually returns, faster and deeper.
Q4. How do I distinguish slot bar burning from pitch bar burning in the field?
Key differences, matching the technical descriptions:
Slot bar burning – Every 2nd / 3rd / 4th bar around the commutator, tied to number of conductors per slot.
Pitch bar burning – Burned zones separated by an angle related to pole pitch (e.g., 180° on a 4-pole machine), often with one or more bars in each zone, usually under the negative brush.
If the spacing makes more sense in electrical degrees (poles) than in slot pitch, think pitch bar, not slot bar.
Q5. Does changing brush grade really make that much difference?
Yes. High-resistivity, multi-wafer brushes are widely recommended for machines with high reactance voltage or narrow commutation zones because they cut circulating currents and sparking, which directly reduces bar burning and flashover risk.
Field experience plus the formal guides both point in the same direction: brush grade is one of the cheapest levers you have.
Q6. How often should I inspect for bar burning?
For heavily loaded industrial DC motors:
Visual commutator and brush inspection at each planned outage
More frequent checks (e.g., monthly) on units with known high-duty or prior burning history
After any major change — new brush supplier, rewind, drive settings change — schedule an early inspection to catch patterns before they turn destructive
Morgan’s maintenance articles suggest that with consistent inspection and targeted corrections, commutator service life can span a decade or more, even in demanding applications.