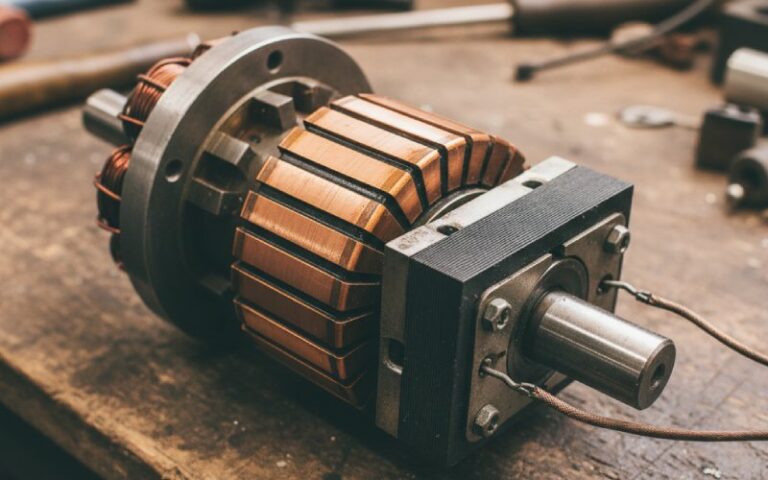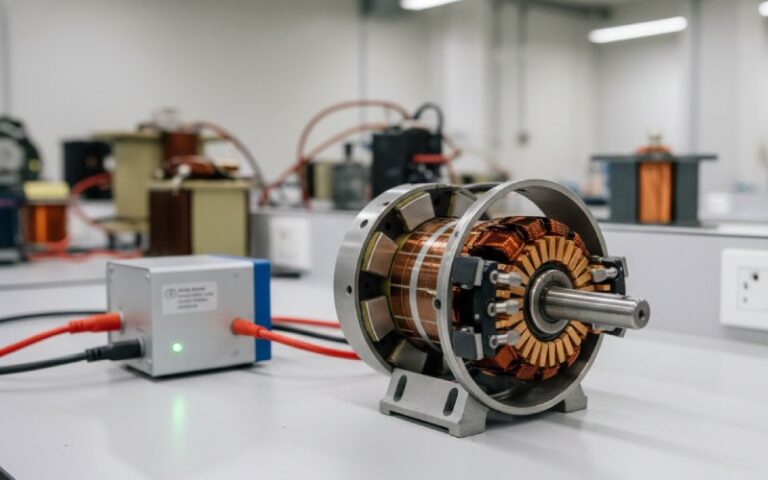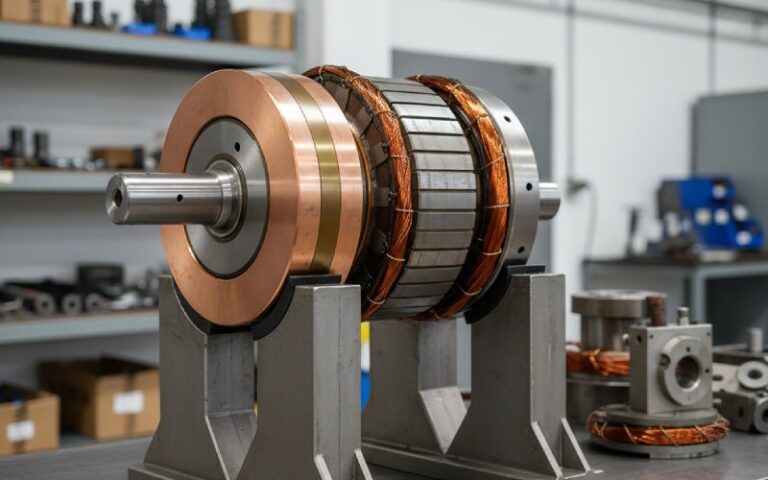
Why Use a Chamfered or Grooved Segment Design?
Table of Contents
1. What chamfers and grooves really change (in practice)
Short version:
- Chamfered segments change how the brush meets the bar edge and how the electric field concentrates at that edge. That affects arcing, copper drag, and mica behavior.
- Grooved surfaces change current density distribution, debris flow, and film stability on the track, especially at higher current densities.
Nothing mystical here. No new physics. Just geometry that quietly shifts risk and lifetime.
2. Chamfered bar edges: why bother?
Most datasheets just say “chamfer 0.4 × 45°” or similar and move on. But there are several separate jobs that little cut is doing.
2.1 Reducing inter-bar flash risk
When you chamfer each bar, the effective distance between the upper edges of adjacent bars increases. That extra millimeter (often less) pushes up the creepage distance along the surface, which reduces the chance of flashover between bars when bar-to-bar voltage is high.
Typical practice from technical notes:
- Chamfer angle: usually 45°, sometimes 30°
- Depth: roughly 1/20 to 1/10 of bar depth
So if you’re running:
- High bar-to-bar voltage
- Long commutator, aggressive load steps
…running without chamfer is basically betting that surface contamination and film will always behave nicely. They don’t.
2.2 Dealing with mica and undercut imperfections
Even with good undercutting, you sometimes get flush or slightly proud mica between bars. That edge can chip, crack, or produce conductive slivers under stress. Documents on bar-edge treatment explicitly call out chamfering as a way to eliminate the risk of mica slivers caused by imperfect undercutting.
So a chamfer:
- Removes the sharp copper corner that likes to peel mica
- Moves the mechanical contact zone slightly away from the fragile interface
It’s cheap insurance against “perfect” workshop work that isn’t always perfect.
2.3 Softer brush entry and exit
When a brush rides over a sharp bar edge:
- The local pressure spike is higher
- Particles can be knocked loose at every bar crossing
- You get a higher chance of edge burning and pattern marks
With a chamfer, the brush meets a small ramp instead of a step, which smooths the transition into the next bar. That reduces:
- Edge chipping
- Copper drag along the rotation direction
- Early ridge formation on the track
If you’ve ever seen a commutator with a pronounced “saw-tooth” pattern along the rotation, the edge geometry plus film behavior were probably not getting along.
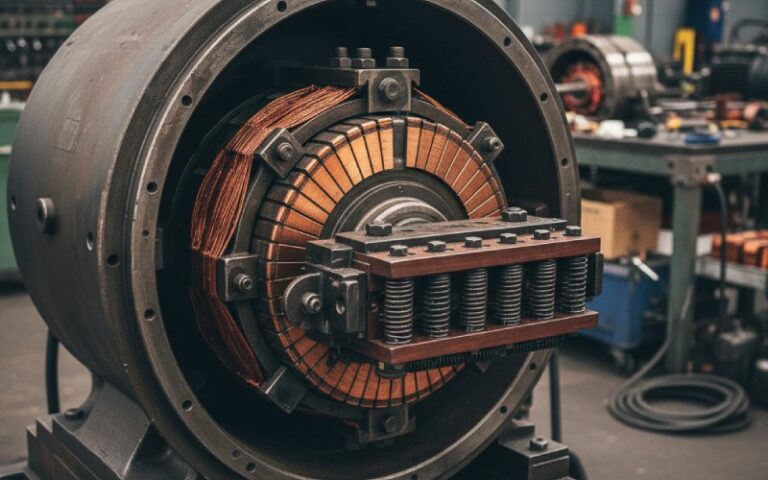
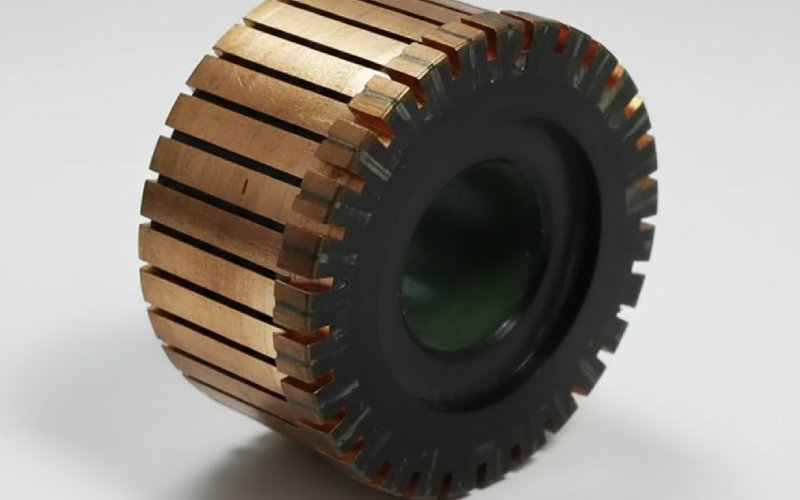
3. Grooved segment designs: when the flat track isn’t enough
Grooving is more intrusive than chamfering. Once you put grooves into a track, you’re making deliberate choices about:
- Current density distribution
- Debris flow and dust packing
- Cooling, if the groove geometry allows it
Not every commutator needs this. Some absolutely do.
3.1 Current density control at high load
Guidelines for grooved slip rings (close cousin to commutators) usually specify that groove pitch should be a submultiple of brush width, so that every brush always covers a whole number of groove periods. That keeps current density across the brush contact more uniform, which is especially useful at high current density.
The same logic carries over when you groove a commutator track:
- Grooves act like small “current density redistributors”
- You can avoid local hot spots under the brush
- Film tends to stabilize when the brush doesn’t see big pressure jumps
3.2 Managing dust and film
Grooves also behave as escape paths for copper and carbon dust. Instead of packing under the brush and creating random high-spot behavior, debris can migrate into the groove volume.
That means:
- More predictable film thickness
- Less random streaking of the patina
- Lower chance of “banded” wear, where one zone looks perfect and the adjacent one is rough
Of course, if you never clean the grooves, they eventually fill and you just paid for fancy pockets of compacted powder. Maintenance and groove design are a pair; they don’t exist separately.
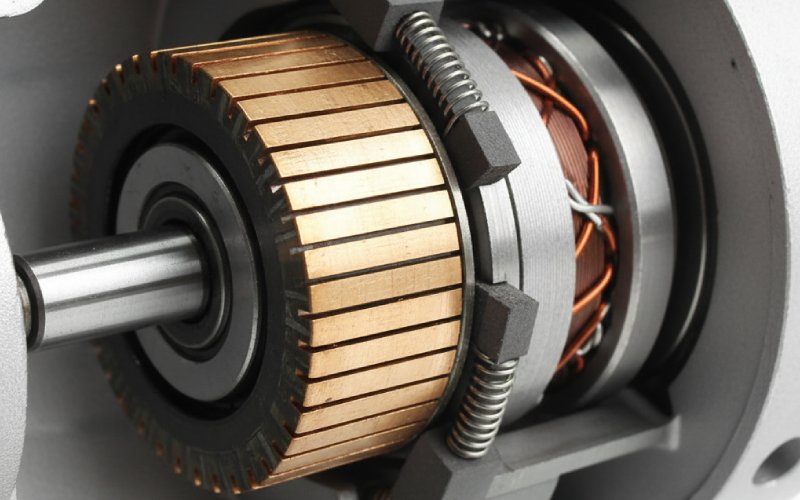
3.3 Grooves plus chamfers
Technical notes on grooved rings point out that after machining grooves, it’s essential to chamfer the resulting sharp edges – typical recommendations are around 0.4–0.5 mm × 45°.
So a “grooved design” in reality is usually:
Grooves + chamfered edges + correct undercutting
If one of those three is missing, performance can actually go down.
4. Flat vs chamfered vs grooved: quick comparison
Below is a compact, practical view. Not theory, just how these options behave in typical industrial DC motors and generators.
| Feature / Concern | Flat segments (no chamfer, no groove) | Chamfered segments only | Chamfered + grooved segments |
|---|---|---|---|
| Bar-to-bar flash risk (high V/bar) | Highest | Lower – longer creepage, softer field at edges | Lowest – longest creepage + broken surface path |
| Sensitivity to undercut defects | High – mica slivers more likely | Lower – edge unloads mica interface | Similar to chamfered, depends on groove geometry |
| Brush entry/exit shock | High | Moderate – ramp effect | Lowest if groove pattern matches brush width |
| Film stability under high current density | Acceptable only at modest current | Better than flat | Best – grooves help redistribute current and debris |
| Debris handling | Dust tends to skate on surface | Slightly better; edges catch some debris | Grooves capture and channel debris away from contact |
| Noise / vibration potential | Can be ok on perfectly aligned systems | Slight improvement | More sensitive to poor alignment, but quieter when right |
| Manufacturing cost | Lowest | Small extra step, usually automated | Highest – extra machining and QA |
| Maintenance effort | Low on paper, high in reality | Similar to flat | Higher – grooves and chamfers must be kept clean |
| Best suited for | Low-voltage, low duty, small machines | Medium voltage, general industrial duty | High current density, high voltage, long duty cycles |
5. Design rules of thumb (that actually help decisions)
You don’t always have time to run FEA for every small DC motor project. These simple thresholds can guide you.
5.1 When a chamfer is basically mandatory
Chamfered bar edges are strongly advised if any of these are true:
- Line voltage or generator output is high enough that bar-to-bar voltage > 30–40 V
- The machine will see frequent step loads or reversing duty
- You know maintenance will occasionally be “creative” with undercutting tools
In those cases, the combination of:
- Increased edge distance, and
- Protection from mica defects
…is cheap risk reduction. Technical guidance explicitly recommends chamfering when voltage between bars is high.
5.2 When to seriously consider grooves
Grooved commutator or ring designs make sense when:
- Brush current density is high and close to material limits
- You expect continuous duty at high temperature
- You’ve seen banded wear patterns or striping on similar machines in the past
In these cases, a smooth track might look nice out of the factory, but field behavior is less predictable. Grooves introduce controlled micro-roughness and flow paths.
5.3 When flat segments are still fine
You don’t need chamfered, grooved everything.
Flat segments can be perfectly adequate if:
- Voltage per bar is low
- Brush current density is conservative
- Environment is clean and maintenance is good
Even then, many shops still put a very light chamfer after turning and undercutting, just to avoid sharp burrs from machining. That’s now routine in a lot of repair practices. (easa.com)
6. Manufacturing and QA: where designs fail in the real world
A nice CAD model doesn’t stop a commutator from failing. The weak spots are usually:
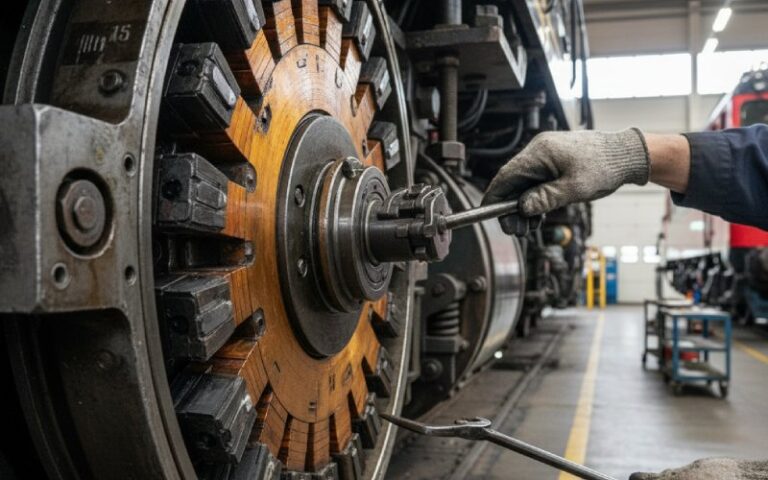
6.1 Manual chamfering with inconsistent bar width
Discussions from repair technicians are full of stories about single-edge hand tools and hacksaw blades used for chamfering. Done by an expert, it works. Done in a hurry, you end up with:
- Unequal bar widths at the surface
- Random differences in chamfer depth
- Non-uniform film and brush contact pressure
So if you buy commutators:
- Ask how the chamfers are produced
- Look for automated or guided tooling rather than freehand only
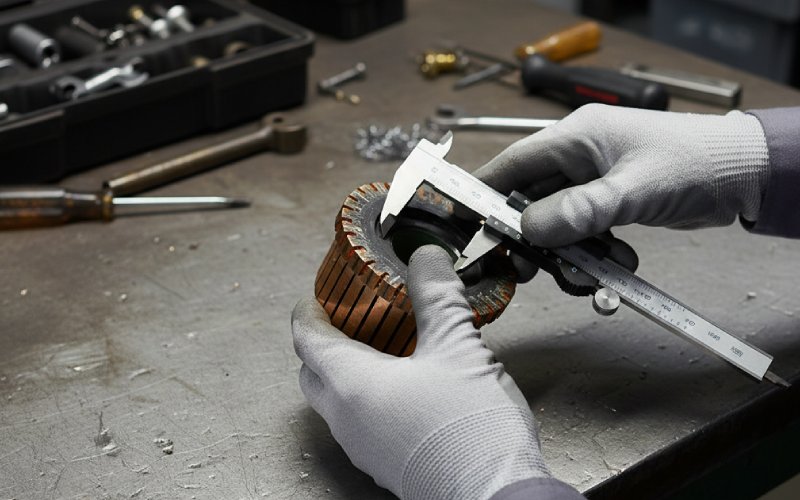
6.2 Undercut depth and chamfer interaction
Technical guidance on undercutting suggests it as a key step to reduce arcing, vibration, and excessive wear by removing insulation from the sliding path.
Where this meets chamfering:
- Too shallow undercut + aggressive chamfer = mica exposed in strange ways
- Too deep undercut + minimal chamfer = a fragile copper “knife” edge
This is why you want:
- A defined undercut depth (not “whatever the blade did today”)
- Chamfer depth specified relative to bar depth and undercut
6.3 Reading wear patterns early
Wear pattern guides highlight issues like:
- Dark, localized bands
- Grooves tracking along the brush path
- Spotty film rather than a continuous tan or charcoal patina
When you see these:
- If the pattern matches bar edges → suspect chamfer design and brush grade
- If the pattern matches grooves → suspect groove depth, pitch, or clogged grooves
A few pictures from early runtime can be more useful than a whole stack of design spreadsheets.
7. What to check with your commutator supplier
If you’re sourcing from a third-party manufacturer, here are direct, simple questions that cut through marketing talk:
- What is your standard chamfer geometry?
- Angle, depth, tolerance. Not just “yes, chamfered”.
- How do you verify bar-to-bar insulation distance at the surface after chamfering?
- Ask for real numbers, not just the insulation material name.
- If you supply grooved segments, what groove pitch do you use relative to brush width?
- If the answer doesn’t mention brush width at all, that’s a flag.
- How are undercuts produced and checked?
- You want a consistent method, not “depends who’s on shift”.
- What maintenance instructions do you give for keeping chamfers and grooves clean?
- There should be a cleaning plan, including when to re-chamfer.
These questions signal that you’re not just buying copper by the kilogram – you’re buying geometry that has to work under real brushes.
8. FAQs on chamfered and grooved commutator segments
Q1. Do chamfered segments always improve brush life?
Not automatically. Chamfering usually reduces edge stress and arcing, which tends to help brush life, but if the chamfer is too deep or inconsistent, the effective contact area shrinks and local current density can rise. That can shorten life. You need sane dimensions and good alignment.
Q2. When should I avoid a grooved design?
Avoid or at least think twice if:
Brush current density is modest
Environment is very dirty and maintenance is rare
Operators are unlikely to clean grooves during shutdowns
In that case, grooves may just become compacted dust pockets and create new high spots.
Q3. How do chamfers relate to undercutting? Can I choose one or the other?
They address different issues:
Undercutting removes insulation from the sliding path to lower arcing and stop hard mica from wearing brushes.
Chamfering reshapes the copper edge to change electric field and mechanical contact.
You usually want both: correct undercut depth plus a controlled chamfer.
Q4. Can a worn commutator be re-chamfered in the field?
Yes, within limits.
Minor re-chamfering is common after turning or cleaning, as long as there is enough bar material left and undercut depth stays acceptable.
Once bar height is low or undercut is close to minimum spec, aggressive re-chamfering risks shortening remaining life.
Field work should follow a clear dimension sheet, not just “looks good”.
Q5. Are grooved commutators noisier?
They can be noisier if:
Brush pressure is too high
Alignment is off
Groove pitch fights with brush width
With correct geometry and setup, noise difference is usually small. Sometimes noise even drops because micro-slip at the surface is more controlled.
Q6. Why not just specify a very smooth, finely polished surface and skip all this?
A very smooth surface helps at first start-up, but:
It doesn’t fix high bar-to-bar voltage
It doesn’t manage dust once the machine runs
It doesn’t compensate for imperfect undercut or brush material choices
Chamfers and grooves are not decoration. They are small pieces of geometry that quietly make the rest of the design more forgiving.
Q7. For a new design, should I start with flat, chamfered, or grooved segments?
A practical starting ladder:
Flat + light chamfer after machining for low-risk, low-voltage designs.
Defined chamfer geometry for medium voltage or where uptime matters.
Chamfered + grooved only when current density, voltage, and duty cycle justify the extra complexity.
You can then tune from real wear patterns instead of guessing.