Understanding Brush Angle and Commutator Advance in DC Motors
This article just asks a simpler question:
Given a real DC motor on your floor, what should you do with brush angle and commutator advance?
Table of Contents
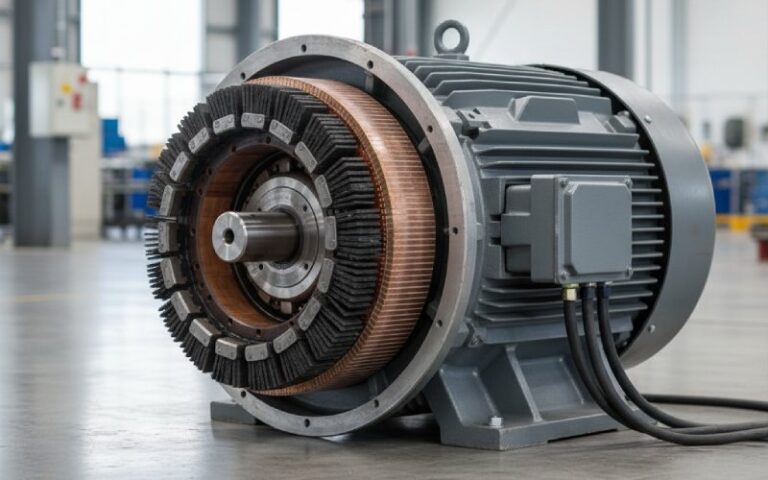
1. Brush angle, commutator advance, and why 90° is almost never right
In theory, the brushes sit on the magnetic neutral plane. In practice, that plane walks away as soon as current and speed go up.
Two main effects push you away from simple radial (90°) positioning:
- Field distortion from armature reaction shifts the magnetic neutral axis, so the ideal commutation zone moves ahead (or behind) the geometric neutral.
- Self-induction in the coils means current in the shorted coil doesn’t reverse instantly; advancing the brush a little more gives you a helping EMF from the opposite field under the next pole.
That second step — extra advance beyond the distortion correction — is what many designers quietly call commutator advance: pushing the commutation zone into a region where the induced EMF assists reversal and reduces sparking.
So: “brush angle” is what you can measure mechanically. “Commutator advance” is what that angle achieves electrically.
They’re tied, but not identical.
2. What actually changes when you move the brushes
Adjusting brush angle and commutator advance changes things your maintenance team can see in minutes, not equations:
- Sparking level and direction at the brushes
- Commutator surface pattern: bar burning, streaks, matte film, bright spots
- Brush temperature and wear rate
- Neutral current and symmetry between directions of rotation
- Torque at low speed and starting behavior
- How much work the interpoles and compensating windings have to do
The textbooks describe the flux vectors. Your team lives with the symptoms. The table below leans on those symptoms.
3. Brush angle / commutator advance cheat sheet
Mechanical “angle” here is qualitative: lagging, close to neutral, modest lead, etc. Think “small turns of the brush rig,” not exact geometry.
| Brush / advance condition | Commutation quality | Commutator surface signs | Brush / holder behavior | Typical causes / comments |
|---|---|---|---|---|
| Brushes slightly retarded (behind true neutral) | Strong sparking in the direction of rotation. Reactance voltage adds to induced EMF in the shorted coil. | Bar burning on leading edges of bars in the running direction; streaks in one direction. | Higher brush temperature, possible vibration; current concentrates on a smaller area. | Neutral marks wrong after rewinding; incorrect brush rig assembly; machine optimized for the opposite direction of rotation. |
| Near geometric neutral at no-load, no extra advance | Acceptable at light load; sparking increases quickly with load or speed; commutation margin is small. | Mixed pattern: mostly uniform film, but occasional bright spots and thin streaks under overload. | Wear okay at light duty, rises with overload cycles. | Common on old machines without strong interpoles that run at roughly fixed light load. |
| Correctly advanced for rated load (factory setting, fixed direction) | Sparkless or very light sparking up to rated load; current reversal mostly complete within the commutation zone. | Smooth, satin-brown film; no localized bar burning; slot bar burning absent or minimal. | Reasonable brush temperature; predictable wear; stable contact film. | What OEM drawings aim for: brush lead a few mechanical degrees ahead of neutral at rated load. Worked examples often show values around 5–15° mechanical. |
| Excessive commutator advance (large forward lead) | Sparking appears again, often on the opposite bar edges; demagnetizing and cross-magnetizing effects grow. | Erosion on trailing edges of bars in the running direction; pattern similar to retarded, but mirrored. | More brush wear; high brush spring force needed to keep contact stable at higher holder angles. | Happens when someone “cures” sparking by repeatedly advancing the brushes without checking interpole polarity and current. |
| Neutral set correctly, then interpole/field changed later | Commutation ok at one specific load or speed; surprisingly bad elsewhere. | Alternating good and bad bars, slot bar burning, uneven film as the machine moves in and out of balance. | Complaints like “fine at half load, ugly at full load” after a rewind. | Field rewound, interpoles mis-connected, or airgaps changed but brush marks reused without a new neutral check. |
| Brush angle wrong due to holder replacement / wear | Commutation drifts over time; early life fine, later life noisy. | Brush tracks narrow, shifted, or not centered on bars; commutator film patchy. | Brush cocking in holders; reduced effective spring force at higher holder angles — force loss can exceed 6–9% at 20–25°. | Non-OEM holders, bent studs, or brush bevels not matching the original holder angle. |
Use this table as a quick triage tool. Walk to the machine, look at the commutator, listen, then decide which row you are closest to.
4. How much brush lead is “normal”?
People like hard numbers. Reality gives you ranges.
- Training material and calculation examples often use mechanical brush leads around 5–15° at full load, depending on pole count, armature current, and size.
- Some OEM manuals only specify the neutral mark and a note such as “do not shift brushes from neutral; interpoles provide commutation EMF up to 25% overload.”
- For small universal motors, the brush angle is baked into the housing; the effective angle may be quite large, optimized for high speed and one direction, with the acceptance that reverse direction is worse.
So instead of chasing a single “correct” angle, treat brush lead as a design compromise:
- Constant-direction, constant-load drives → fixed lead tuned for that duty.
- Reversing drives without robust interpoles → compromise lead and brush grade, plus regular inspection.
- Heavy-duty industrial motors with strong interpoles → brushes close to neutral mark, rely on commutating EMF from interpoles.
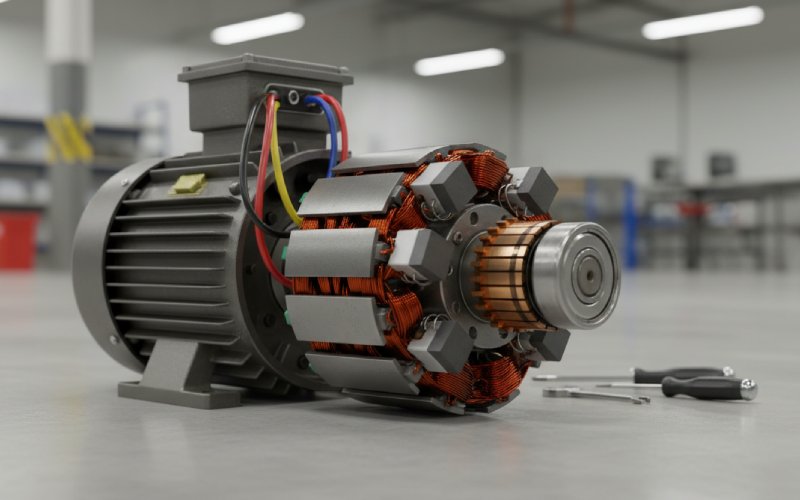
5. Interpoles, compensating windings, and what they change
Once interpoles and compensating windings enter the picture, brush angle and commutator advance do not disappear — they just move up a level.
- Interpoles generate an EMF in the commutating coils proportional to armature current. That EMF cancels the reactance voltage and finishes current reversal while brushes stay near a fixed neutral mark.
- Well-designed interpoles can keep commutation acceptable up to about 20–30% overload without moving the brushes.
- Compensating windings counteract armature reaction under the pole faces, which stabilizes the neutral plane itself. That reduces how much brush shift would otherwise be needed as load changes.
So on an interpole machine, your primary task becomes:
Keep brushes on the correct neutral mark, then make sure the interpole circuit and polarity are right.
On a non-interpole machine, your task is simpler to describe and more work to do:
Move the brushes with the neutral plane as load changes, or set a compromise and accept some sparking in off-design conditions.
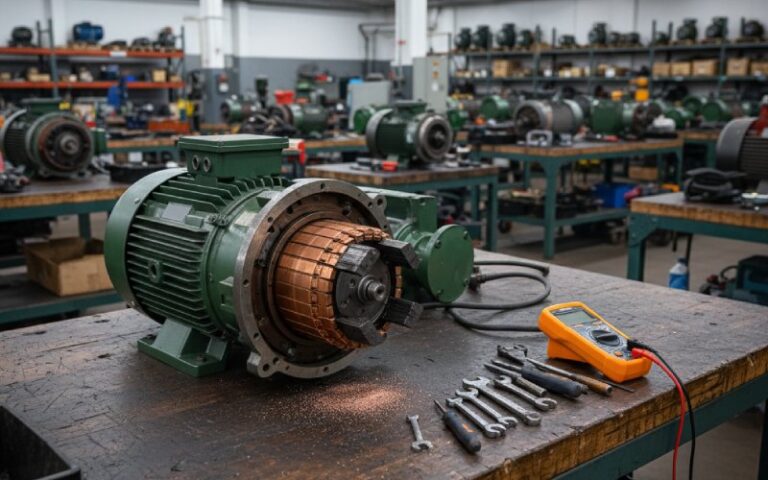
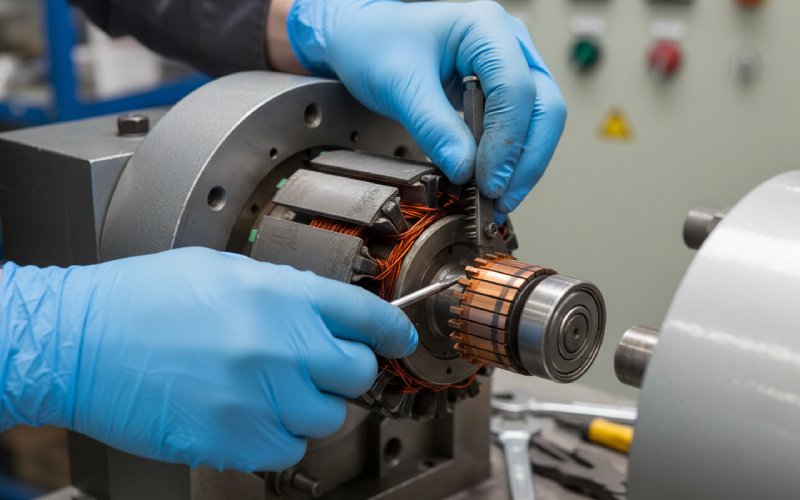
6. Practical workflow: adjusting brush angle on an existing motor
For a B2B environment, you probably want something your technicians can actually follow without a long theory note. A compact workflow:
- Document what you have
- Record brush rig position relative to the housing: photos, marks, measurements at the periphery.
- Note direction of rotation, supply voltage, and field connections.
- Find or recreate the neutral reference
- Look for OEM neutral marks on the end shield or brush rig.
- If missing, use a neutral-setting method (AC or DC voltage drop, or minimal-voltage technique) similar to what EASA describes for service shops.
- Return brushes to neutral and test at rated load
- Set brushes to neutral, run at correct speed and voltage under rated or near-rated load.
- Observe sparking both visually and, if you have it, through temperature and vibration data.
- Apply small, measured shifts
- Shift the brush rig a small mechanical angle in the logical direction (usually forward lead for motors) and watch for a decrease in sparking.
- Move in increments that correspond to only a few electrical degrees. That often means a few millimetres at the commutator periphery, depending on diameter.
- Watch the commutator surface, not just the sparks
- After running time, inspect for bar burning, bright spots, and film stripping; these are longer-term indicators of commutation quality than a quick spark check.
- Match spring force to holder angle
- At higher holder angles, part of the spring force is “spent” holding the brush sideways in the holder instead of downwards on the commutator. Losses of several percent are typical once holder angles reach 20–25°.
- Adjust or re-specify springs if you significantly change holder angle or brush bevels, or you will get unstable contact at higher speeds.
- Lock, tag, and record
- Once you have acceptable sparking and film, lock the brush rig, mark its position clearly, and record the configuration.
- For fleets, add this to the equipment standard for that motor type to reduce variation between sites.
7. Design and sourcing notes for OEMs and buyers
If you’re designing machines or specifying replacement commutators and brushgear, brush angle and commutator advance turn into drawing decisions and RFQ lines.
Some practical notes:
- Define brush angle relative to a clear reference
- Usually: centerline of the main pole, direction of rotation, and commutator periphery.
- Avoid ambiguous phrases such as “set for good commutation”; drawings should specify angles or neutral marks.
- Align brush grade with advance strategy
- Higher-resistance carbon grades help with resistance commutation but may run hotter.
- High-speed universal motors tolerate more geometric brush angle when grade selection supports stable film.
- Consider lifecycle shift of effective brush angle
- Wear patterns, bevel geometry, and brush cross-section can change the effective angle over time.
- There are even designs that intentionally change brush angle as the brush wears, to compensate for other drift effects.
- Specify holder angle and allow for spring force correction
- Larger holder angles give better contact stability in both directions of rotation but reduce effective downward spring force; manufacturer data often lists force loss vs angle so you can compensate.
- Include commutator quality in sourcing, not only copper and insulation
- Bar geometry, mica undercut, surface finish, and runout all affect how sensitive the machine is to brush angle errors.
A good way to think about procurement: treat “commutator + brushgear + angle + spring system” as one unit. Sourcing any one of those in isolation works until it doesn’t.
8. Typical mistakes around brush angle and commutator advance
You probably recognize some of these from failure reports:
- Keeping old brush marks after a rewind
- New armature, slightly different slotting, or altered interpole airgap → neutral plane moves.
- Old marks reused → machine sparks in one direction or only at certain loads.
- Swapping brush holders with generic alternatives
- New holders have different offset or angle; effective brush angle changes by several degrees.
- No one updates drawings or neutral marks, so future technicians “reset to marks” and recreate the problem.
- Using brush advance as the only fix
- Every sparking complaint gets the same remedy: “move the brushes forward.”
- After a few such adjustments, the machine has strong commutator advance but poor torque, higher heating, and still-imperfect commutation.
- Ignoring the interaction with spring force and brush grade
- As brush angle grows, required spring force increases; if springs are not changed, the new setting is unstable at speed.
- Running reversing motors with a single “compromise” mark and no procedure
- Drive runs well forward, poorly in reverse; someone then adjusts for reverse and degrades forward duty.
- For critical applications, separate marks and documented procedures per direction are often safer.
9. FAQ – short answers for busy engineers
1. Is it okay to run a DC motor with brushes exactly at geometric neutral?
Only at light load and modest speed, and preferably on a machine with interpoles or compensating windings. As soon as armature reaction and self-induction become significant, a small forward lead (commutator advance) is usually needed to keep sparking under control.
2. Can I use one brush angle for both directions of rotation?
Sometimes, but it is a compromise.
Constant-direction motors are usually set for that direction only.
Reversing drives either accept worse commutation in one direction or use symmetric holder arrangements, suitable brush grades, and strong interpoles to reduce the penalty.
For heavy industrial duty in both directions, plan for specific commissioning checks in each direction rather than assuming one angle will be ideal.
3. How often should brush angle be checked in an industrial setting?
There is no universal interval, but a practical rule:
Whenever you change: armature, field or interpole coils, brush holders, brush grade, or commutator.
Whenever you see: repeated commutator damage patterns (bar burning, slot bar burning, recurring bright spots) that don’t match loading history.
On critical machines, many plants include a neutral-check after major electrical repairs as part of the standard work order.
4. What is the difference between “brush shift,” “brush lead,” and “commutator advance”?
In everyday shop language these get mixed, but you can distinguish them:
Brush shift – the act of moving the brush rig away from its previous position.
Brush lead – the mechanical angle by which the brush is ahead of the neutral plane or pole center line.
Commutator advance – the effective advance of the commutation zone so that the induced EMF helps current reversal; achieved by brush lead plus the local field environment.
In drawings and specifications, it helps to use “brush lead” for the angle and reserve “commutator advance” for the effect being targeted.
5. Does more brush advance always reduce sparking?
No.
A small increase from a retarded position may reduce sparking. Beyond an optimal range, additional advance can increase sparking, shift bar erosion to the opposite edge, and reduce torque.
Think of advance as having a shallow optimum, not a one-direction fix.
6. Does brush angle matter on small fractional-horsepower motors?
Yes, but it is usually frozen into the housing design.
In many small universal motors (appliances, tools), the brush angle is chosen once for typical operating speed and direction, and there is no provision for adjustment. The OEM balances efficiency, cost, and acceptable sparking over the expected life.
For B2B buyers, this mostly affects selection and qualification, not field adjustment.
10. Key points to carry into your next specification or service job
- Treat brush angle + commutator advance + interpoles + brush grade as one system, not separate topics.
- On existing machines, use commutator appearance and neutral-check methods, not only spark size, to judge settings.
- When sourcing or designing, specify brush angle and neutral reference clearly, and consider how holders, springs, and wear will change effective angle over time.
If you align those parts, you usually get longer commutator life, predictable brush performance, and fewer surprises during overloads — without relying on guesswork at the brush rig.