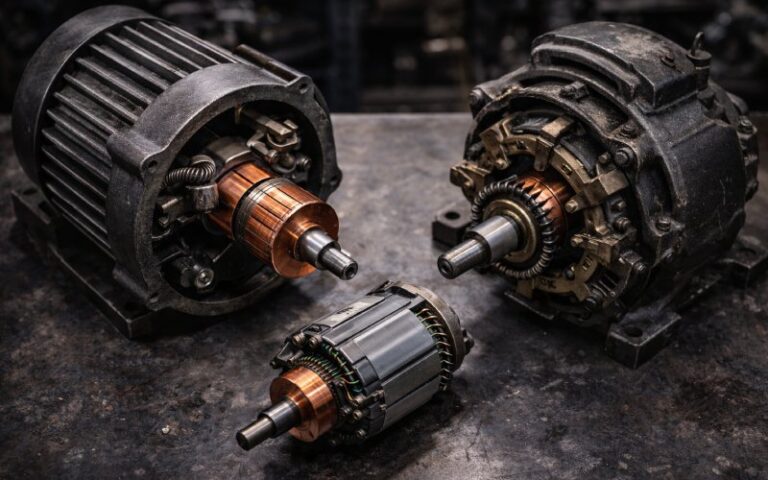
Commutator Maintenance Products: What They Are and When to Use Them
Most commutator damage gets worse because the wrong product is picked first: a cleaner when the surface needs film, a stone when the issue is proud mica, a seating strip when the bar face is already out of round. In our factory service work, we sort commutator maintenance products into five groups: dry cleaners, resurfacing stones, brush seating abrasives, undercut and slot tools, and film-finishing aids. That keeps the job narrow. It also saves copper.
Another point. Not every ugly surface is a bad surface. Uniform streaking in the film can be acceptable if the film is intact and the bars are not being damaged. What matters is whether you are looking at contamination, geometry error, or film behavior. Different fix each time.
Table of Contents
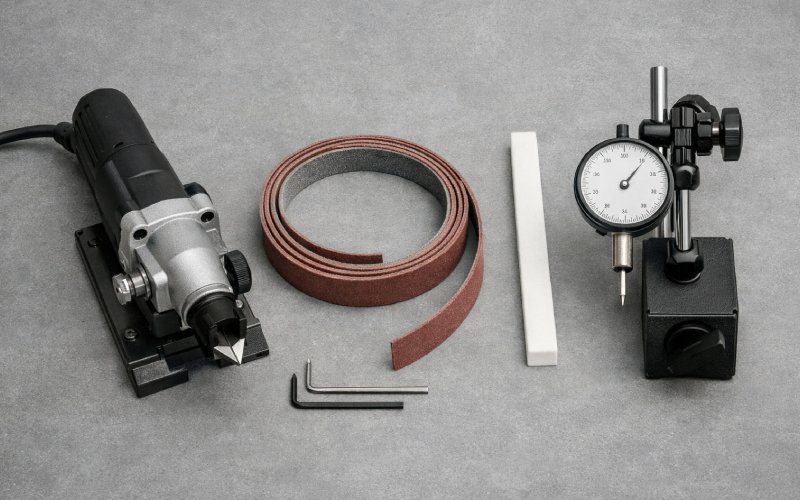
The commutator maintenance products we actually keep within reach
| Product type | What it is really for | Use it when | Skip it when |
|---|---|---|---|
| Dry cleaning kit | Removing loose carbon, grit, and dry contamination without stripping a working film | Dust loading, light dry dirt, shutdown inspection cleanup | Oil contamination, high mica, grooves, ridges |
| Dressing or resurfacing stone | Correcting the copper surface with controlled material removal | Light ridges, small burns, thick film, minor high mica, light burrs | Stable film with no real damage, large geometry errors that need machining |
| Brush seating abrasive | Matching the brush face to the commutator radius | New brushes, poor face contact, split contact on small-radius work | Out-of-round collectors, loose bars, unresolved sparking causes |
| Mica undercutter and slot tool | Restoring slot geometry and clearing fins or burrs | After turning or grinding, proud mica, packed slots, post-undercut cleanup | Surface is already clean and slot depth is still correct |
| Finishing or film-start product | Helping the surface settle after grinding or correction work | Raw copper after resurfacing, slow film build, light finishing | As a substitute for fixing contamination, pressure, load, or geometry |
These are our default decisions on shutdown work and running corrections. The categories line up with field practice: medium-grade stones for small ridges or high mica, seating products for new brushes or poor face contact, slot tools after turning or when mica stands proud, dry cleaning for dust, and film aids only after the surface is already right.
1) Dry cleaning products are maintenance tools, not repair tools
Routine cleanup should be dry. Vacuum first. Low-pressure dry air only to move dust out of the machine, not deeper into it. A canvas wiper or lint-free dry cloth can remove grit and carbon while preserving the running film. For slightly greasy shutdown work, we use a residue-free electrical cleaner on the cloth, never as a flood wash, and only after the brushes are removed. Routine solvent cleaning of the commutator or brush rigging is a poor habit.
If the surface is black and smeared from oil, do not keep wiping and call it maintenance. That is a contamination problem. Fix the leak path or vapor source first. Otherwise the film returns wrong, the hot spots stay, and eventually you start seeing copper transfer into the brush.
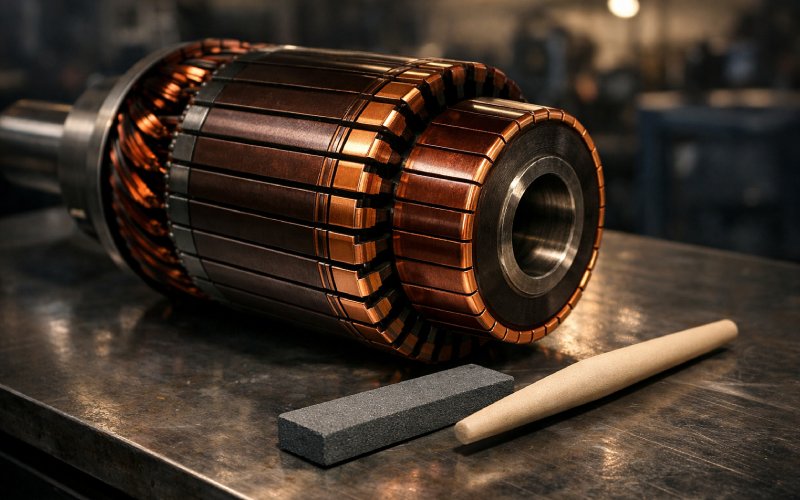
2) Dressing stones do the real work, but only when copper actually needs correction
A proper commutator stone is not a daily cleaner. We reach for it when mica stands high, when the surface has light ridges or small burns, when the film is too heavy, or when there is minor burr formation after service. Medium grades are the default for that kind of correction. Coarser grades are for removing more copper. Fine and polish grades are finishing tools, not problem-solvers.
Two cautions. First, stone use removes metal; overuse shortens collector life. Second, after seating or stoning, abrasive residue must be cleared from the brush paths and surrounding machine interior. We vacuum, then blow outwards, then inspect again. Skipping that step is how a clean job starts wearing like a dirty one.
A small rule from the floor: if the commutator still holds a stable film and the defect is only visual, leave it alone. We would rather preserve a working surface than improve it into raw copper. That sounds obvious. It is often ignored.
3) Brush seating products are for contact geometry, not for rescuing a bad commutator
New brush installation. Partial face contact. Split contact pattern on small-radius work. This is where seating products earn their place. A seating stone or non-conductive abrasive strip lets the commutator carry grit into the brush face so the brush wears into radius quickly without attacking the copper the same way. For manual seating, non-conductive commutator paper or clean sandpaper is still used in many repair cells, usually coarse first for shaping, then finer for finish. The target is not “looks seated.” We want about 95% face contact.
What this product cannot do: it will not correct out-of-round, loose bars, poor spring balance, wrong brush pressure, or bad commutation. If those are the real faults, seating just makes the contact area prettier for a few hours. Then the sparking comes back.
We also avoid metal-containing abrasive cloth on brush seating jobs. Non-conductive materials only. One of those details people skip when production is waiting. It matters.
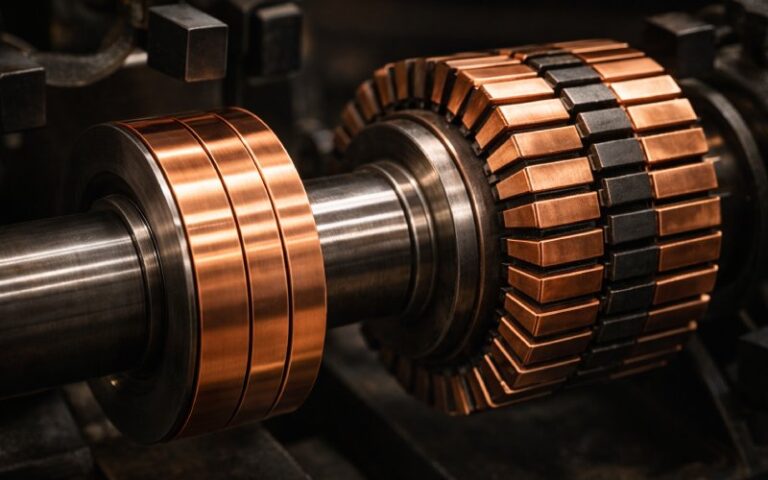
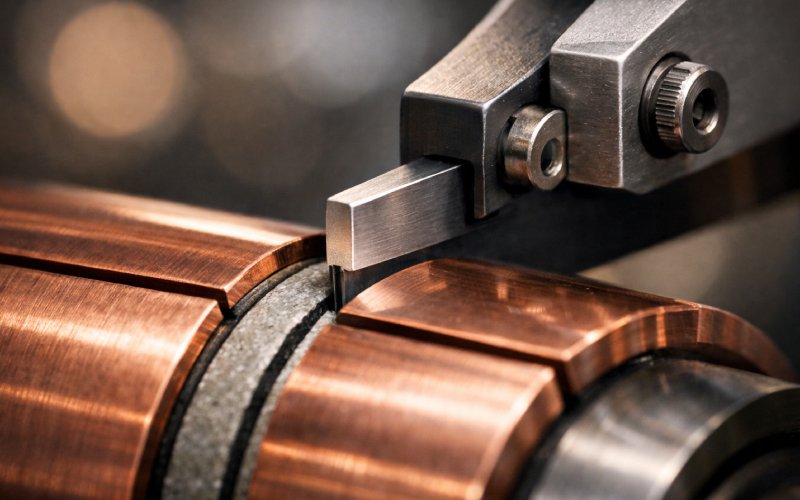
4) Mica undercutting tools are not optional once the slot geometry is gone
After turning or grinding, the copper may be clean and concentric but the slot condition can still be wrong. If mica is flush or proud, the brush rides mica before it rides copper. That lifts current off the bar face, creates ridges as copper wears, and starts chipping. At that point you need an undercutter, not another polishing pass.
Our usual sequence is simple: cut the slots to restore insulation clearance, clean out the debris, remove any side fins or burrs, then chamfer the bar edges lightly so the brush crosses the segment edge cleanly. On many armatures the practical undercut ends up close to the mica thickness, while the chamfer itself stays small—just enough to break the edge, not enough to steal bar width.
This is also where handheld slot scrapers still make sense. Not for bulk removal. For cleanup. Fins, packed carbon, copper burrs after undercutting—those are scraper work. Quick, local, controlled.
5) Finishing and film-start products are secondary. Useful, but secondary.
Freshly machined copper is not a finished running surface. It needs the right roughness, clean edges, and a path to rebuild film. In our factory practice, that means a light final stone or burnishing step after the heavy correction, then controlled restart. Some service teams also use a film-aid wax after grinding to speed deposit formation. We treat that as a finishing aid, not a cure. If the underlying current density, contamination, pressure, or geometry is wrong, wax does nothing useful for long.
Surface roughness matters more than many product pages admit. Too smooth, and film build slows. Too rough, and brush wear jumps. A practical target used across industrial commutator work is roughly Ra 0.9–1.8 µm for larger industrial commutators, with lower values on small units; surfaces at or below about 0.2 µm are too polished, and values above about 2 µm increase brush wear. That is why we do not chase mirror finish for its own sake. Mirror is nice on a photo. Not always on a running collector.
How we choose the product in ten seconds
When the machine lands in our service bay, we do not ask, “What cleaner should we use?” We ask three shorter questions.
- Is the problem dirt, geometry, or film? Dirt gets dry cleaning. Geometry gets stone, turning, or undercutting. Film gets a lighter hand, sometimes no abrasion at all.
- Is copper removal actually justified? If no, do not stone it. If yes, remove the least copper that restores the surface.
- Will this product fix the cause, or just the mark it left? Seating products fix contact fit. They do not fix spring pressure. Solvent can remove oil, not the leak. Undercutting fixes proud mica, not a bad brush set. Simple separation. Saves time.
FAQ
Which commutator maintenance product should be stocked first?
Start with the products that cover the most common, low-risk jobs: dry cleaning tools, a medium-grade dressing stone, a non-conductive seating abrasive, and a slot-cleaning or chamfer tool. That set handles dust, light ridge removal, new-brush seating, and post-undercut cleanup without forcing you into heavy machining on every job.
Can I use solvent as a regular commutator cleaner?
Not as routine practice. Use dry wiping, vacuum, and controlled low-pressure dry air first. Bring in a residue-free electrical cleaner only for confirmed grease or oil contamination on shutdown equipment, and apply it to the cloth, not as a bath.
When do I choose a seating stone instead of a dressing stone?
Use a seating product when the brush face needs to conform to the commutator radius. Use a dressing stone when the copper surface itself needs correction—high mica, small ridges, light burns, or heavy film. Mixing those two jobs is how people remove copper when they only needed brush contact.
Does every turned commutator need undercutting?
If turning or grinding leaves the mica too high or closes the slot condition, yes. The collector can look good and still run badly if the insulation is not below the bar surface and the edges are not chamfered. After undercutting, clear every burr and fin before restart.
Is a mirror finish the goal?
No. The goal is a controlled running surface that can support film without chewing brushes. Over-polished copper can delay film formation, while rough surfaces increase wear. Target working roughness, not showroom shine.
Can I use sandpaper on a commutator?
For controlled brush seating, non-conductive commutator paper or clean sandpaper is still used in many shops. For finishing the copper surface itself, we prefer purpose-made commutator stones because they control the cut better and avoid the habit of hand-polishing the collector into the wrong surface. Never use conductive abrasive cloth.
That is the shortlist. Stock by failure mode, not by catalog category, and your commutator maintenance products stop being shelf fillers and start saving copper.