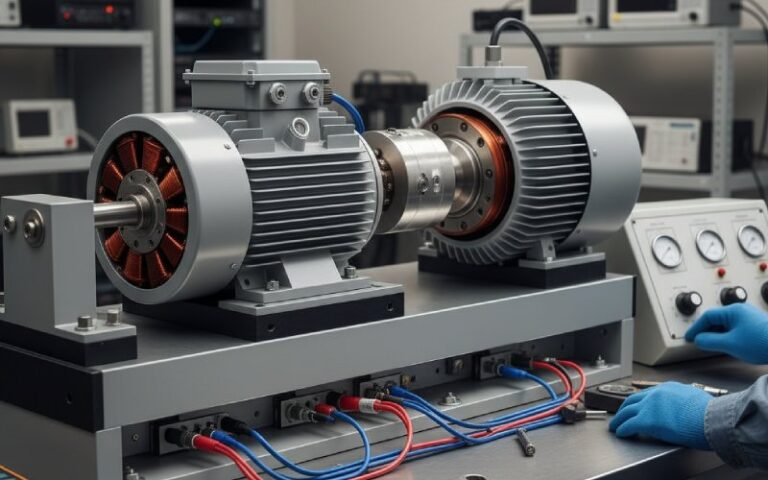
Armature Winding and Commutator Connection
Armature winding and commutator connection are usually discussed as if they belong to different decisions. In production, they do not. The winding layout decides the electrical path. The commutator connection has to carry that path under heat, brush transition, vibration, speed, and repeated current reversal. That is where a design that looks acceptable on paper starts to separate into two groups: one that runs clean, and one that comes back with blackened bars, unstable brush wear, or rising contact resistance.
For a commutator manufacturer, the real question is not whether a motor uses lap winding or wave winding in the abstract. The real question is simpler: what does that winding force the commutator connection to do, and how much margin is left after assembly tolerances, load cycles, and rotor speed start working on the joint? That is the point of this article. We are not here to repeat basic winding theory. We are here to show how custom commutator design should match the winding scheme already chosen by the motor designer.
Table of Contents
Lap Winding vs. Wave Winding in Commutator Design
In a simplex lap winding, the coil ends connect to adjacent commutator segments, and the number of parallel paths increases with pole count. That makes lap winding common in lower-voltage, higher-current machines, but it also means the commutator system has to live with more parallel circuits and more sensitivity to imbalance between paths. When flux under different poles is not perfectly even, circulating currents can develop. Then the commutator and brushes carry the evidence first.
Wave winding pushes the current path differently. It forms only two parallel paths regardless of pole count, which is why it is often chosen for higher-voltage, lower-current designs. From the commutator side, that changes segment loading, brush current transfer, and the connection geometry we prefer for stable production. Fewer paths can simplify some balancing issues, but the current per path and the bar-to-bar behavior still have to be checked against segment dimensions, bar spacing, and lead anchoring.
For buyers, the practical point is this: a commutator that works well with one armature winding arrangement is not automatically the best fit for another. Segment pitch, tang geometry, riser form, insulation clearance, and lead support should be reviewed against the winding pattern before tooling is frozen. That is standard engineering discipline. It is also where many early-life failures could have been avoided.
How Commutator Segment Connections Must Match the Winding Scheme
A winding designer may focus on coil progression and parallel paths. A commutator factory has to focus on the joint itself. Once the coil lead leaves the slot and enters the segment, the issue becomes mechanical before it becomes electrical. If the lead can move, flex, rub, or relax inside the connection, resistance drift will follow. Maybe not on day one. It still follows.
That is why we review connection style together with winding style. A lap-wound armature carrying higher current may need a connection with stronger conductor retention, larger electrical margin, and tighter control of local heating at the segment entry. A wave-wound armature may shift the concern toward segment spacing, path stability, and clean current transfer during commutation. The winding is the electrical map. The commutator connection is the place where that map becomes a physical joint.
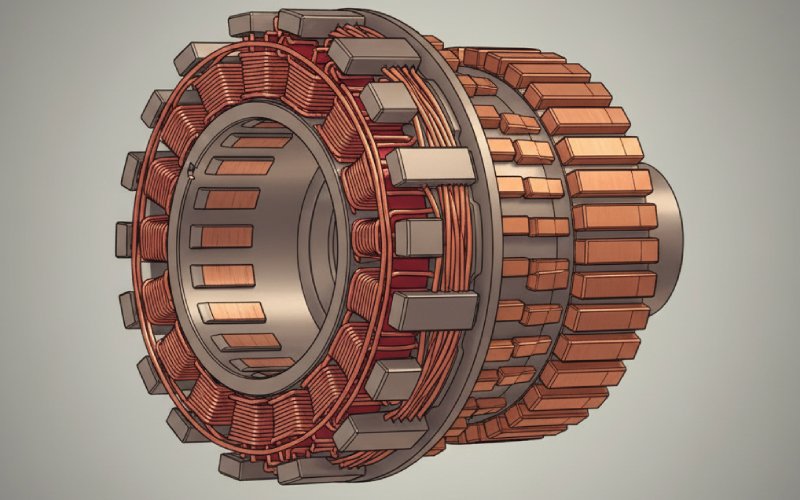
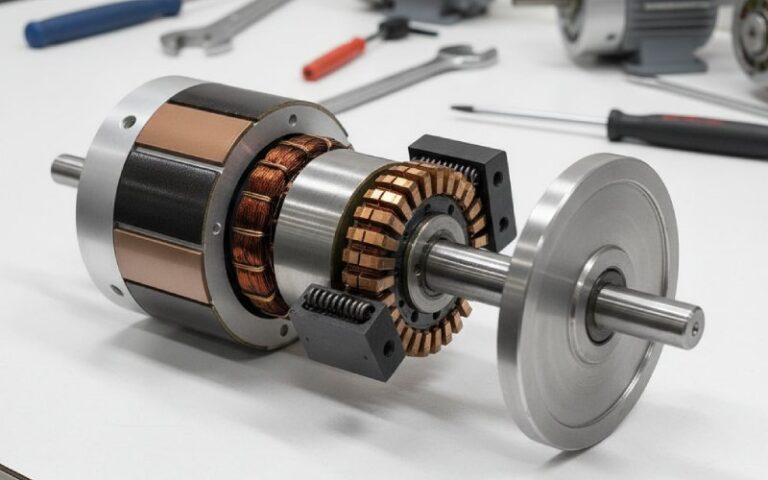
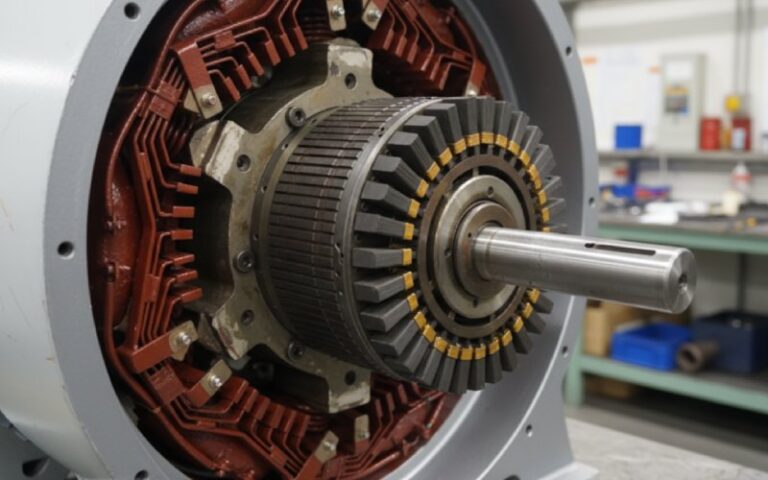
Tang Connections in Custom Commutator Manufacturing
Tang-type commutator connections remain widely used because they are compact, efficient in automated winding, and strong when the tang form, staking process, and wire positioning are all under control. In common factory practice, the lead is positioned at the tang, insulation is removed at the contact zone during the process, and the tang is deformed or hot-staked to complete the joint. The method is fast. It is also unforgiving when geometry is wrong.
The usual problems are not mysterious. The tang may grip without forming a stable low-resistance bond. The wire may be oversized for the tang window. The unsupported lead length may be too long, so the conductor keeps working the same point under centrifugal load and thermal cycling. The result shows up later as darkened bars, intermittent sparking, local heat, or connection resistance that drifts away from the rest of the armature.
For that reason, when we build a custom commutator for tang connection, we do not look only at bar count and outer diameter. We review tang angle, tang opening, conductor entry direction, expected wire section, and how the lead will be supported after winding. Those details matter more than polished catalog drawings.
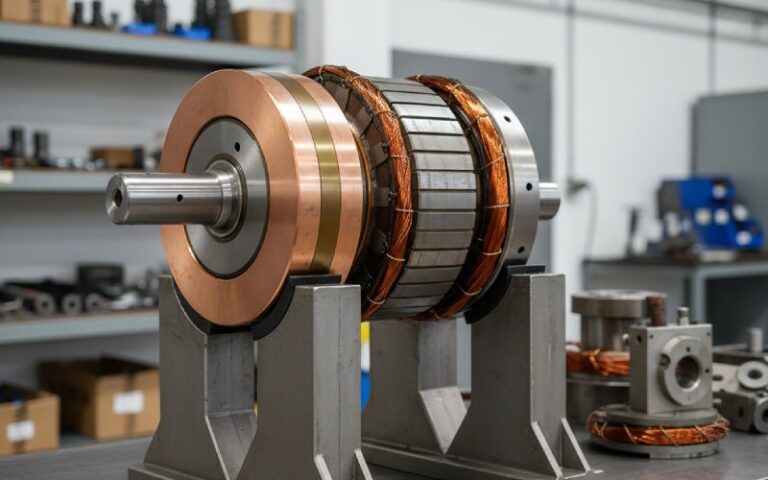
Riser Connections for Heavy-Duty Commutator Applications
Riser or slot-type connections are often chosen when conductor retention and joint control need more structure. A known industrial approach uses a preformed conductor inserted into a tapered or shaped slot with interference, followed by staking or forming of the riser to lock the conductor in place. The logic is plain: do not ask solder alone to hold a joint that will see current, heat, and mechanical stress together.
That does not mean riser style is always better. It means it solves a different problem. In some heavy-duty armatures, it gives better retention and better control over conductor placement. In others, it adds forming complexity, tighter dimensional demands, or cost that is not justified by the application. The right decision depends on current, speed, lead size, winding route, and how the motor will actually be used.
Why Equalizer Connections Matter in Lap-Wound Armatures
If a machine has multiple parallel armature paths, it also has the possibility of circulating current between paths when the induced voltages are not perfectly equal. In lap-wound armatures, equalizer connections exist to tie points of equal potential together and reduce the effect of those imbalances. This is not a theoretical accessory. It is a production safeguard against the small asymmetries that real machines always manage to collect.
The causes are familiar: slight air-gap variation, eccentricity, dimensional stack-up, magnetic inequality between poles, and assembly shifts that are small individually but not small once the armature is under load. Without equalizers where they are needed, the extra current has to go somewhere. Usually it goes into heating, arcing, and brush instability. The commutator surface records the argument.
From a supplier side, this affects commutator review in a practical way. If the armature is lap wound and the design is sensitive to path imbalance, the commutator drawing cannot be reviewed in isolation. Segment count, connection pattern, and the presence or absence of equalizer strategy need to be checked together. Otherwise the commutator may be dimensionally correct and still wrong for the motor.
Commutation Requirements the Commutator Manufacturer Cannot Ignore
During commutation, the coil short-circuited under the brush has to reverse current within a very small time interval. That reversal is opposed by reactance voltage due to coil inductance, and this is one of the main reasons sparking appears even when brush position is near the neutral zone. So brush position alone does not rescue a weak commutator design. The connection path, segment geometry, and surface condition still have to support clean current transfer.
In larger or more heavily loaded machines, interpoles are commonly used because they provide a reversing electromotive force that offsets reactance voltage, and their effect rises with armature current. That matters to the commutator factory because segment insulation, bar geometry, brush track finish, and joint stability all operate inside that same commutation window. Commutation is not only a motor-design topic. It is a commutator durability topic.
This is where many drawings are too quiet. They show bar count, diameter, shaft fit, maybe tang form. They do not show enough about the operating current ripple, overload pattern, brush width, or reversal severity. Yet those are exactly the conditions that decide whether the connection stays stable. When a buyer sends us an armature commutator project, we would rather review those conditions early than discover them through field returns.
Commutator Surface Finish, Mica Undercut, and Brush Film Control
Connection quality is not enough if the running surface is wrong. A commutator bar that is properly connected but poorly finished will still create unstable brush contact. Industrial brush guides note the same three points again and again: the commutator surface should not be too rough or too glossy, high mica creates brush trouble, and the working film on the copper has to remain even and controlled.
For that reason, our review of an industrial armature commutator includes these checks:
- Mica undercut: the mica must remain below the copper working surface so the brush does not ride on hard high spots. High mica is a common cause of contact instability and brush damage.
- Edge condition: segment edges and slot transitions should be controlled so the brush crosses bar boundaries without violent disturbance. Surface defects at the segment edge often grow into visible wear patterns.
- Brush film stability: film tone and film uniformity depend on current density, brush grade, and operating conditions. Too little current density can strip film. Too much can overheat the track and shorten brush life.
- Surface roughness consistency: the track needs a finish that supports seating and current transfer without turning into a threaded or glazed surface.
This part is often treated as maintenance language. It should not be. For a commutator supplier, surface finish is part of delivered product quality, not a service issue to be postponed until after shipment.
Armature Winding and Commutator Connection Design Table
The table below shows how we align winding choice with commutator connection decisions during project review.
| Armature condition | What it means for the commutator | What we usually review first | Typical risk if ignored |
|---|---|---|---|
| Simplex lap winding, higher current | More parallel paths, higher sensitivity to imbalance | Tang or riser retention, segment loading, equalizer requirement | Circulating current, heating, unstable brush behavior |
| Wave winding, higher voltage | Two parallel paths, different current distribution through bars | Segment pitch, bar spacing, lead entry geometry | Uneven commutation margin, local sparking |
| Heavy-duty duty cycle with repeated starts | More thermal and mechanical stress at the joint | Connection strength, lead anchoring, resistance drift check | Early joint fatigue, darkened commutator bars |
| High-speed rotor | Greater centrifugal loading on unsupported leads | Lead support path, tang deformation control, insulation clearance | Lead movement, rubbing, cracked insulation |
| Brush-sensitive application | Surface finish and bar transition become critical | Mica undercut, edge condition, surface consistency | Rapid brush wear, film problems, bar burning |
This review logic follows established winding behavior for lap and wave patterns, the role of equalizer connections in parallel paths, and the importance of joint resistance and surface condition in commutated machines.
How We Review a Custom Commutator for Winding Compatibility
When a customer sends a drawing, we do not start by asking only for dimensions. We start by checking whether the commutator connection matches the armature winding and duty.
We normally review:
- Winding type: lap, wave, or another special connection pattern.
- Current and voltage profile: because connection style that survives one load profile may not survive another.
- Connection method: tang, riser, welded, or other specified joint form.
- Lead path and support: especially for higher speed or repeated thermal cycling.
- Commutator surface requirements: undercut, edge condition, expected brush track stability.
- Resistance uniformity expectations: because unstable connection resistance is often the earliest measurable sign of a weak joint.
A good commutator supplier should be able to discuss these points without forcing the customer into a full motor redesign. That is the balance buyers usually want: not theory for its own sake, not blind build-to-print either. Something in between. The useful part.

Common Failure Points in Armature Commutator Connections
Most premature failures cluster around a small set of mistakes.
1. Weak mechanical locking at the segment
If the connection depends on contact pressure more than proper forming or locking, the joint may survive initial testing and still drift under service. Heat and vibration are patient.
2. Unsupported lead length
If the conductor is left free to flex between the coil end and the segment, movement will concentrate at one point. That point becomes the problem later.
3. Wrong connection style for the actual load
A compact tang design can be excellent in one motor and too light for another. A heavier riser design can be right for one platform and unnecessary cost for the next. Selection by habit usually costs more than selection by duty.
4. Ignoring equalizer requirements in parallel paths
Lap-wound armatures without proper equalizer strategy can push imbalance back into the commutator system. The commutator then gets blamed for a system issue it was never allowed to escape.
5. Poor running surface control
High mica, inconsistent track finish, or unstable film formation can turn an otherwise sound joint into a brush and commutation problem.
Why Buyers Ask for Custom Commutator Engineering Review
Most B2B buyers are not looking for a lecture on winding theory. They are trying to avoid a specific production problem: connection failure at the tang, unstable brush wear, commutator bar discoloration, poor life in repeated start-stop duty, or a new motor platform that needs a commutator supplier who can match the winding arrangement without trial-and-error tooling.
That is why a useful supplier conversation usually starts with these points:
- armature winding type
- wire size or conductor section
- target current and voltage
- speed and duty cycle
- preferred commutator connection style
- any known field failure pattern
With those inputs, a commutator manufacturer can review whether the segment design, connection form, and surface finish strategy are aligned with the motor instead of merely matching old dimensions.
Request a Drawing Review for Your Armature Winding and Commutator Connection
A stable motor does not come from a winding drawing alone, and it does not come from a commutator drawing alone. It comes from the fit between them.
If your project involves a custom commutator, a heavy-duty commutator connection, or a redesign around lap winding or wave winding compatibility, send us your drawing or sample. We review connection style, segment geometry, winding fit, and production risk before mass build. That usually saves more time than fixing a weak joint after the first batch.
FAQ: Armature Winding and Commutator Connection
What is the difference between armature winding and commutator connection?
Armature winding defines how the coils are arranged electrically through the armature. Commutator connection defines how those coil ends are physically and electrically joined to the commutator bars. In service, both act as one system. The winding sets the path. The connection decides whether that path stays stable under real operating stress.
How does lap winding affect commutator design?
Lap winding creates multiple parallel paths and is commonly used in higher-current applications. That means the commutator design has to consider path balance, equalizer strategy where needed, and connection stability under higher current distribution across the segment system.
How does wave winding affect commutator connection selection?
Wave winding forms two parallel paths, which changes current distribution and connection behavior at the commutator. It can simplify some balancing issues, but the segment pitch, conductor entry, and commutation margin still need to match the motor duty.
Why do commutators fail prematurely at the tang connection?
The usual reasons are weak tang forming, oversized or poorly supported conductors, lead movement, local heating, and resistance drift at the joint. A tang that looks closed is not always a tang that stays stable.
When is a riser connection better than a tang connection?
Usually when the application needs stronger conductor retention, more controlled conductor positioning, or a connection less dependent on simple contact pressure. It is not automatically better. It is better in the right duty.
Why are equalizer connections important in lap-wound armatures?
Because parallel paths can develop unequal induced voltages due to mechanical and magnetic asymmetry. Equalizers connect points of equal potential and help reduce circulating currents that would otherwise appear as heat, arcing, and unstable brush behavior.
How does a commutator manufacturer test connection quality?
A practical check is resistance uniformity across armature commutator connections. Methods exist specifically for measuring connection resistance and winding resistance through the commutator bars, because a weak joint often appears first as abnormal resistance behavior before complete failure.
What drawing data should be sent for a custom commutator review?
At minimum: winding type, segment count, wire or conductor size, operating current and voltage, speed, duty cycle, preferred connection style, and any known failure history. Without that, a supplier can copy dimensions but still miss the application. The missed part is usually the expensive part.